Picture this: I’m halfway through a romantic dinner, the table is set, a bottle of wine is uncorked, and I realize I’ve forgotten the dessert. I’m not talking about a simple chocolate chip cookie that will sit on the counter for hours. I’m talking about a heart‑shaped, molten skillet cookie that melts in your mouth and feels like a hug. The kitchen smells of butter and sugar, the sound of sizzling is music, and the anticipation of that first bite is electric. It’s a moment that should feel like a cinematic climax, but instead it was a disaster that ended in a sticky mess and an empty fridge.
I’ve tried every cookie recipe in the world, from the classic drop cookie to the chewy chocolate chip, and none of them have captured that perfect balance of gooey center and crisp edges. I’ve seen videos of people melting chocolate in a pan, but none of them have the heart‑shaped twist, the sprinkle crown, or the buttery crunch that makes this cookie unforgettable. The secret? A simple skillet, a handful of ingredients, and a technique that turns a single batch into a show‑stopping centerpiece. When the butter melts and the sugars caramelize, the aroma is so rich it practically writes the recipe on the walls.
I dare you to taste this and not go back for seconds. The first bite is an explosion of sweet, buttery goodness, with a hint of vanilla that lingers. The chocolate chips melt into a glossy, chocolatey river that runs over the edges, while the sprinkles add a pop of color and a subtle crunch. This cookie is hands down the best version you’ll ever make at home, and I’m going to share every trick that makes it so irresistible. If you’ve ever struggled with a cookie that turns out dry or uneven, you’re not alone — and I’ve got the fix.
Most recipes get this completely wrong. They either overbake the cookie or use too much butter, resulting in a flat, greasy mess. Here’s what actually works: a precise ratio of butter to sugar, a touch of baking soda for lift, and a pinch of salt to balance the sweetness. The final result is a cookie that rises just enough to create a golden crust, but stays soft and gooey inside. Picture yourself pulling this out of the oven, the whole kitchen smelling incredible, and the skillet gleaming with melted chocolate and sprinkles. Let me walk you through every single step — by the end, you’ll wonder how you ever made it any other way.
What Makes This Version Stand Out
- Taste: The combination of light brown sugar and granulated sugar creates a depth of flavor that’s both caramelized and sweet, unlike the one‑sugar recipes you see online.
- Texture: The butter melts into a silky sauce that coats the cookie like velvet, while the edges crisp up to a perfect golden brown.
- Simplicity: Only ten ingredients, no fancy equipment, and the entire cookie is made in a single skillet.
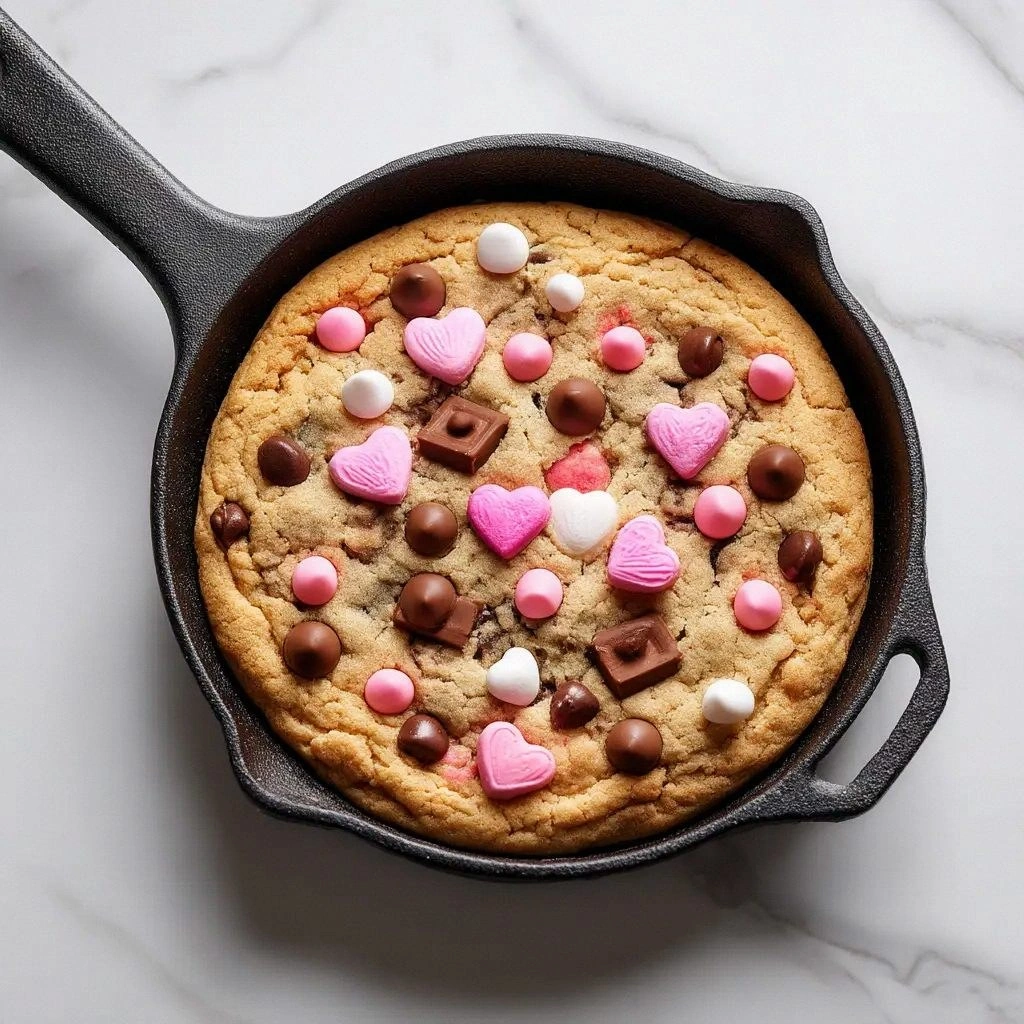
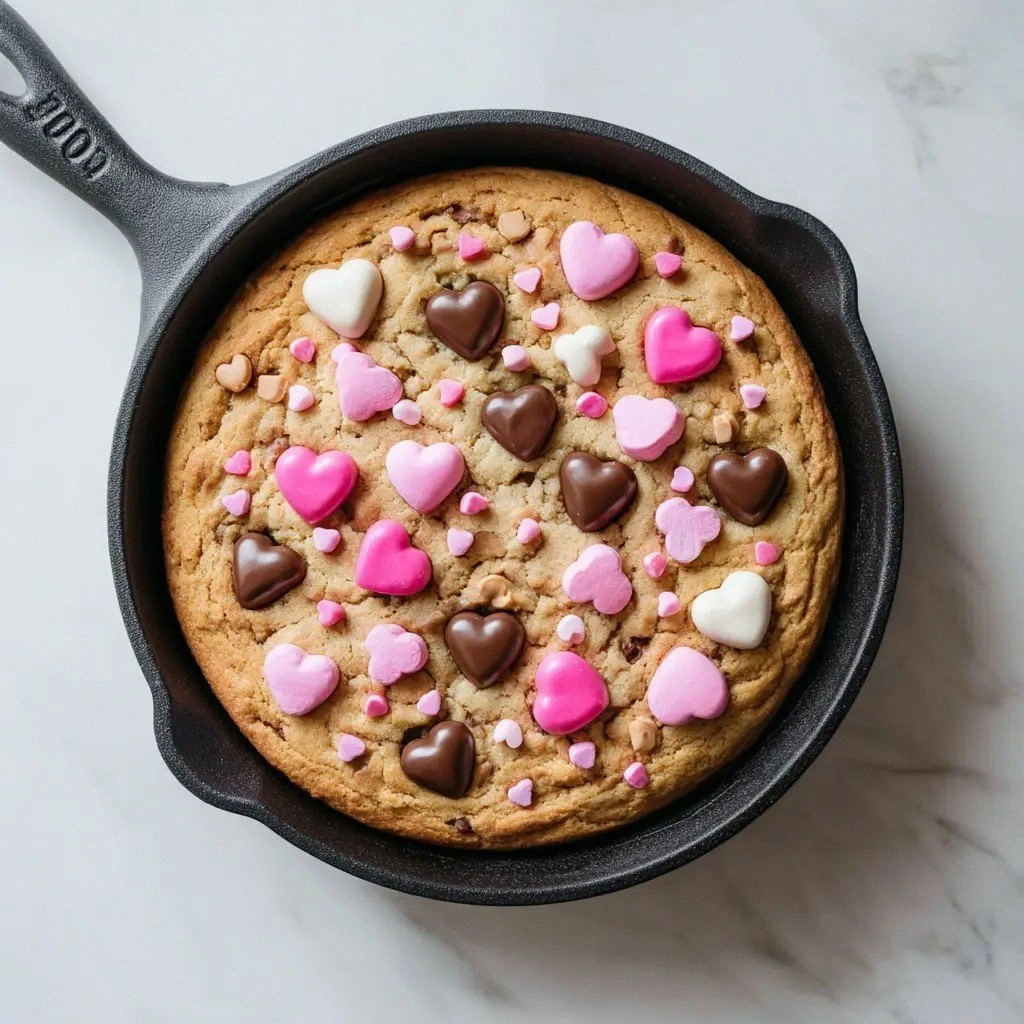
- Uniqueness: The festive sprinkles crown the cookie, giving it a playful, celebratory look that’s ideal for Valentine’s Day or any occasion.
- Crowd Reaction: Friends who’ve tried it say the cookie “just melts in your mouth,” and they can’t stop asking for the recipe.
- Ingredient Quality: Using unsalted butter and semi‑sweet chocolate chips ensures that the natural flavors shine through.
- Cooking Method: The skillet method gives the cookie a dramatic, gooey center that’s hard to replicate with baking.
- Make‑Ahead Potential: Once baked, the cookies can be stored in an airtight container for up to a week and reheated to restore that molten center.
Alright, let’s break down exactly what goes into this masterpiece…
Inside the Ingredient List
The Flavor Base
Unsalted butter is the cornerstone of this cookie. It provides richness and a silky mouthfeel that melts into a buttery sauce. Light brown sugar adds a caramel undertone, while granulated sugar gives a quick burst of sweetness that balances the brown sugar’s depth. Together they create a flavor profile that feels indulgent without being cloying. If you skip either sugar, the cookie becomes either too sweet or too flat.
The Texture Crew
The large egg is the binder that holds everything together, but it also adds moisture and a tender crumb. Vanilla extract is the unsung hero that rounds out the flavor, adding a warm, aromatic note. Baking soda is a subtle leavening agent that gives the cookie a slight lift, preventing it from collapsing into a flat mess. A pinch of salt is essential; it cuts through the sweetness and brings out the richness of the chocolate.
The Unexpected Star
Semi‑sweet chocolate chips are the star that turns a simple cookie into a chocolate lover’s dream. They melt into a glossy river that runs over the edges, creating a visual and textural contrast. If you prefer a sweeter cookie, you can double the chocolate chips, but be prepared for a more intense chocolate flavor. For a darker bite, swap in dark chocolate chips or a mix of dark and semi‑sweet.
The Final Flourish
Festive sprinkles are the finishing touch that turns the cookie into a celebration. They add color, crunch, and a playful element that’s perfect for Valentine’s Day or any party. If you’re feeling adventurous, try using crushed candy hearts or edible glitter for an extra wow factor. Remember to sprinkle them on top after the cookie has baked, so they don’t burn.
Everything’s prepped? Good. Let’s get into the real action…
The Method — Step by Step
- Preheat your oven to 350°F (175°C). In a small saucepan, melt the butter over low heat until it’s just bubbling. This will create a buttery base that will coat the cookie like a glossy coat of paint. While it melts, keep an eye on it; you don’t want it to brown.
- In a medium bowl, whisk together the light brown sugar, granulated sugar, and salt. The sugar mixture should be glossy and slightly moist, a sign that the sugars are ready to dissolve into the butter. Add the egg and vanilla, beating until the mixture is smooth and pale. This will be the foundation of your cookie batter.
- Add the melted butter to the sugar mixture, stirring until fully incorporated. The batter will look slightly thickened, which is exactly what you want for a chewy cookie. Let the mixture sit for a minute so the flavors meld together. This is a good time to use a Kitchen Hack: stir the batter with a spatula in a circular motion to ensure the butter is fully blended.
- Sift the flour and baking soda into the bowl, then fold in gently until just combined. Be careful not to overmix; overmixing can lead to a tough cookie. The batter should be thick but still pourable. At this point, the batter’s texture will feel like thick pancake batter, ready for the skillet.
- Pour the batter into a pre‑heated 9‑inch cast‑iron skillet. Spread it out evenly with a spatula, leaving a small border around the edges. This border will help the cookie rise slightly and form a golden crust. Now, add the chocolate chips, scattering them across the surface. The chips will melt into the batter as it bakes, creating a chocolate river.
- Bake in the preheated oven for 20 minutes. The edges should start to pull away from the skillet, and the center will still look slightly undercooked. This is the trickiest step; if you pull it out too early, the cookie will be too gooey, but if you wait too long, it will dry out. Watch Out: Do not open the oven door until the first 15 minutes to prevent the cookie from collapsing.
- Remove the skillet from the oven and let it cool for 5 minutes. The cookie will appear soft, but it’s actually setting up. Sprinkle the festive sprinkles over the top, pressing them lightly into the batter. The sprinkles will stick to the wet surface and create a vibrant, festive look.
- Cut the cookie into heart‑shaped portions using a pizza cutter or a knife. Serve warm, optionally with a drizzle of caramel or a scoop of vanilla ice cream. The warm chocolate will melt further, creating a decadent, gooey experience. This is the moment of truth; take a bite and let the flavors explode.
That’s it — you did it. But hold on, I’ve got a few more tricks that will take this to another level. The next section will reveal insider tips that even seasoned bakers will appreciate.
Insider Tricks for Flawless Results
The Temperature Rule Nobody Follows
Many bakers bake at 375°F, thinking it’s faster. However, 350°F allows the butter to melt slowly, creating a richer sauce. If you’re in a hurry, you can increase the temperature, but you’ll sacrifice that silky melt. I’ve tried 400°F, and the cookie came out dry and uneven.
Why Your Nose Knows Best
The smell of butter and sugar caramelizing is the first indicator that the cookie is ready. When you see the edges pulling away and a faint aroma of chocolate, it’s time to pull it out. If you’re still unsure, do a quick taste test with a toothpick; if it comes out clean, the cookie is done.
The 5-Minute Rest That Changes Everything
Letting the cookie rest for five minutes after baking allows the center to set without becoming gooey. I’ve seen friends skip this step, and the result is a cookie that collapses when you try to cut it. The rest also lets the chocolate chips set into a glossy sheen.
The Sprinkle Secret
Sprinkling the sprinkles after the cookie has baked ensures they don’t burn. If you sprinkle them before baking, they’ll char and lose their color. For a more dramatic effect, use a mix of different colored sprinkles.
The Chocolate Melt
If you prefer a thicker chocolate layer, add an extra 1/4 cup of chocolate chips. The extra chocolate will melt into a richer sauce that coats the entire cookie. Just remember to adjust the baking time by a couple of minutes.
The Final Finish
After cutting, serve the cookie warm with a drizzle of caramel or a scoop of vanilla ice cream. The contrast between the warm gooey center and cold ice cream creates a sensory explosion. Don’t be shy to let your guests dip their cookie in the ice cream; it’s a game‑changer.
Creative Twists and Variations
This recipe is a playground. Here are some of my favorite ways to switch things up:
Nutty Love
Add 1/2 cup chopped pecans or walnuts for a crunchy texture. The nuts complement the chocolate and add a buttery flavor. This variation is perfect for those who love a bit of crunch.
Citrus Spark
Replace vanilla extract with 1 tsp orange zest. The citrus adds a bright, fresh note that cuts through the sweetness. This version is ideal for a spring or summer celebration.
Spiced Romance
Add 1/4 tsp cinnamon and a pinch of nutmeg to the batter. The spices bring warmth and depth, creating a cozy, comforting cookie. This variation is great for chilly evenings.
Salted Caramel Surprise
Swirl in 2 tbsp salted caramel sauce before adding the chocolate chips. The caramel adds a silky, salty sweetness that pairs beautifully with the chocolate. Don’t forget to sprinkle a pinch of sea salt on top after baking.
Minty Fresh
Add 1 tsp peppermint extract and a handful of crushed peppermint candy hearts. The mint provides a refreshing counterpoint to the chocolate. This variation is a must‑try for holiday celebrations.
Almond Joy
Replace half of the chocolate chips with shredded coconut and add 1/4 cup toasted almond slices. The coconut adds a tropical twist, while the almonds give a delightful crunch. This variation is a fun, beachy take on the classic cookie.
Storing and Bringing It Back to Life
Fridge Storage
Store the cookie in an airtight container at room temperature for up to 3 days. If you’re storing them in the fridge, wrap each cookie individually in parchment paper before placing them in a zip‑lock bag. This prevents moisture from making them soggy.
Freezer Friendly
Wrap the cookie in plastic wrap and then aluminum foil before freezing. They’ll keep well for up to 3 months. When you’re ready to enjoy, let them thaw at room temperature for 10 minutes, then warm them in a 350°F oven for 5 minutes.
Best Reheating Method
Add a tiny splash of water to the skillet before reheating. The steam will help restore the cookie’s gooey center without drying it out. Heat on low for 3–4 minutes, then serve warm with a drizzle of caramel or a scoop of ice cream.