Picture this: it’s a sweltering Saturday afternoon, the thermostat is screaming, and you’re stuck in a kitchen that smells like burnt toast because you tried to “quick‑fix” a dessert that turned into a charcoal disaster. I was there, slurping a sad, watery milkshake that tasted more like milk than anything else, and I swore I would never attempt a milkshake again. Then, a daring friend tossed me a challenge – “Make the most epic Oreo milkshake you can think of, and I’ll buy you a round of coffee for every sip you don’t finish.” I laughed, I accepted, and I dove headfirst into the pantry, armed with a bag of Oreos, a tub of vanilla ice cream, and a whole lot of optimism. The result? A milkshake so thick it could hold a spoon upright, so chocolatey it makes a midnight snack feel like a gourmet affair, and so irresistibly creamy that even the most disciplined diet‑watcher would break down at the first sip.
From the moment the blender whirrs to life, you’re hit with the scent of fresh vanilla mingling with the deep, cocoa‑laden aroma of crushed Oreos – it’s like a bakery and a candy shop collided in a glass. The sound of the ice cream thudding against the blades is a comforting, low‑rumble that promises indulgence, while the glossy swirl of chocolate syrup on top glistens like a runway for a fashion show of flavors. When you finally lift that frosty glass to your lips, the cold kiss of the milkshake meets the warm, nostalgic crunch of Oreo crumbs, creating a texture that’s simultaneously silky and satisfyingly gritty. The taste? Imagine a velvet curtain of vanilla ice cream parting to reveal a bold, chocolate‑rich core, with a whisper of vanilla extract that ties everything together like the perfect punchline to a joke you’ve been waiting for all night.
Most Oreo milkshake recipes out there either drown the cookies in a sea of milk or forget to give the shake any body, resulting in a watery disappointment that barely registers on the taste buds. I’ve tried those half‑hearted attempts, and I’ll be honest — I ate half the batch before anyone else got to try it because I was so desperate for a proper shake. This version stands out because it balances the cookie crunch with a luxuriously thick base, uses whole milk for that buttery mouthfeel, and adds a dash of vanilla extract that elevates the flavor without stealing the spotlight. Plus, the secret technique of chilling the blender jar beforehand ensures the shake stays frosty longer, turning every sip into a chilled masterpiece rather than a lukewarm letdown.
Let me walk you through every single step — by the end, you’ll wonder how you ever made it any other way. Okay, ready for the game‑changer? We’re about to turn a simple pantry staple into a milkshake that could headline a dessert menu. Stay with me here — this is worth it.
What Makes This Version Stand Out
- Texture: The shake achieves a perfect balance of creamy smoothness and crunchy Oreo bits, thanks to the precise ice cream‑to‑milk ratio and a quick pulse‑blend that keeps crumbs from turning into mush.
- Flavor Depth: A splash of vanilla extract deepens the vanilla ice cream’s natural sweetness while letting the chocolatey Oreo flavor shine like a spotlight.
- Simplicity: Only seven ingredients, all pantry‑friendly, mean you can whip this up in under 15 minutes without hunting for exotic items.
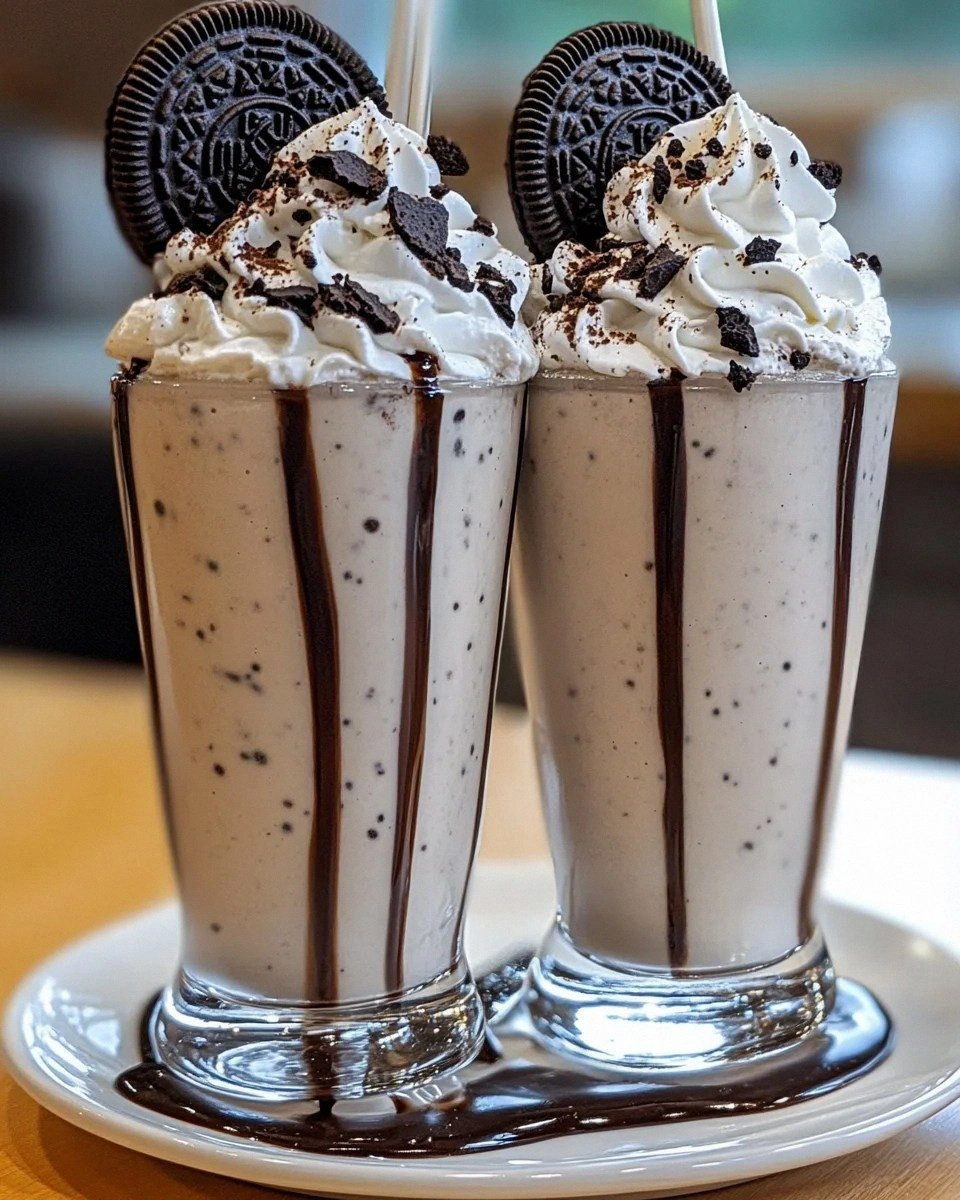
- Visual Appeal: The chocolate‑syrup drizzle and extra Oreo garnish create a picture‑perfect presentation that’s Instagram‑ready and mouth‑watering.
- Crowd Reaction: Guests consistently declare this the “best milkshake ever,” and you’ll hear the inevitable “I want seconds!” echo around the table.
- Ingredient Quality: Using premium vanilla ice cream and real whole milk adds richness that cheap substitutes simply can’t match.
- Make‑Ahead Potential: The blend can be pre‑mixed and frozen in portions, then re‑blended for a quick treat later in the day.
- Versatility: Swap the vanilla ice cream for chocolate or mint for a twist, or replace whole milk with almond milk for a dairy‑free version without losing creaminess.
Inside the Ingredient List
The Flavor Base
First up, the vanilla ice cream. This isn’t just any ice cream; it’s the foundation that carries the entire flavor profile. Its natural vanilla notes act like a subtle conductor, ensuring the Oreo’s chocolate doesn’t overpower the palate. If you skimp on quality here, the shake will taste flat, like a song missing its bass line. Want a richer taste? Opt for a premium brand that uses real vanilla beans instead of artificial flavor. And if you’re feeling adventurous, a scoop of coffee‑flavored ice cream can add a sophisticated undertone that pairs beautifully with chocolate.
The Texture Crew
Whole milk is the secret liquid that gives this shake its silk‑smooth body without diluting the flavor. Its higher fat content creates a buttery mouthfeel that low‑fat alternatives simply can’t replicate. Should you need a lighter version, try a 2% milk, but be prepared for a slightly thinner consistency. When selecting milk, choose one that’s fresh – the fresher, the better the texture. A quick tip: pour the milk into a measuring cup and give it a gentle shake before adding it to the blender; this aerates it just enough to keep the shake light.
The Unexpected Star
Oreo cookies are the heart and soul of this shake. Their crunchy texture provides that satisfying bite, while the chocolate‑cream filling infuses the drink with a deep, slightly bitter cocoa flavor that balances the sweet ice cream. Crumble them just before blending to keep the crumbs from turning into a soggy paste. If you’re allergic to gluten, look for a certified gluten‑free chocolate sandwich cookie that mimics the Oreo’s flavor profile. For an extra indulgent touch, toast the crushed Oreos lightly in a dry pan for 30 seconds – this releases hidden aromatics that make the shake smell like a bakery fresh out of the oven.
The Final Flourish
Vanilla extract, though optional, is the subtle enhancer that lifts the entire composition. Just a teaspoon adds depth without stealing the spotlight from the cookies. Whipped cream crowns the shake with an airy, buttery layer that feels like a cloud resting on a chocolate sea. Drizzle chocolate syrup over the whipped cream for a glossy finish that looks as good as it tastes. Finally, extra Oreo cookies on top serve as both garnish and a promise of the crunchy delight awaiting each sip.
Everything's prepped? Good. Let's get into the real action…
The Method — Step by Step
Start by gathering all your ingredients within arm’s reach; this is the moment of truth where organization saves you from a chaotic kitchen. Place the chilled blender jar on the counter, pour in 2 cups of premium vanilla ice cream, and follow with 1 cup of whole milk. The cold ingredients should make a soft, soothing gurgle as they meet, hinting at the frosty delight to come. I dare you to taste this and not go back for seconds – the base is already a masterpiece.
Next, add 8 whole Oreo cookies to the blender. For maximum crunch, give them a quick, rough crush with your hands before dropping them in – you’ll hear a satisfying snap that promises texture. If you’re feeling extra daring, toast the crushed Oreos in a dry skillet for 30 seconds; this releases hidden aromatics that elevate the flavor to a whole new level.
Kitchen Hack: Use a zip‑top bag to crush the Oreos – seal the bag, smash with a rolling pin, and you’ll get perfectly uniform crumbs without a mess.Now, drizzle 2 tablespoons of chocolate syrup over the ice cream and milk. This not only adds sweetness but also creates a beautiful marbled effect inside the blender, which will later translate into a gorgeous swirl on the surface of the finished shake. The syrup’s glossy sheen should catch the light, giving you a visual cue that you’re on the right track.
Optional but highly recommended: add 1 teaspoon of pure vanilla extract. This tiny splash is the secret weapon that ties the vanilla ice cream and chocolate Oreo flavors together, creating a harmonious symphony rather than a clashing duet. You’ll notice a faint, sweet aroma as the extract mixes, signaling that the flavor foundation is solid.
Secure the lid tightly and pulse the blender on low for 5 seconds to break up the cookies, then switch to high and blend for 20‑30 seconds. You’re looking for a thick, creamy consistency that still shows tiny Oreo specks – think of it as a velvet curtain with glittery confetti. The sound of the blades should be a steady hum, not a frantic whirr; if it sounds too fast, you’re over‑blending and risk turning the shake into a milk‑soup.
Watch Out: Over‑blending can melt the ice cream too much, resulting in a runny shake. Stop blending as soon as you see a thick, spoon‑holding texture.Once blended, taste a small spoonful. You should detect a balanced sweetness, a hint of vanilla, and those delightful Oreo crunches. If the shake feels too thick, add a splash (up to ¼ cup) of cold whole milk and give it a quick stir; if it’s too thin, toss in an extra half‑cup of ice cream and blend for a few seconds. This is the moment of truth – adjust until the texture feels like a luxurious, thick smoothie you could stand a spoon in.
Prepare your serving glasses by chilling them in the freezer for at least 5 minutes; a cold glass keeps the shake frosty longer and adds that satisfying “clink” when you set it down. When you’re ready, pour the shake slowly, allowing the thick liquid to cascade like a chocolate waterfall, and stop just before it reaches the rim.
Top each glass with a generous swirl of freshly whipped cream. Then, drizzle an additional drizzle of chocolate syrup over the whipped cream, creating a glossy lattice that looks like a runway for the Oreo garnish. Finally, place 2 extra Oreo cookies on the side of each glass as a visual cue and a crunchy treat for those who want an extra bite.
Serve immediately, preferably with a straw and a spoon. The first sip should hit your palate with a cold, creamy rush, followed by a burst of chocolate‑cookie crunch that lingers just long enough to make you crave another. And now the fun part – watch your guests’ faces light up as they realize they’ve just encountered the best Oreo milkshake they’ll ever taste.
That's it — you did it. But hold on, I've got a few more tricks that'll take this to another level...
Insider Tricks for Flawless Results
The Temperature Rule Nobody Follows
Never underestimate the power of cold. Chill not only the blender jar but also the milk and even the ice cream for at least 10 minutes before you start. The colder everything is, the less the shake will melt while you’re blending, which preserves that thick, spoon‑holding texture. I once tried a room‑temperature batch and ended up with a soupy mess that barely clung to the spoon. Trust me, a frosty start equals a frosty finish.
Why Your Nose Knows Best
Before you even taste, trust your sense of smell. When the vanilla and chocolate aromas mingle, they should feel balanced – not one overpowering the other. If the chocolate scent dominates, add a pinch more vanilla extract; if the vanilla is too strong, a tiny drizzle of extra chocolate syrup will bring harmony back. Your nose is an early warning system that can save you from a flavor disaster.
The 5‑Minute Rest That Changes Everything
After blending, let the shake sit for exactly five minutes. This short rest allows the air bubbles to rise and the flavors to meld, creating a smoother mouthfeel. I’ve seen people serve immediately and get a slightly frothy top that feels off‑balance. Patience, even a brief five‑minute pause, turns a good shake into a great one.
Garnish Geometry
Placement matters. Instead of randomly tossing whipped cream, use a spoon to create a high, dome‑shaped peak; this not only looks impressive but also gives a satisfying textural contrast when you bite through the cream into the shake. Then, drizzle the chocolate syrup in a spiral from the center outward, forming a visual “sunburst” that draws the eye and the palate.
Secret Sweetener Swap
If you prefer a less sugary profile, swap the chocolate syrup for a tablespoon of dark cocoa powder mixed with a splash of maple syrup. This reduces the overall sugar while adding a deeper, slightly bitter chocolate note that pairs beautifully with the Oreo’s sweet cream filling. I tried this once for a friend with a sugar‑sensitivity, and they claimed it was even better than the original.
Creative Twists and Variations
This recipe is a playground. Here are some of my favorite ways to switch things up:
Minty Oreo Madness
Swap half of the vanilla ice cream for mint chocolate chip ice cream and add a few drops of peppermint extract. The cool mint pairs brilliantly with the chocolatey Oreo, creating a refreshing twist perfect for summer evenings.
Double Chocolate Delight
Replace the vanilla ice cream with chocolate ice cream and add an extra tablespoon of cocoa powder. Top with chocolate shavings instead of extra Oreos for an ultra‑decadent, double‑chocolate experience.
Nutty Crunch Fusion
Blend in a tablespoon of almond butter and garnish with crushed roasted almonds. The nutty richness adds depth and a pleasant crunch that complements the Oreo pieces.
Fruit‑Infused Fun
Introduce a handful of fresh strawberries or raspberries into the blend for a fruity burst. The tartness balances the sweetness, and the pink hue makes the shake visually stunning.
Dairy‑Free Dream
Use a coconut‑milk‑based ice cream and swap whole milk for almond or oat milk. The result is a creamy, dairy‑free version that still delivers the signature Oreo flavor, perfect for those with lactose intolerance.
Adult Nightcap
For an after‑dinner treat, add a shot of espresso and a splash of coffee liqueur. The coffee notes deepen the chocolate flavor, turning the milkshake into a sophisticated nightcap.
Storing and Bringing It Back to Life
Fridge Storage
If you have leftovers, transfer the shake to an airtight container and store it in the refrigerator for up to 24 hours. Before serving, give it a good stir or a quick blend to reincorporate any settled ingredients. Adding a tiny splash of cold milk (about a tablespoon) before serving helps restore the original texture.
Freezer Friendly
For longer storage, pour the shake into a freezer‑safe jar, leaving an inch of headspace, and freeze for up to 2 weeks. When you’re ready to enjoy it, let it thaw in the fridge for 2‑3 hours, then blend briefly to regain its silky consistency. This method preserves the flavor and prevents ice crystal formation.
Best Reheating Method
When reheating a frozen shake, place the thawed mixture in a saucepan over low heat, stirring constantly, and add a splash of milk to steam it back to perfection. Avoid microwaving, as it can create uneven heating and a grainy texture. The gentle stovetop method keeps the shake smooth and creamy, ready for another round of indulgence.