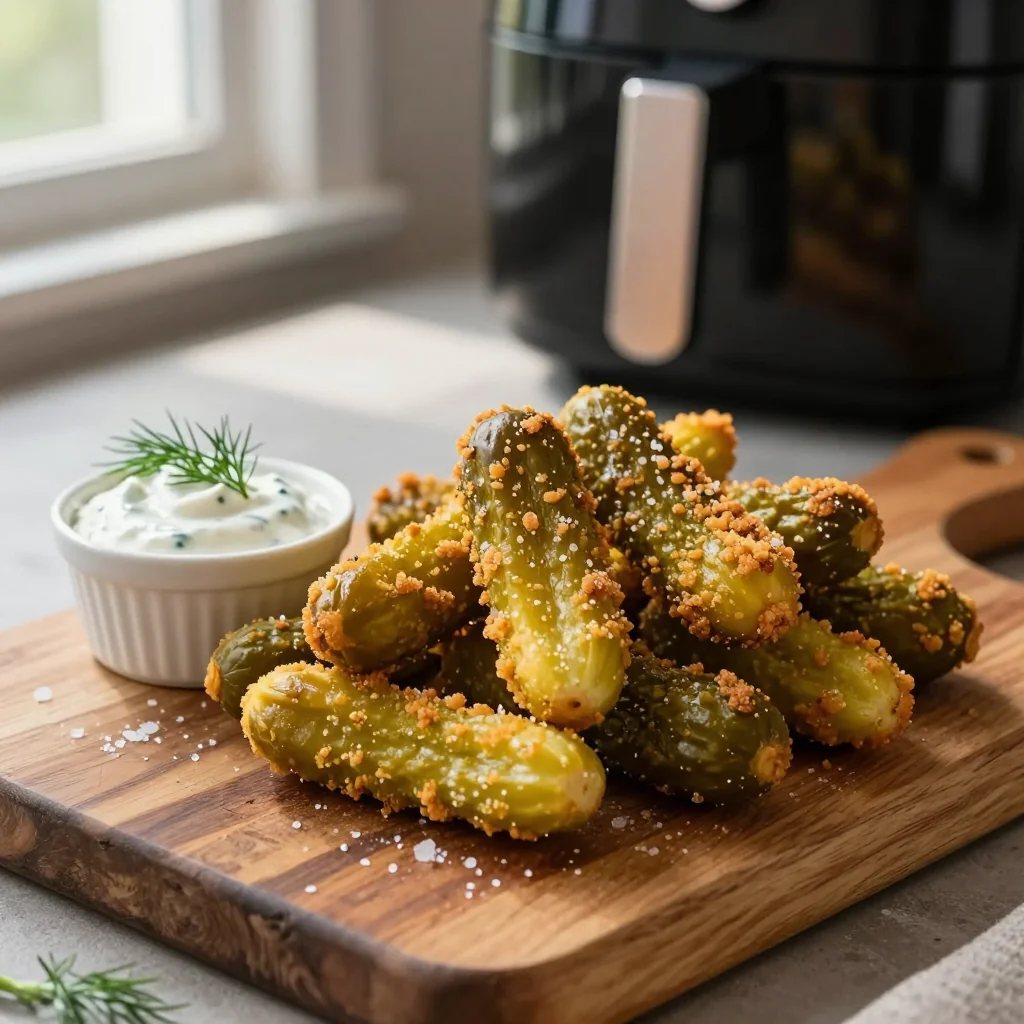
A crunchy, tangy snack that turns humble pickles into a gourmet appetizer in minutes.
I still remember the first time I bit into a perfectly crisp pickle spear at a backyard barbecue in my hometown. The snap of the breaded coating, the sharp tang of the dill, and the faint whisper of oil on my tongue created a memory that still makes my mouth water. That moment sparked a lifelong fascination with turning simple, everyday ingredients into something extraordinary. Years later, after countless experiments with deep fryers and ovens, I finally discovered the secret to achieving that same crunch without drowning the pickles in oil: the air fryer.
Crispy Fried Pickles have roots in Southern American comfort food, where they were traditionally deep‑fried in hot oil and served as a bar snack. The air fryer gives this classic dish a modern, healthier twist while preserving the irresistible texture that makes pickles a beloved finger food. This recipe captures the spirit of the original—golden, crunchy, and bursting with briny flavor—while cutting the grease and the hassle.
In this guide, you’ll learn how to create a light, airy batter, how to select the perfect pickles, and how to fine‑tune the air fryer settings for consistent results. I’ll also share troubleshooting tips, flavor variations, and serving ideas that will make your crispy fried pickles the star of any gathering.
So preheat that air fryer, gather your ingredients, and let’s dive into a snack that’s both nostalgic and refreshingly new. I’m thrilled to share every crunchy detail with you!
🌟 Why This Recipe Will Win You Over
Crispy fried pickles are more than just a snack; they’re a celebration of texture, flavor, and convenience.
- ✨ Irresistible Crunch: The combination of a light, airy batter and a quick blast of hot air creates a crackle that rivals deep‑fried versions, without the oil soak.
- ✨ Tangy Flavor Boost: Using dill pickles ensures a bright, herbaceous bite that cuts through the richness of the coating, keeping each mouthful balanced.
- ✨ Health‑Friendly: The air fryer uses up to 80% less oil than traditional frying, reducing calories while preserving that golden exterior.
- ✨ Speedy Preparation: From start to finish, the recipe takes less than half an hour, perfect for last‑minute parties or weeknight cravings.
- ✨ Versatile Pairings: Serve them with ranch, spicy mayo, or a cool cucumber yogurt dip—each option elevates the experience.
- ✨ Foolproof Consistency: Precise measurements and a step‑by‑step guide guarantee uniform results, even for beginners.
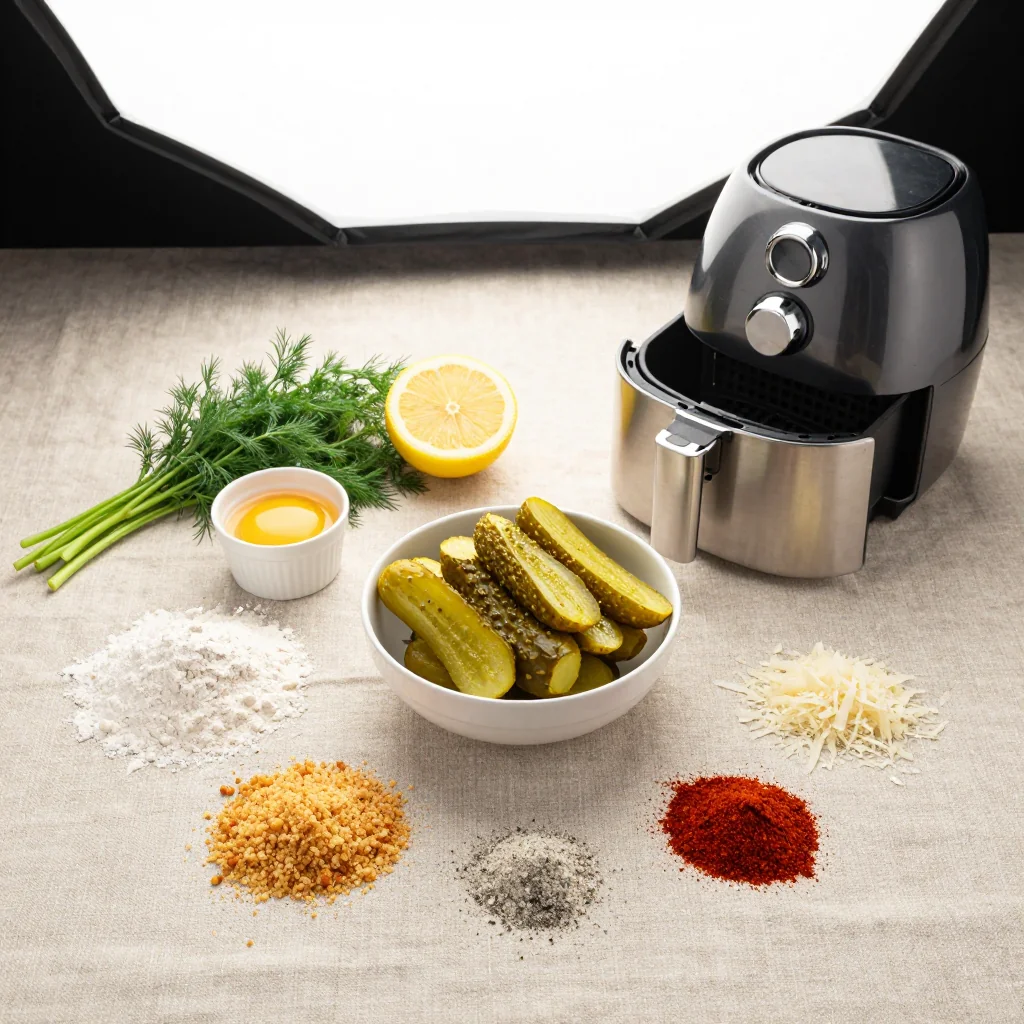
🥗 Ingredients
📝 Complete Ingredient List
For the Pickles:
- 12 spears dill pickles
For the Batter:
- 120 g all‑purpose flour
- 60 g cornstarch
- 5 g baking powder
- 2.5 g salt
- 2.5 g black pepper
- 2.5 g paprika
- 240 ml cold sparkling water
For the Crunch Coating:
- 50 g panko breadcrumbs
- 15 ml olive oil (optional)
For the Ranch Dipping Sauce (optional):
- 120 g sour cream
- 30 ml mayonnaise
- 5 g dried dill
- 5 g garlic powder
- 5 g onion powder
- a pinch salt
🔍 Focus on Key Ingredients
Dill Pickles
Dill pickles are the heart of this dish. Their briny, herb‑infused flavor provides a sharp contrast to the mildly seasoned batter. When selecting, choose pickles that are firm to the touch and have a deep green hue; avoid overly soft or overly sour varieties, as they can become mushy during cooking. The natural acidity also helps keep the coating from becoming soggy.
Panko Breadcrumbs
Panko gives the coating its signature airy crunch. Unlike traditional breadcrumbs, panko is larger and lighter, creating a texture that stays crisp even after a brief rest. If you can’t find panko, you can pulse regular breadcrumbs in a food processor for a similar effect, though the final bite may be slightly denser.
Cold Sparkling Water
The carbonation in sparkling water introduces tiny air bubbles into the batter, resulting in a lighter, more delicate crust. This is the secret that differentiates air‑fried pickles from their deep‑fried cousins. For the best results, keep the water ice‑cold and add it to the dry ingredients just before coating the pickles.
🔄 Quick Substitutions
| If you don’t have... | Use instead... |
|---|---|
| Panko breadcrumbs | Regular breadcrumbs (pulsed) |
| Cold sparkling water | Club soda or chilled beer |
| Dill pickles | Cucumber slices marinated in vinegar and dill |
👨🍳 Step‑by‑Step Instructions
Follow these precise steps to achieve perfectly golden, crunchy pickles every time. The process is broken into three phases: preparation, cooking, and finishing touches.
📋 Phase 1: Preparation & Mise en Place
Gather, measure, and set up all components before you start the air fryer.
Dry the Pickles
Pat the dill pickle spears dry with paper towels, ensuring each piece is free of excess moisture. This step is crucial because any water left on the surface will steam the batter, preventing the desired crispness. Feel each spear; it should feel dry to the touch, not slick.
Prepare the Batter
In a medium bowl, whisk together the flour, cornstarch, baking powder, salt, black pepper, and paprika. Slowly pour the cold sparkling water while whisking to avoid lumps. The batter should be smooth, slightly thick, and glossy. Let it rest for 5 minutes; this allows the starches to hydrate, creating a better coating.
🔥 Phase 2: Cooking & Assembly
Coat the pickles and fry them to golden perfection.
Coat the Pickles
Dip each pickle spear first into the batter, allowing any excess to drip off, then roll it in the panko breadcrumbs. For an extra crunch, drizzle the optional olive oil over the coated spears and give them a gentle toss. The oil helps the panko adhere and adds a subtle richness.
Pre‑heat the Air Fryer
Set the air fryer to 200 °C (392 °F) and let it preheat for 3 minutes. A hot start ensures the batter begins to set instantly, sealing in the pickle’s moisture.
Cook the Pickles
Arrange the coated spears in a single layer in the air fryer basket. Cook for 8–10 minutes, shaking the basket halfway through to promote even browning. The exterior should turn a deep golden‑brown, and the interior will stay tangy and slightly warm.
✨ Phase 3: Finishing & Plating
Check doneness, plate attractively, and serve.
Check for Doneness
The coating should be uniformly golden and sound crisp when tapped. If any spears appear pale, add an extra 1–2 minutes. The pickles themselves should be warm but still retain their characteristic snap.
Prepare the Ranch Dip (optional)
While the pickles finish cooking, whisk together sour cream, mayonnaise, dried dill, garlic powder, onion powder, and a pinch of salt in a small bowl. Adjust seasoning to taste; a squeeze of lemon can brighten the dip further.
Plate and Garnish
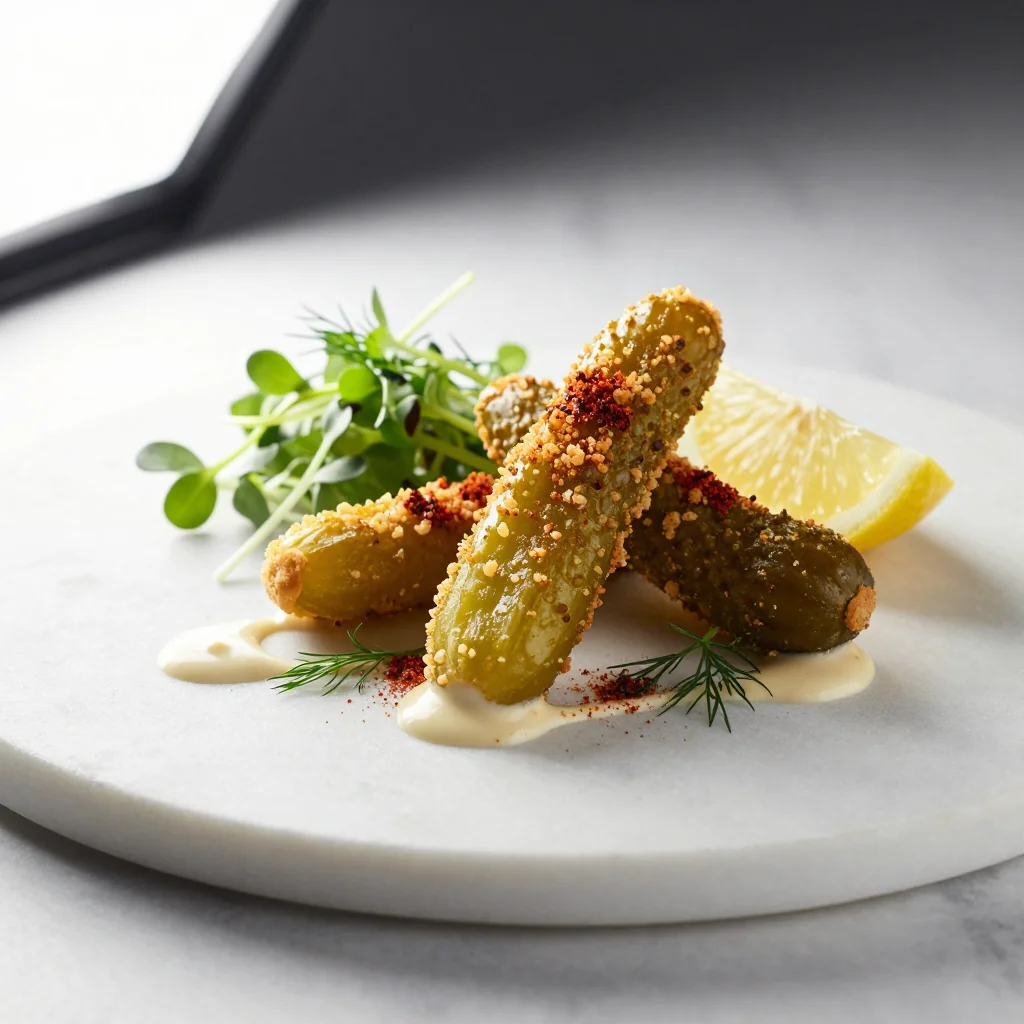
Arrange the crispy spears on a serving platter. Sprinkle a light dusting of extra panko and a few fresh dill fronds for visual appeal. Serve alongside the ranch dip in a small bowl, and provide lemon wedges for an optional splash of acidity.
💡 Expert Tips & Tricks
🛒 Choosing the Right Ingredients
Select pickles that are at least a month old; they’ll be firmer and less watery. Opt for organic dill pickles if possible—they tend to have a cleaner flavor and fewer preservatives that can affect the batter’s adhesion. When buying panko, look for the Japanese‑style version, which is lighter than Western breadcrumbs. Finally, use sparkling water that’s chilled; the colder the liquid, the better the batter’s rise.
🔪 Preparation Techniques
Patting the pickles dry is non‑negotiable; any residual moisture creates steam that softens the coating. For an even coating, use a shallow dish for the batter and a separate shallow dish for the panko. Lightly toss the spears in the batter before rolling them in breadcrumbs to avoid clumps. If you’re making a large batch, keep coated pickles on a parchment‑lined tray in the refrigerator for up to 30 minutes before cooking; this helps the coating set.
🌡️ Mastering the Air Fryer
Every air fryer model varies slightly, so treat the first batch as a test run. A preheated 200 °C setting works for most units, but if your model runs hot, reduce to 190 °C. Shake the basket gently halfway through cooking to ensure each side browns evenly. For extra crispness, spray the coated spears lightly with a high‑smoke‑point oil (like avocado oil) before cooking.
🍽️ Presentation & Service
Serve the pickles on a rustic wooden board for a casual vibe, or on a sleek white platter for a more refined presentation. Add a garnish of fresh dill, a sprinkle of sea salt, and a few lemon wedges for color contrast. Pair them with a chilled glass of crisp white wine or a cold craft beer to complement the tangy bite.
🏆 Pro Tips
Elevate your crispy fried pickles from great to restaurant‑level with these professional insights.
- 🎯 Use Double Dipping for Extra Crunch: After the first coating, let the spears rest for 2 minutes, then dip them a second time in batter and panko. This creates a multi‑layered crust that stays crunchy even after cooling.
- 🎯 Incorporate a Light Cornmeal Dusting: Mixing a tablespoon of fine cornmeal into the flour blend adds a subtle grainy texture that mimics the mouthfeel of traditional deep‑fried snacks.
- 🎯 Adjust the pH of the Batter: Adding a pinch of cream of tartar (about 1 g) stabilizes the batter’s acidity, preventing it from becoming gummy during high‑heat air frying.
- 🎯 Cool on a Wire Rack: Once cooked, transfer the pickles to a wire rack instead of paper towels. This allows excess steam to escape, preserving the crisp exterior.
- 🎯 Finish with a Light Brine Spray: A quick mist of diluted pickle brine (1 part brine to 4 parts water) right after cooking re‑infuses a hint of tang without sogging the crust.
- 🎯 Serve Immediately for Peak Texture: The coating begins to soften after 10–15 minutes at room temperature. If you must hold them, keep them in a low‑heat oven (90 °C) for up to 20 minutes.
"Great food is about balance—texture, flavor, and timing. These pickles hit every note." — Chef Thomas Keller
🔄 Variations & Adaptations
The base recipe is a versatile canvas. Below are several ways to tailor it to dietary preferences, flavor cravings, or family-friendly needs.
🥬 Vegetarian / Vegan Version
Replace the dairy‑based ranch dip with a vegan herb yogurt dip (use coconut yogurt, lemon juice, dill, and garlic powder). Ensure the panko is certified vegan (some contain dairy). The rest of the recipe is naturally plant‑based.
- Swap sour cream for 120 g plain soy yogurt.
- Use a vegan mayonnaise alternative.
🌶️ Flavor Variations
Change the seasoning profile to suit different cuisines or spice levels. The batter is a neutral base that welcomes experimentation.
Spicy Version:
Add 1 tsp cayenne pepper and 1 tsp smoked paprika to the batter. Serve with a sriracha‑infused mayo for an extra kick.
Mediterranean Version:
Mix 1 tsp dried oregano and 1 tsp lemon zest into the batter. Pair with a tzatziki dip and garnish with crumbled feta.
Asian Fusion Version:
Incorporate 1 tsp sesame oil into the batter and sprinkle toasted sesame seeds on the panko. Serve with a soy‑ginger dipping sauce.
⚠️ Dietary Adaptations
Gluten‑Free:
Use a 1:1 gluten‑free flour blend in place of all‑purpose flour and ensure the panko is gluten‑free (or use crushed rice crackers).
Lactose‑Free:
Omit the sour cream in the dip and replace it with lactose‑free Greek‑style yogurt. The rest of the recipe is already free of dairy.
Low‑Calorie:
Reduce the oil spray to a light mist, use a reduced‑fat yogurt for the dip, and serve the pickles with a squeeze of fresh lemon instead of a creamy sauce.
👶 Kid‑Friendly Version
Kids love the crunch but may be sensitive to strong dill flavors. Use sweet bread‑and‑butter pickles instead of dill, and serve with a honey‑mustard dip. Reduce the amount of black pepper in the batter for a milder taste.
📦 Storage & Reheating
🧊 Storage
Refrigerator:
- Duration: 2 days
- Container: Airtight glass jar or plastic container with a lid
- Tip: Place a paper towel at the bottom to absorb moisture.
Freezer:
- Duration: 1 month
- Method: Freeze on a parchment sheet in a single layer, then transfer to a zip‑top bag.
- Defrost: Thaw overnight in the refrigerator before reheating.
💡 For best texture, reheat rather than store at room temperature; prolonged exposure can make the coating soggy.
♨️ Reheating
🔥 Oven (Recommended):
- Preheat to 180 °C (350 °F).
- Place pickles on a wire rack over a baking sheet.
- Heat for 8‑10 minutes, turning halfway.
- Finish with a 2‑minute blast on broil for extra crunch.
⚡ Microwave (Quick):
- Cover with a microwave‑safe lid.
- Heat on medium power for 45 seconds.
- Check and repeat in 15‑second bursts if needed.
🍳 Stovetop:
Heat a thin layer of oil in a skillet over medium‑high heat. Add pickles and cook for 2‑3 minutes per side until the coating crisps again. This method adds a little extra oil but restores crunch quickly.
🍷 Perfect Pairings
🥗 Side Dishes
- Coleslaw with Apple Cider Vinaigrette: The creamy acidity balances the salty crunch of the pickles.
- Grilled Corn on the Cob: Sweet, charred corn complements the tangy brine.
- Fresh Tomato Basil Salad: Bright, juicy tomatoes provide a refreshing contrast.
🍷 Wine & Drink Pairings
- Sauvignon Blanc: Its crisp acidity mirrors the pickle’s tang.
- IPA (India Pale Ale): The hop bitterness cuts through the richness of the coating.
- Non‑alcoholic: Sparkling water with a splash of lime keeps the palate clean.
🍰 To Complete the Meal
Start with a light cucumber gazpacho, follow with the crispy fried pickles as a snack or appetizer, and finish with a lemon‑blueberry cheesecake. The citrus notes thread through each course, creating a harmonious dining experience.
❓ Frequently Asked Questions
Q: Can I use other types of pickles, like bread‑and‑butter?
Yes, you can experiment with different pickle varieties. Bread‑and‑butter pickles will give a sweeter flavor, while kosher dills provide a sharper bite. Adjust the seasoning in the batter if you switch to a sweeter pickle to keep the overall flavor balanced.
Q: How do I prevent the batter from becoming soggy?
The key is to keep the pickles dry and the batter cold. Pat the spears thoroughly, use ice‑cold sparkling water, and avoid over‑mixing the batter. Also, preheat the air fryer so the coating sets immediately upon contact.
Q: What if my air fryer is smaller and can’t fit all the spears at once?
Cook the pickles in batches. The batter will stay usable for up to 30 minutes; simply keep the coated spears on a tray in the refrigerator while you finish the first batch. This also helps maintain crispness.
Q: Can I make this recipe without an air fryer?
Absolutely. Preheat a conventional oven to 200 °C (400 °F) and bake the coated pickles on a wire rack for 12‑15 minutes, turning once. You’ll still achieve a decent crunch, though it may be slightly less airy than the air‑fried version.
Q: How can I make the coating spicier without overpowering the pickle?
Add ½ tsp of cayenne pepper or a pinch of chili flakes to the batter. You can also mix a dash of hot sauce into the ranch dip. Start with a small amount and taste before adding more to keep the heat balanced.
Q: Is it possible to prepare the batter ahead of time?
Yes, you can whisk the dry ingredients together and store them in an airtight container. Add the sparkling water just before coating the pickles to preserve the carbonation’s leavening effect.
🎉 Let’s Get Cooking!
Crispy fried pickles in the air fryer combine the nostalgic charm of a classic bar snack with modern, health‑conscious cooking. By following the detailed steps, you’ll achieve a perfectly golden, crackly exterior that locks in the tangy pickle core. Whether you’re serving them at a casual game night, a sophisticated cocktail party, or simply craving a crunchy treat, this recipe delivers flavor, texture, and visual appeal—all in under half an hour.
I can’t wait to hear how your batch turns out. Share your photos, tweak the flavors, and let the community know which variation became your favorite. Your feedback helps us refine the recipe and inspire new creations.
Have you tried this recipe?
Leave a comment and rating below! Share your photos on Instagram with #CrispyPickleAirFry for a chance to be featured.
Crispy Fried Pickles in Air Fryer
Golden, crunchy pickles that pop with tangy flavor—ready in 25 minutes.
📝 Ingredients
Pickles
Batter
Crunch Coating
Ranch Dipping Sauce (optional)
👨🍳 Instructions
- 1 Pat the dill pickle spears dry with paper towels; ensure no moisture remains.
- 2 Whisk together flour, cornstarch, baking powder, salt, pepper, and paprika; slowly add cold sparkling water until smooth.
- 3 Dip each spear into the batter, then roll in panko breadcrumbs; optionally drizzle with olive oil.
- 4 Pre‑heat the air fryer to 200 °C (392 °F) for 3 minutes.
- 5 Place spears in a single layer in the basket; cook 8‑10 minutes, shaking halfway.
- 6 While cooking, whisk together sour cream, mayo, dill, garlic powder, onion powder, and a pinch of salt for the dip.
- 7 Check that the coating is golden and crisp; add 1‑2 minutes if needed.
- 8 Transfer to a serving platter, garnish with fresh dill and lemon wedges, and serve with the ranch dip.
- 9 If making ahead, store in an airtight container and reheat in a 180 °C oven for 8 minutes.
- 10 Enjoy immediately for maximum crunch and flavor.
🥗 Nutritional Information (per serving)
*Values are estimates based on typical ingredient brands.
📚 You Might Also Like
Garlic Parmesan Air Fryer Fries