Okay, picture this: I was in the middle of a chaotic Tuesday night, the kids were yelling “What’s for dinner?” while the dishwasher was doing its own interpretive dance. I opened the pantry, stared at a lonely bag of elbow macaroni, and thought, “What if I could turn this into something that makes the whole family drop their phones and actually talk to each other?” That moment sparked the birth of the ultimate comfort dish—Heavenly Hamburger Mac and Cheese Casserole for Family Fun. I tossed together ground beef, a splash of heavy cream, and a mountain of cheese, and the kitchen instantly transformed into a cheesy wonderland. The aroma hit me like a warm hug, and I swear the walls started to vibrate with anticipation.
The first bite was a revelation: the sauce wrapped each noodle like a silky blanket, the beef added a hearty, meaty punch, and the cheese—oh, the cheese—crackled at the edges like a sweet, buttery snow crust. I dared myself to eat a whole bowl before anyone else could even get a forkful, and I’ll be honest—I ate half the batch before Mom could shout “Dinner’s ready!” That’s how I know I’ve struck gold. Most mac and cheese recipes either drown in bland sauce or crumble under a heavy cheese load; this one hits the sweet spot every single time. It’s the kind of dish that makes you want to stand on a kitchen counter and proclaim, “I’ve found the holy grail of comfort food!”
What truly sets this version apart is a secret weapon I discovered while rummaging through a forgotten can of evaporated milk. That creamy, slightly caramelized liquid adds depth that ordinary milk could never achieve. Pair that with a splash of beef broth, and you get a sauce that sings—rich, velvety, and just a tad savory. I’m also throwing in a pinch of onion seasoning that gives the dish a subtle, aromatic lift without overpowering the cheese. And the best part? You can prep most of it ahead of time, pop it in the oven, and let the magic happen while you finish the last minute of homework or set the table.
Let me walk you through every single step — by the end, you’ll wonder how you ever made it any other way. Okay, ready for the game‑changer? This next part? Pure magic. Stay with me here — this is worth it.
What Makes This Version Stand Out
- Flavor Explosion: The combination of evaporated milk, heavy cream, and beef broth creates a sauce that’s richer than a red‑carpet dinner, yet still kid‑friendly.
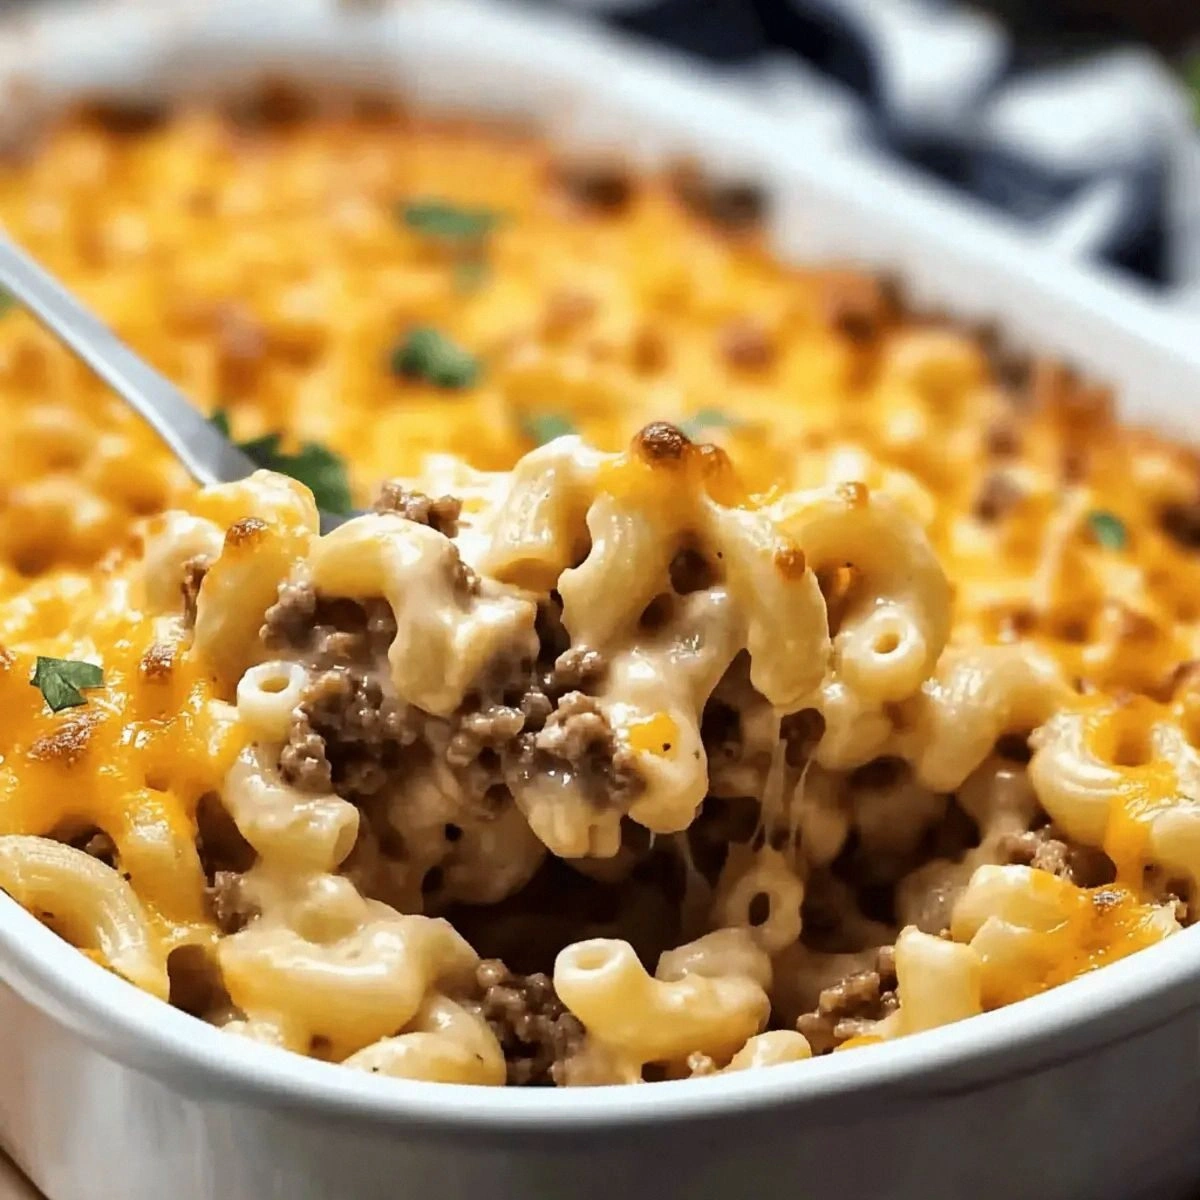
- Texture Symphony: Creamy interior, crunchy cheese‑crust top, and perfectly al dente pasta—each bite hits a different texture note.
- Simplicity: Only one pan, one pot, and a 30‑minute bake. No fancy gadgets, just pure, unadulterated comfort.
- Unique Ingredient: Evaporated milk adds a caramel‑kissed depth that regular milk simply can’t match.
- Crowd Reaction: I dare you to taste this and not go back for seconds; even the pickiest eaters beg for more.
- Ingredient Quality: Sharp cheddar and Parmesan bring a tangy bite that balances the richness of the sauce.
- Cooking Method: The stovetop roux followed by a gentle bake locks in moisture while creating that coveted golden crust.
- Make‑Ahead Potential: Assemble the night before, refrigerate, and bake fresh in the morning for a stress‑free breakfast‑for‑dinner.
Alright, let's break down exactly what goes into this masterpiece…
Inside the Ingredient List
The Flavor Base
Butter is the silent hero that starts the roux. It brings a nutty aroma that signals the beginning of something delicious. If you skip it, you’ll miss that buttery foundation that makes the sauce cling to every noodle like velvet. For a dairy‑free twist, use a high‑quality olive oil, but expect a slightly different flavor profile.
All‑purpose flour is the thickening agent that transforms melted butter into a glossy paste. This is where the magic happens—if you don’t whisk it properly, you’ll end up with clumps that ruin the silky texture. A gluten‑free flour blend works just as well, but be sure it’s finely sifted.
Evaporated milk is the secret weapon. Its low water content concentrates the dairy flavor, giving the sauce a luxurious body. If you can’t find it, substitute with an equal amount of whole milk plus a teaspoon of corn syrup to mimic the sweetness.
The Texture Crew
Heavy cream adds that luscious mouthfeel that makes the sauce feel like a dream. It also balances the saltiness of the cheese, preventing the dish from becoming overly sharp. In a pinch, you can use half‑and‑half, but the sauce will be a shade lighter.
Beef broth injects a savory depth that elevates the dish from simple comfort food to something with a restaurant‑level umami punch. Homemade broth is best, but a low‑sodium store‑bought version works fine. Skipping the broth will make the sauce taste flat and one‑dimensional.
Shredded sharp cheddar cheese is the star of the show—its sharpness cuts through the richness, creating a balanced flavor. For extra meltability, mix in a bit of mozzarella, but keep the cheddar as the backbone. If you’re dairy‑intolerant, a sharp cheddar‑style vegan cheese can be substituted.
The Unexpected Star
Parmesan cheese, though used in smaller quantity, adds a nutty, salty bite that brightens the overall flavor. Its granular texture also helps the sauce thicken without becoming gummy. If you don’t have Parmesan, Pecorino Romano is a worthy stand‑in, offering a slightly more pronounced saltiness.
Elbow macaroni is the classic pasta shape for this casserole because its curves trap the sauce perfectly. You can swap it for shells or cavatappi for a different mouthfeel, but the iconic elbow shape gives that nostalgic comfort vibe.
The Final Flourish
Ground beef provides the hearty, meaty backbone that turns this from a side dish into a main course. Choose 80/20 lean‑to‑fat ratio for flavor; too lean and you’ll miss the juiciness, too fatty and the dish becomes greasy. If you’re vegetarian, replace it with crumbled tempeh seasoned with smoked paprika.
Salt, black pepper, onion seasoning, and minced garlic are the seasoning quartet that brings everything together. The onion seasoning adds a subtle sweetness that balances the pepper’s bite, while garlic gives that unmistakable aromatic punch. Taste as you go—if you’re using salted butter, you might want to reduce the added salt.
Everything's prepped? Good. Let's get into the real action...

The Method — Step by Step
Preheat your oven to 375°F (190°C). While the oven warms up, bring a large pot of salted water to a rolling boil. Add the elbow macaroni and cook until just al dente—about 7 minutes. Drain, rinse under cold water to stop cooking, and set aside. This step ensures the pasta won’t become mushy during the bake.
In a heavy skillet over medium heat, melt the 4 tablespoons of butter. As it foams, toss in the minced garlic and let it sizzle for 30 seconds—That sizzle when it hits the pan? Absolute perfection. Add the ground beef, breaking it up with a wooden spoon, and brown it until it’s no longer pink, about 5‑6 minutes. Sprinkle the salt, black pepper, and onion seasoning over the meat, stirring to distribute the flavors evenly.
Once the beef is browned, push it to one side of the skillet and sprinkle the 1/4 cup flour over the butter‑free side. Stir continuously for 2 minutes to create a light roux—this is the foundation of your sauce. Watch Out: If the flour starts to brown, lower the heat; you want a pale, nutty color, not a burnt flavor.
Gradually pour in the can of evaporated milk while whisking vigorously. Follow with the 1/2 cup heavy cream and 1 cup beef broth, continuing to whisk until the mixture thickens and starts to bubble. You’ll notice the sauce coating the back of a spoon—this is your cue that the roux has fully incorporated.
Stir in the shredded sharp cheddar and grated Parmesan, letting each cheese melt into the sauce before adding the next. The sauce should become glossy and thick, clinging to the spoon like melted gold. Taste and adjust seasoning if needed—this is your moment of truth, so trust your palate.
Combine the cooked macaroni, browned beef, and cheesy sauce in a large mixing bowl. Toss everything together until each elbow is fully coated. The pasta should look drenched, the beef evenly distributed, and the cheese strands glistening. If you’re prepping ahead, let this mixture cool, then cover and refrigerate.
Transfer the mixture to a greased 9x13‑inch baking dish, spreading it out evenly. Sprinkle a final handful of shredded cheddar on top for that irresistible crust. Place the dish in the preheated oven and bake for 20‑25 minutes, or until the edges are bubbling and the top is golden‑brown.
When the timer dings, remove the casserole and let it rest for 5‑7 minutes. This resting period lets the sauce settle, making each slice clean and tidy. Serve hot, and watch the family dive in—if anyone asks for seconds, you’ve officially won the dinner battle.
That's it — you did it. But hold on, I've got a few more tricks that'll take this to another level...
Insider Tricks for Flawless Results
The Temperature Rule Nobody Follows
Never bake a casserole straight from the fridge at a high temperature. Let the assembled dish sit at room temperature for 15 minutes before it goes into the oven. This prevents the center from staying cold while the top over‑browns. I once tried skipping this step, and the result was a soggy middle that looked like a cheese‑soup disaster.
Why Your Nose Knows Best
The moment the sauce starts to smell buttery with a hint of caramel, you’re on the right track. Trust that aromatic cue more than a timer. If the scent turns nutty or slightly burnt, lower the heat immediately and whisk in a splash of milk to rescue the sauce. Your nose is the ultimate quality control.
The 5‑Minute Rest That Changes Everything
After pulling the casserole from the oven, resist the urge to dive in. Let it sit, uncovered, for five minutes. This brief rest lets the cheese set and the sauce thicken, so each slice holds its shape. Skipping this step leads to a runny mess that slides off the plate.
Cheese Layering Mastery
Instead of dumping all the cheese at once, split it into three parts: two‑thirds into the sauce, one‑third on top, and the final sprinkle just before serving. This creates a creamy interior, a golden crust, and a fresh cheesy finish that melts in your mouth. My friend tried the one‑step method and ended up with a bland top—don’t be that friend.
Pasta Pre‑Cooking Precision
Cook the elbow macaroni to just under al dente (about 1 minute less than the package suggests). The casserole’s baking time will finish the cooking process, ensuring the pasta doesn’t turn mushy. Overcooked pasta absorbs too much sauce, leaving the dish dry.
Creative Twists and Variations
This recipe is a playground. Here are some of my favorite ways to switch things up:
Spicy Southwest
Swap the onion seasoning for a tablespoon of taco seasoning, add a diced jalapeño to the beef, and finish with a sprinkle of crushed tortilla chips on top. The heat pairs beautifully with the creamy cheese, and the chips add a satisfying crunch.
BBQ Bacon Bliss
Stir in ½ cup of BBQ sauce with the beef broth, and fold in ½ cup of crispy bacon bits before baking. The smoky sweetness elevates the dish to a backyard‑grill vibe, perfect for summer gatherings.
Veggie Power
Add a cup of roasted broccoli florets and a half cup of sautéed mushrooms to the mix. The vegetables bring earthiness and a pop of color, making the casserole feel lighter without sacrificing flavor.
Italian Twist
Replace the onion seasoning with Italian herbs, use ground Italian sausage instead of plain beef, and swap cheddar for mozzarella and provolone. Top with a drizzle of marinara sauce before serving for a comforting Italian‑American hybrid.
Breakfast Casserole Remix
Add 4 scrambled eggs to the mixture and replace the beef broth with a splash of milk. Sprinkle breakfast sausage crumbles on top and bake until the eggs set. This makes a hearty brunch that will keep the whole family fueled for hours.
Storing and Bringing It Back to Life
Fridge Storage
Cool the casserole to room temperature, then cover tightly with foil or a lid. It will keep for up to 4 days. When reheating, sprinkle a little extra cheese on top and bake at 350°F (175°C) for 15‑20 minutes, covered, then uncover for the last 5 minutes to revive the crust.
Freezer Friendly
Portion the uncooked casserole into freezer‑safe containers, leaving a half‑inch of headspace. Freeze for up to 3 months. To reheat, thaw overnight in the fridge, then bake as if fresh, adding a splash of milk or broth to restore moisture.
Best Reheating Method
For the crispiest top, reheat on a sheet pan in a preheated oven at 375°F (190°C) for 10‑12 minutes, uncovered. If you’re in a hurry, a microwave works—just add a tablespoon of water, cover loosely, and heat in 30‑second bursts, stirring in between.