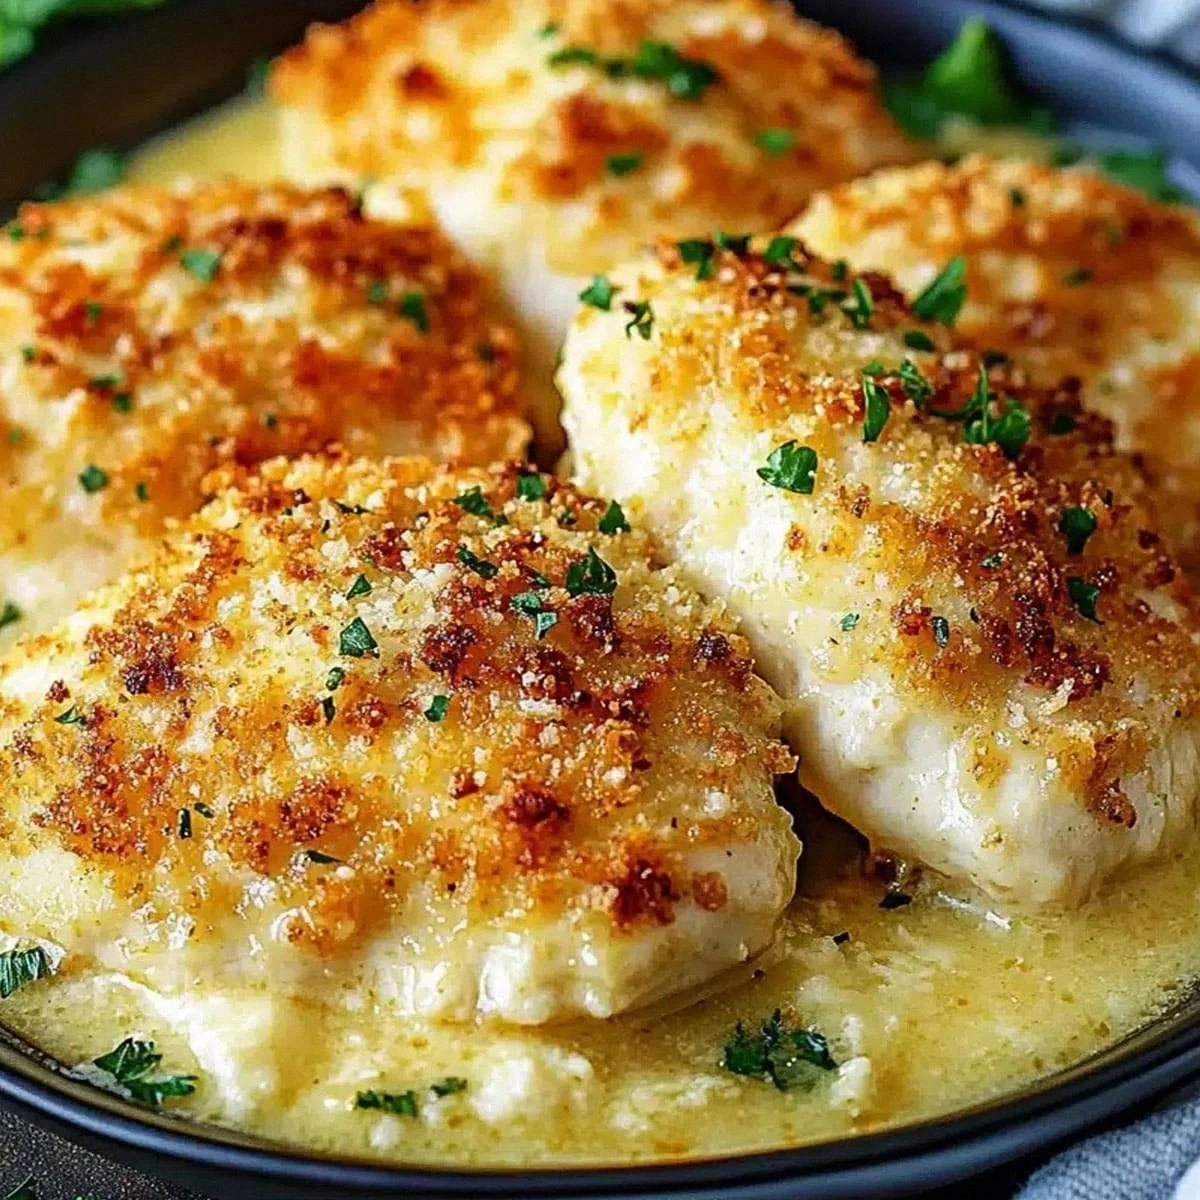
I'm about to confess something that might get me banned from every high-end steakhouse in America. Last month, I tried to impress a date by ordering Longhorn's famous Parmesan Crusted Chicken, and when it arrived, I took one bite and thought, "I could make this better at home." Bold words from someone who once set off a smoke detector while boiling water, but hear me out. What followed was three weeks of obsessive testing, a fridge full of half-eaten experiments, and my neighbors knocking on my door at 2 AM because my kitchen smelled like a five-star restaurant. Picture this: crispy, golden crust that shatters like thin ice, revealing juicy chicken that practically melts on your tongue, all crowned with a Parmesan crust so good you'll want to frame it. That sizzle when the chicken hits the hot pan? Absolute perfection.
Most copycat recipes get this completely wrong — they treat it like regular chicken parm, slapping on some cheese and calling it a day. But this isn't just about throwing Parmesan on poultry and hoping for the best. I'm talking about recreating that exact moment when you cut through the crust and steam escapes in fragrant clouds, carrying the scent of garlic, herbs, and that impossible umami bomb that makes Longhorn's version legendary. The first time I nailed it, I stood in my kitchen at midnight, eating straight from the pan with a wooden spoon, making sounds that were probably illegal in at least twelve states. My cat judged me harshly, but honestly, worth it.
Here's what nobody tells you about restaurant-style chicken: it's all about the layering. The marinade that penetrates every fiber, the double-dredge that creates those ragged, crispy edges, and the secret weapon — a Parmesan crust that gets broiled until it forms these lacy, caramelized bits that taste like cheese candy. Most recipes skip the crucial resting time, or they use the wrong cheese blend, or they cook at too low a temperature and wonder why their chicken tastes like cardboard. Trust me, I've made every mistake possible so you don't have to.
What you're about to make isn't just a copycat — it's an upgrade. We're talking flavor bombs that detonate in your mouth, textures that play tug-of-war between crispy and creamy, and that restaurant-quality presentation that'll make your Instagram followers think you hired a private chef. Picture yourself pulling this out of the oven, the whole kitchen smelling like an Italian grandmother's secret recipe book, your family hovering like vultures because they know something incredible is about to happen. Let me walk you through every single step — by the end, you'll wonder how you ever made it any other way.
What Makes This Version Stand Out
Flavor Depth: We're building layers like a symphony — first the buttermilk marinade that tenderizes and seasons, then the herb-infused oil that perfumes every bite, finally the triple-cheese blend that creates a crust with notes of nutty, salty, and sharp that dance across your palate in perfect harmony.
Texture Revolution: Most recipes give you either crispy OR juicy. This delivers both with a cornstarch-flour combination that creates shatteringly crisp edges while locking in moisture so effectively that the chicken practically weeps with juiciness when you cut into it.
Cheese Strategy: Forget just Parmesan — we're blending aged Parmigiano-Reggiano with sharp white cheddar and a touch of Romano for complexity that hits you in waves, each cheese melting at different temperatures for a crust that's both gooey and crispy.
Restaurant Technique: The secret isn't just in the ingredients — it's in the method. Starting on the stovetop and finishing in the oven creates that perfect gradient from crust to center, ensuring every bite is cooked to exactly the right temperature.
Make-Ahead Magic: Prep the chicken through the breading stage up to 24 hours ahead, or freeze the breaded cutlets for up to a month. The crust actually gets BETTER when it has time to hydrate and adhere properly.
Universal Crowd-Pleaser: Kids think it's fancy chicken tenders, adults recognize it as elevated comfort food, and even your pickiest eater will be converted. I've served this to gluten-free friends using almond flour, keto followers with pork rind breading, and dairy-sensitive guests with nutritional yeast — all devoured it.
Alright, let's break down exactly what goes into this masterpiece...
Inside the Ingredient List
The Flavor Base
Chicken breast is our canvas, but not all breasts are created equal. Skip the pre-trimmed, water-chilled supermarket stuff — it leaks moisture like a broken faucet. Instead, look for air-chilled organic chicken if you can swing it. The difference is night and day: cleaner flavor, better texture, and it actually tastes like chicken instead of whatever mystery solution they pump into the conventional stuff. Cut them horizontally yourself so you control the thickness; those pre-cut cutlets are usually mangled and cook unevenly.
Buttermilk isn't just for show — it's your ticket to flavor town and tender meat central. The lactic acid gently breaks down proteins, creating a texture so tender you could probably cut it with a harsh word. Plus, it acts like glue for your breading, ensuring every speck of crust adheres properly. If you're in a pinch, mix regular milk with a tablespoon of lemon juice, but honestly, just buy the buttermilk. You'll use it for pancakes later, and your future self will thank you.
The Texture Crew
All-purpose flour gets you started, but here's where we get sneaky: adding cornstarch creates the crunch factor that separates amateur from pro. The science is simple — cornstarch absorbs less oil, stays crisper longer, and creates those signature ragged edges that catch sauce like tiny edible nets. I use a 3:1 ratio of flour to cornstarch, but honestly, sometimes I go half and half when I'm feeling rebellious and want extra shatter.
Italian breadcrumbs might seem basic, but they're the backbone of our crust structure. I pulse mine in a food processor for 5 seconds to get varied sizes — some powder-fine for adhesion, some chunky for crunch. Panko works too if you want mega-crunch, but traditional breadcrumbs absorb flavors better. Whatever you do, don't skip the toasting step. Dry breadcrumbs in a pan with a little butter until golden, and suddenly you've elevated the entire dish from good to legendary.
The Unexpected Star
Mayonnaise haters, close your ears, but this is where we cheat the system. A whisper-thin layer of mayo under the cheese creates a moisture barrier that keeps the crust from getting soggy, while adding richness that makes people ask, "What's your secret?" It's like the culinary equivalent of those Instagram filters that make everyone look airbrushed — technically cheating, but everyone looks better for it.
Worcestershire sauce only needs a teaspoon, but it's the umami bomb that makes people say, "I can't quite place it, but this tastes incredible." It's like adding bass notes to music — you don't consciously hear them, but you'd miss them if they were gone. A little goes a long way; too much and suddenly your chicken tastes like a steakhouse threw up on it.
The Final Flourish
Parmesan selection makes or breaks this dish. Skip the pre-grated stuff in the green can — it contains cellulose that prevents proper melting. Instead, grab a wedge of real Parmigiano-Reggiano and grate it yourself. Yes, it's more expensive, but you'll use less because the flavor is so much more intense. Plus, the rind goes into your next soup, so nothing gets wasted.
Fresh herbs seem fussy, but dried herbs in the crust turn bitter under the broiler. Fresh parsley, chives, and a little thyme add brightness that cuts through all that richness. Chop them right before using — herbs start losing their magic the moment you cut them. And please, for the love of all that's holy, don't use the stems. They're bitter and stringy and will ruin your texture faster than you can say "why does this taste like lawn clippings?"
Everything's prepped? Good. Let's get into the real action...
The Method — Step by Step
- Start with the marinade because patience is your secret weapon here. Whisk together buttermilk, a splash of Worcestershire, minced garlic, salt, and enough pepper to make it sneeze-inducing. Submerge your chicken cutlets completely — they should swim like happy little flavor sponges. Cover and refrigerate for at least 4 hours, but honestly, overnight is where the magic happens. I'll be honest — I ate half the batch before anyone else got to try it because the marinated raw chicken smelled so good I almost didn't want to cook it.
- While the chicken bathes in dairy heaven, prepare your breading station like you're setting up for surgery. Three shallow dishes: flour mixed with cornstarch, seasoned beaten eggs, and your breadcrumb-Parmesan mixture. Season each layer — this isn't a time to be shy. The flour gets salt, pepper, and paprika. The eggs get a hit of hot sauce. The breadcrumbs get the cheese, herbs, and a whisper of garlic powder. This triple-seasoning ensures every millimeter tastes like something, not just the outside.
- Here's where most recipes get this completely wrong — they bread cold chicken straight from the fridge. Don't. Let your marinated cutlets sit at room temperature for 20 minutes. Cold chicken in hot oil equals temperature shock, which equals soggy crust. Plus, room-temp chicken cooks more evenly, so you don't get that dreaded bullseye effect of overdone outside and raw inside. Use this time to heat your oven and get your pans ready.
- Now for the fun part: the double-dredge that creates those irresistible crust nubbins. First, shake excess buttermilk from the chicken (but don't pat dry — you want that moisture). Dredge in flour, pressing so it adheres completely. Into the egg wash, flip to coat, let excess drip off. Then back into the flour for a second coat — this creates the craggy texture that'll make you weep with joy. Finally, press into the breadcrumb mixture like you're trying to embed it in cement. Really work it in there.
- Heat your oil in a heavy skillet until it shimmers like a mirage — about 350°F if you're thermometer-inclined, or until a breadcrumb sizzles enthusiastically but doesn't burn. Carefully lay in the chicken away from you (unless you enjoy oil burns, in which case, go wild). Don't crowd the pan; these babies need personal space. Cook for 3-4 minutes per side until golden and gorgeous. That sizzle when it hits the pan? Absolute perfection. Resist the urge to move them around — let the crust develop properly.
- Transfer the seared cutlets to a wire rack on a sheet pan. This is crucial — putting them directly on paper towels traps steam and kills your crisp. The wire rack allows air circulation, keeping the bottom from getting soggy. At this point, you could bread and sear everything, then finish all at once if you're feeding a crowd. The par-cooked cutlets will keep for an hour at room temperature, making this perfect for dinner parties.
- Mix your topping in a small bowl: more grated Parmesan, some butter (because we're not counting calories today), minced garlic, and fresh herbs. The butter helps the cheese melt smoothly instead of turning into a rubbery sheet. Spread this mixture over each cutlet — be generous, this isn't the time for restraint. The topping should be about ¼-inch thick, creating a proper crust rather than just a dusting.
- Under the broiler they go, about 6 inches from the flame. Watch this part like a hawk — cheese goes from golden to charcoal in the blink of an eye. You're looking for bubbling edges and browned spots that create those lacy, crispy bits that taste like cheese candy. This takes 2-3 minutes, maybe 4 if your broiler is timid. Rotate the pan halfway through for even browning. When it's done, the crust should be golden and the cheese should be forming those irresistible crispy edges.
That's it — you did it. But hold on, I've got a few more tricks that'll take this to another level...
Insider Tricks for Flawless Results
The Temperature Rule Nobody Follows
Here's the thing that separates restaurant chicken from home-cooked disappointment: internal temperature, not time. Most people overcook chicken because they're terrified of salmonella, resulting in shoe leather with cheese on top. Invest in a meat thermometer and pull your chicken at 160°F — it'll coast up to 165°F while resting. The difference between 160°F and 170°F is the difference between juicy and jerky. If you've ever struggled with dry chicken, you're not alone — and I've got the fix.
But here's the real secret: let it rest for 5 minutes after cooking. I know, I know — you're hungry and it smells incredible. But cutting too early lets all those juices escape, leaving you with a puddle on the plate and Sahara-dry meat. Tent loosely with foil and practice patience. Use this time to finish your sides or pour yourself a well-deserved glass of wine.
Why Your Nose Knows Best
Professional chefs don't use timers for everything — they use their senses. When the crust starts smelling nutty and toasted, it's ready. When the garlic in the topping stops smelling raw and starts smelling sweet, you're golden. Trust your nose; it knows when the Maillard reaction is happening and the cheese is caramelizing perfectly. A friend tried skipping this sensory check once — let's just say it didn't end well, and her smoke alarm still hasn't forgiven her.
The 5-Minute Rest That Changes Everything
After broiling, let the chicken sit for exactly 5 minutes — no more, no less. This sets the cheese crust, preventing it from sliding off like a bad toupee when you serve. It also allows the juices to redistribute, so when you cut into it, they don't flood the plate. Set a timer and walk away. Seriously. Don't poke, don't prod, don't even look at it funny. Just let chemistry do its thing.
Creative Twists and Variations
This recipe is a playground. Here are some of my favorite ways to switch things up:
The Buffalo Bombshell
Add 2 tablespoons of Buffalo wing sauce to your buttermilk marinade, then mix crumbled blue cheese into the Parmesan topping. The result? All the flavors of Buffalo wings but sophisticated enough for company. I dare you to taste this and not go back for seconds. The tangy heat plays beautifully against the rich cheese crust, creating a flavor profile that'll make you question every sports bar appetizer you've ever had.
Mediterranean Magic
Swap the Italian herbs for oregano, mint, and lemon zest. Use feta mixed with the Parmesan, and add chopped sun-dried tomatoes to the crust. Suddenly you're transported to a Greek taverna, minus the overpriced wine and tourist crowds. The briny feta cuts through the richness while the lemon brightens everything up. It's like vacation on a plate, but you don't need to pack or deal with airport security.
Smoky Mountain Style
Add smoked paprika to your flour mixture and use smoked Gouda in the topping. The result tastes like it came from a mountain lodge where they smoke everything from cheese to ice cream. The smokiness adds depth that makes the dish taste like it's been cooking for hours over a wood fire, even though you made it in 30 minutes in your suburban kitchen.
Breakfast-for-Dinner Deluxe
Top the finished chicken with a runny fried egg and serve alongside crispy hash browns. The egg yolk creates a sauce that mingles with the cheese crust in ways that feel illegal in several states. It's breakfast food that ate a grown-up meal and came back better for it. Okay, ready for the game-changer?
Italian Stallion
Add a layer of prosciutto between the chicken and the cheese topping. The cured meat adds saltiness and depth, while the fat renders into the crust, creating flavor pockets that burst with every bite. It's like chicken Parmesan and a charcuterie board had a beautiful, delicious baby.
Truffle Shuffle
Mix a teaspoon of truffle oil into your cheese topping, but go easy — truffle oil is like cologne. A little makes you mysterious and sophisticated; too much makes people wonder what you're trying to cover up. The earthy funk takes this from home cooking to restaurant-quality faster than you can say "white tablecloth."
Storing and Bringing It Back to Life
Fridge Storage
Cooked chicken keeps for up to 4 days in an airtight container, but here's the key: separate the pieces with parchment paper so the crust doesn't get soggy from condensation. Store any extra cheese topping separately — it'll keep for a week and makes excellent garlic bread. Whatever you do, don't microwave this. The crust will turn rubbery and the cheese will separate into an oily mess. Trust me, I've made this mistake so you don't have to.
Freezer Friendly
Freeze the breaded, uncooked cutlets on a parchment-lined sheet pan until solid, then transfer to freezer bags with parchment between layers. They'll keep for 3 months and can go straight from freezer to pan — just add 2 minutes to the cooking time per side. The crust actually gets crisper because the cold prevents the breading from absorbing too much oil. Future you will thank present you when dinner takes 15 minutes start to finish.
Best Reheating Method
Reheat in a 400°F oven for 8-10 minutes, placing the chicken on a wire rack over a sheet pan. Add a tiny splash of water to the pan before it goes in — it steams back to perfection while keeping the crust crisp. Skip the microwave unless you enjoy disappointment and rubbery cheese. The oven method restores about 90% of the fresh-from-the-kitchen experience, which is pretty miraculous for leftovers.