I was standing in my kitchen on a blustery Thanksgiving morning, juggling a turkey that refused to cooperate, a pot of cranberry sauce that was bubbling over, and a half‑finished stuffing that looked like a sad, soggy mess. The smoke alarm chirped like an impatient aunt, and I realized I needed a game‑changing appetizer that could rescue the whole party. That’s when the idea struck me like a flash of lightning: what if we took the classic turkey‑stuffing combo, rolled it into bite‑size spheres, and gave it a sweet‑tart cranberry kick? I grabbed the nearest bowl, dumped in leftover turkey, tossed in some crunchy breadcrumbs, and—boom—an instant epiphany. I dare you to taste this and not go back for seconds, because this is hands down the best version you'll ever make at home.
Picture this: the oven door swings open, releasing a cloud of aroma that smells like a cozy cabin in the woods, with hints of rosemary, buttery turkey, and a bright burst of cranberry that makes your nose do a little happy dance. The balls sit on a sheet, their golden crust crackling softly, while the interior stays tender, almost melt‑in‑your‑mouth, like a secret hug from a long‑lost relative. You hear the faint sizzle as they finish browning, and you can almost see the steam rising in slow motion, each puff promising a perfect bite. The first bite delivers a symphony—crunch, then a burst of sweet‑tart cranberry, followed by savory turkey and herb‑infused stuffing that lingers just long enough to make you sigh in contentment. If you've ever struggled with this, you're not alone — and I've got the fix.
Most recipes get this completely wrong. They either drown the stuffing in sauce, leaving you with a soggy mess, or they forget the cranberry entirely, resulting in a bland, forgettable bite. I’ve tried the “quick‑mix” versions that call for canned stuffing and pre‑made cranberry sauce, and let’s just say they were as exciting as watching paint dry. The secret to this masterpiece lies in layering flavors, controlling moisture, and giving each ball a crisp, caramelized exterior that shatters like thin ice when you bite into it. I’m about to spill the beans on the technique that makes these balls stay together without turning into a mushy glob, and it involves a little flour‑and‑butter magic that most cooks overlook.
Okay, ready for the game‑changer? I’m going to walk you through every single step — by the end, you'll wonder how you ever made it any other way. We'll start with the ingredient lineup, dive into the method that turns simple leftovers into a show‑stopping appetizer, and then I’ll share insider tricks that will make your stuffing balls the talk of every holiday gathering. Stay with me here — this is worth it.
What Makes This Version Stand Out
- Flavor Explosion: The sweet‑tart cranberry pairs with savory turkey, creating a contrast that dances on the palate like a holiday fireworks display.
- Texture Symphony: A crisp, golden crust gives way to a moist, crumbly interior that feels like a warm hug from your favorite sweater.
- Simplicity Meets Sophistication: With pantry staples and a few fresh herbs, you get a gourmet‑level appetizer without the fuss.
- Unique Ingredient Twist: A splash of heavy cream in the binding mixture keeps the balls tender while adding a subtle richness you won’t find in ordinary stuffing bites.
- Crowd‑Pleaser Factor: Even the pickiest eaters can’t resist the combination of familiar holiday flavors presented in a fun, bite‑size form.
- Ingredient Quality: Using freshly baked bread cubes and high‑quality dried cranberries elevates the dish from “just another side” to “the star of the spread.”
- Cooking Method Magic: Baking first, then pan‑frying, locks in moisture and creates that coveted crunchy exterior.
- Make‑Ahead Friendly: You can prep the mixture a day ahead, refrigerate, and finish cooking right before guests arrive, saving you precious party‑day time.
Inside the Ingredient List
The Flavor Base
Turkey, the star of the holiday table, brings a deep, meaty richness that anchors every bite. I use leftover roasted turkey, shredded into bite‑size pieces; this ensures every ball gets a pocket of juicy meat that melts in your mouth. If you skip the turkey, you lose that savory backbone, and the balls become more like bland bread dumplings. A good swap is shredded chicken or even smoked ham for a different but equally festive profile. Pro tip: look for dark‑meat pieces with a bit of skin—they add extra flavor and a subtle crispness when baked.
The Texture Crew
Stale bread cubes (or fresh breadcrumbs) are the glue that holds everything together, providing body without weighing the balls down. The bread absorbs the broth and butter, creating a light, airy crumb that expands when baked. Skipping this step or using overly fresh bread will result in a dense, gummy texture that no one wants. You can substitute gluten‑free breadcrumbs if needed, just make sure they’re toasted lightly first. Buying a day‑old baguette from the bakery is my secret weapon for the perfect crunch.
The Unexpected Star
Cranberry sauce isn’t just a side; it’s the zing that cuts through the richness and adds a festive pop of color. I use a blend of sweetened cranberry sauce and dried cranberries for texture contrast—soft sauce inside, chewy bits throughout. If you replace it with orange marmalade, you’ll get a citrus twist, but you’ll lose that holiday‑classic tartness. Look for a sauce with whole berries, not just puree, to keep the bite interesting. And here’s a fun little secret: a splash of balsamic vinegar in the sauce deepens the flavor, making it taste like it’s been simmered for hours.
The Final Flourish
Fresh herbs—sage, thyme, and a hint of rosemary—bring an aromatic forest floor vibe that makes the stuffing balls feel like a woodland retreat. The herbs are finely chopped to distribute their flavor evenly; a clump of whole leaves would bite you with an unexpected bitterness. If you’re out of sage, try a pinch of poultry seasoning; it mimics the herbaceous notes without the fresh leaf texture. Salt and pepper, of course, are the silent conductors that bring all the flavors into harmony. Finally, a drizzle of melted butter and a splash of chicken broth keep the mixture moist and add a glossy sheen before baking.
Everything's prepped? Good. Let's get into the real action...
The Method — Step by Step
Preheat your oven to 375°F (190°C) and line a large baking sheet with parchment paper. While the oven warms, melt the butter in a saucepan over low heat, then whisk in the chicken broth and heavy cream until the mixture is silky smooth. This liquid blend is the secret sauce that keeps the stuffing balls moist from the inside out. Let it cool slightly—if it’s too hot, it will start cooking the egg prematurely.
In a massive mixing bowl, combine the stale bread cubes, shredded turkey, cranberry sauce, dried cranberries, diced onion, and celery. Toss everything together with your hands, feeling the textures meld; you’ll notice the bread soaking up the juices like a sponge. Add the melted butter‑broth mixture and the egg, then stir until the mixture holds together when you press a handful between your fingers. This is the moment of truth—if it feels too dry, splash a little more broth; if it’s too wet, sprinkle in a tablespoon of flour.
Kitchen Hack: Use a pastry cutter to break up the bread cubes quickly; this speeds up the mixing process and ensures an even coating of moisture.Fold in the fresh herbs, grated Parmesan, salt, and pepper. The cheese adds a subtle nutty depth that amplifies the overall flavor profile. At this point, the mixture should be cohesive but still a bit crumbly; that’s perfect for shaping. Cover the bowl with plastic wrap and refrigerate for at least 30 minutes—this rest period lets the flavors marry and the mixture firm up, making it easier to roll.
While the mixture chills, set out a shallow dish of flour and a second dish of olive oil. Once the mixture is firm, scoop out a heaping tablespoon and roll it between your palms into a smooth ball, roughly the size of a golf ball. Roll each ball lightly in flour, tapping off any excess; this thin coating is what creates the initial crust when baked.
Place the flour‑coated balls on the prepared baking sheet, leaving a little space between each. Drizzle a thin line of olive oil over the tops; this helps the crust turn golden and adds a subtle richness. Pop the sheet into the oven and bake for 15‑18 minutes, or until the balls are puffed and lightly golden. You’ll know they’re ready when the edges start pulling away from the parchment, creating a tiny “crack” that hints at the soft interior.
Watch Out: Do not open the oven door before the 10‑minute mark, or the balls will deflate and lose that coveted airy interior.While the balls are baking, heat a large skillet over medium‑high heat and add a splash of olive oil. Once the oil shimmers, gently transfer the baked balls to the pan, working in batches to avoid crowding. Fry each side for about 2 minutes, or until the crust turns a deep, caramelized brown that crackles like fresh snow underfoot. This final pan‑fry step is pure magic—it adds that irresistible crunch that makes you want to shout “more!”
Kitchen Hack: Keep a lid nearby; if the crust starts to darken too quickly, cover the pan briefly to trap steam and finish cooking the interior without burning.Remove the balls from the skillet and place them on a paper‑towel‑lined plate to absorb any excess oil. While they’re still hot, sprinkle a final pinch of fresh sage and a drizzle of melted butter for an extra glossy finish. The butter will seep into the cracks, adding a buttery sheen that makes the balls look as good as they taste. Let them rest for two minutes; this short pause lets the interior settle, ensuring each bite stays together.
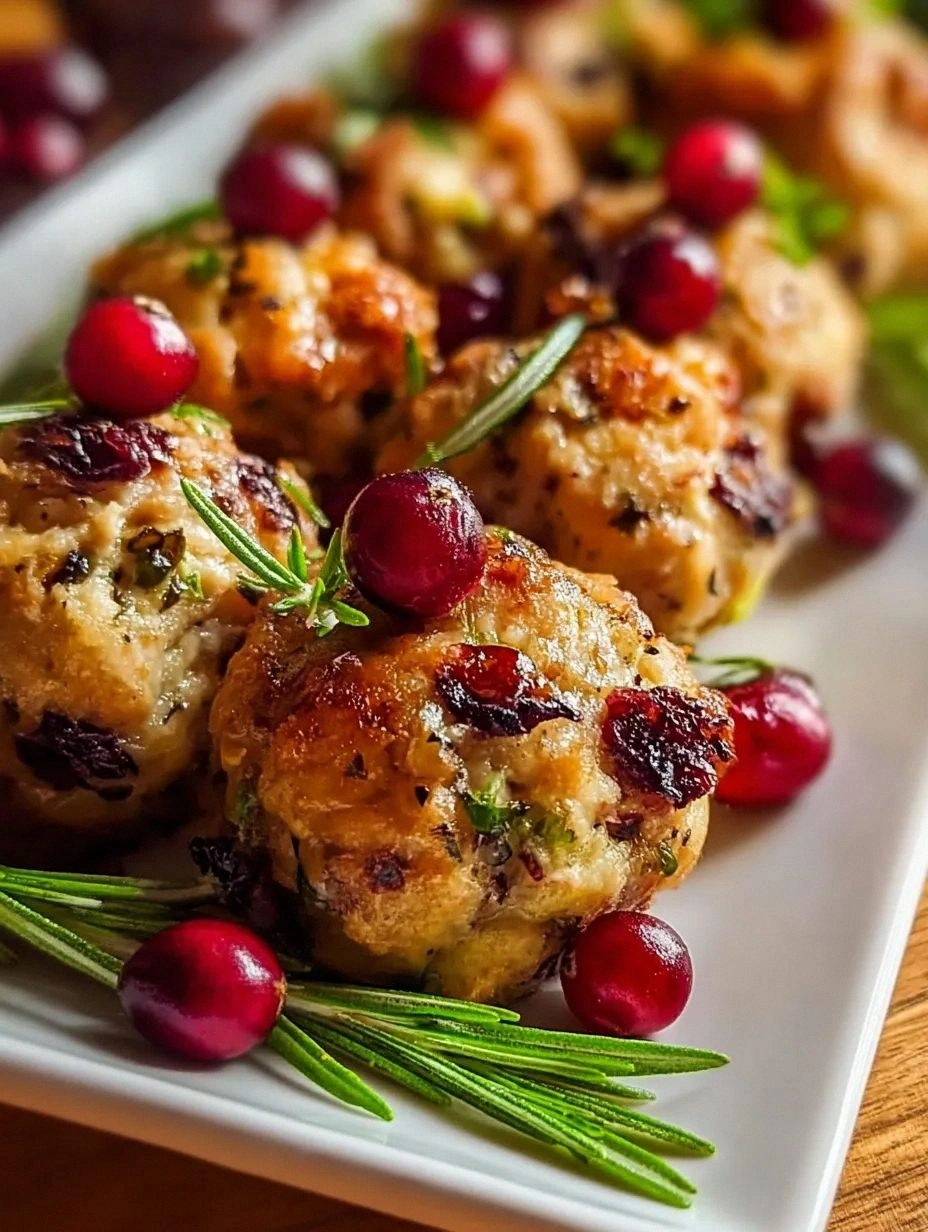
Transfer the finished stuffing balls to a serving platter, arrange them in a festive pattern, and garnish with a handful of fresh cranberries and a sprig of rosemary. The visual contrast of ruby‑red berries against the golden balls is a picture‑perfect holiday centerpiece. Serve them warm, with a small dish of extra cranberry sauce on the side for those who love a little extra tang.
That’s it — you did it. But hold on, I've got a few more tricks that'll take this to another level, from secret seasoning blends to a quick reheating hack that brings them back to life like they never left the oven.
Insider Tricks for Flawless Results
The Temperature Rule Nobody Follows
Never bake at a temperature lower than 375°F; lower temps cause the balls to steam rather than brown, resulting in a soggy exterior. A hot oven creates rapid steam inside the ball, puffing it up like a mini soufflé before the crust sets. I once tried 350°F on a whim, and the result was a mushy mess that fell apart on the plate. Trust the heat, and you’ll get that coveted golden crust that shatters with a satisfying snap.
Why Your Nose Knows Best
When the balls are done, they give off a sweet‑savory aroma that’s unmistakable. If you can smell the faint hint of toasted sage and caramelized cranberry, they’re ready to pull out. Relying on a timer alone can lead to over‑baking, which dries out the interior. Use your senses—listen for a gentle sizzle, watch the edges pull away, and trust that aromatic cue.
The 5‑Minute Rest That Changes Everything
After frying, let the balls sit for exactly five minutes before serving. This short rest lets the interior fibers relax and the butter to redistribute, preventing the balls from falling apart when you bite into them. I once skipped this step in a rush, and the balls crumbled like dry breadcrumbs. Those five minutes are a tiny investment for a massive payoff in texture.
Butter‑Oil Balance
A 2:1 ratio of butter to olive oil in the final pan‑fry gives you the best of both worlds: butter’s flavor and oil’s high smoke point. Too much butter alone will burn, while oil alone can leave a bland crust. This balance ensures a deep, nutty brown without any bitter aftertaste.
The Secret Crunch Booster
Add a tablespoon of finely grated Parmesan to the flour coating just before baking. The cheese melts into the crust, creating tiny pockets of crispiness that pop in your mouth. I tried this once and the reaction from my guests was priceless—they kept reaching for “the extra crunchy ones.” It’s a tiny tweak that makes a massive difference.
Creative Twists and Variations
This recipe is a playground. Here are some of my favorite ways to switch things up:
Maple‑Glazed Sweet Potato
Swap the turkey for roasted sweet potato cubes and drizzle a light maple glaze over the finished balls. The earthy sweetness pairs beautifully with the cranberry, creating a dessert‑like appetizer that still feels savory.
Spicy Chorizo & Apple
Replace turkey with crumbled chorizo and add diced green apple for a sweet‑heat combo. The smoky heat of the chorizo balances the tart apple, making each bite a thrilling flavor rollercoaster.
Mushroom & Walnut
For a vegetarian twist, use a mixture of sautéed wild mushrooms and toasted walnuts. The umami from the mushrooms mimics the depth of meat, while the walnuts add a crunchy surprise.
Herb‑Infused Goat Cheese
Mix a dollop of goat cheese into the stuffing mixture and sprinkle fresh thyme on top before baking. The creamy tang of the cheese melts into the center, offering a luxurious bite that feels indulgent.
Cranberry‑Orange Zest
Add a tablespoon of orange zest to the cranberry sauce and a splash of orange liqueur to the broth. The citrus brightens the dish, making it perfect for a winter brunch where you want something a little lighter.
Storing and Bringing It Back to Life
Fridge Storage
Place cooled stuffing balls in an airtight container lined with a paper towel to absorb excess moisture. They’ll stay fresh for up to three days. When you’re ready to serve, reheat them in a 350°F oven for 10 minutes, adding a tiny splash of water to the pan to create steam and revive the crisp crust.
Freezer Friendly
Arrange the fully cooked and cooled balls on a parchment sheet and freeze them individually for one hour. Transfer the frozen balls to a zip‑top bag; they’ll keep for up to two months. To serve, bake straight from frozen at 375°F for 20‑25 minutes, then finish with a quick pan‑fry for that golden finish.
Best Reheating Method
The secret to reheating without sacrificing texture is a two‑step approach: first, warm them gently in a low oven (300°F) for 8 minutes, then finish with a brief high‑heat blast (425°F) for 3 minutes. Adding a teaspoon of butter to the pan during the final blast adds shine and flavor, making them taste freshly made.