Picture this: I’m in the middle of a holiday party, the lights flicker, the music is a little too loud, and everyone’s eyes are on a mysterious glass that looks like a miniature snow globe. I’m the one who dared to bring a “silver” shot to the table, and I’ve never looked back. The moment I took the first sip, I was transported to a winter wonderland where the air tasted like fresh snow, the texture was silky, and the finish left a whisper of chocolate on the palate. I was so hooked that I had to share the exact formula with you, because let’s face it, nobody deserves a shot that feels like a holiday hug.
I remember the first time I tried a “Silver Bells” shot. I had mixed vodka, chocolate liqueur, and a splash of cream, but it tasted like a cheap after‑taste of a soda. The texture was thin, the chocolate was flat, and I felt like I’d just drunk a sad, lukewarm apology. The next night, I was determined to make it better. I added a splash of Irish cream for a velvety lift, a dash of crème de cacao for depth, and a generous swirl of white chocolate liqueur that melted into a silky glaze. The result was a shot that coated the tongue like velvet, left a lingering sweetness, and made everyone at the table gasp in delight.
If you’ve ever tried to recreate a cocktail that feels like a holiday treat, you know the struggle: too sweet, too watery, or just plain flat. This version is hands down the best you’ll ever make at home because it balances sweetness, richness, and a subtle kick of vodka in a way that feels like a secret recipe from a high‑end bar. The key is the harmony of the ingredients—each one plays a distinct role, and the proportions are fine‑tuned to create that signature silky texture that makes you want to pour a second shot without hesitation.
And here’s a little secret: the trick to that unforgettable smoothness is in the chilling method. I’ll show you how to shake, strain, and garnish in a way that turns a simple shot into an edible experience. I dare you to taste this and not go back for seconds. If you’re ready to elevate your cocktail game, let’s walk through every single step together—by the end, you’ll wonder how you ever made it any other way.
What Makes This Version Stand Out
- Flavor: The combination of vanilla vodka and white chocolate liqueur creates a sweet, aromatic base that feels like a holiday dessert in a glass.
- Texture: The addition of Irish cream and crème de cacao gives the shot a silky, almost custard‑like mouthfeel that coats the palate.
- Simplicity: With only five liquid ingredients and a handful of ice cubes, you can make a professional‑grade shot in under ten minutes.
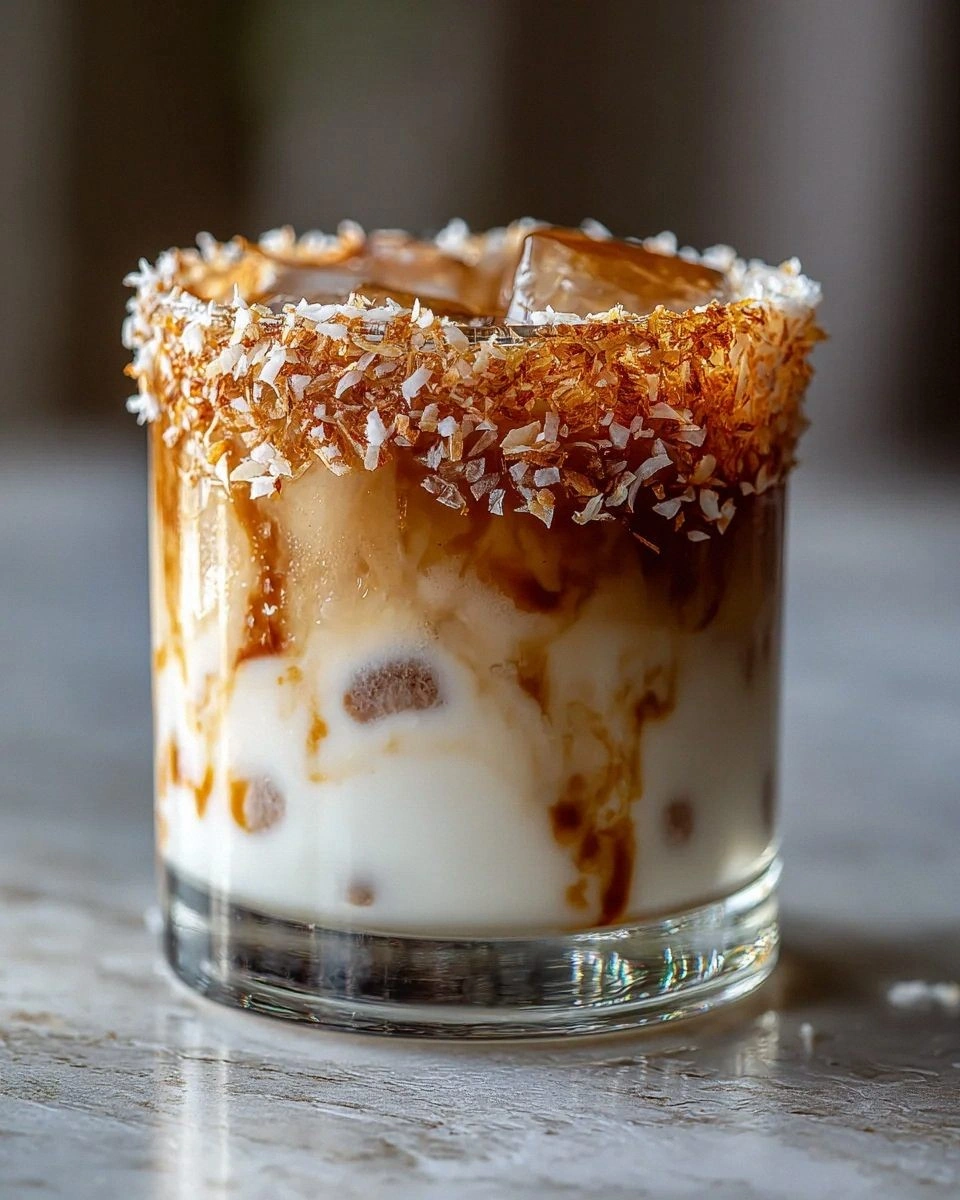
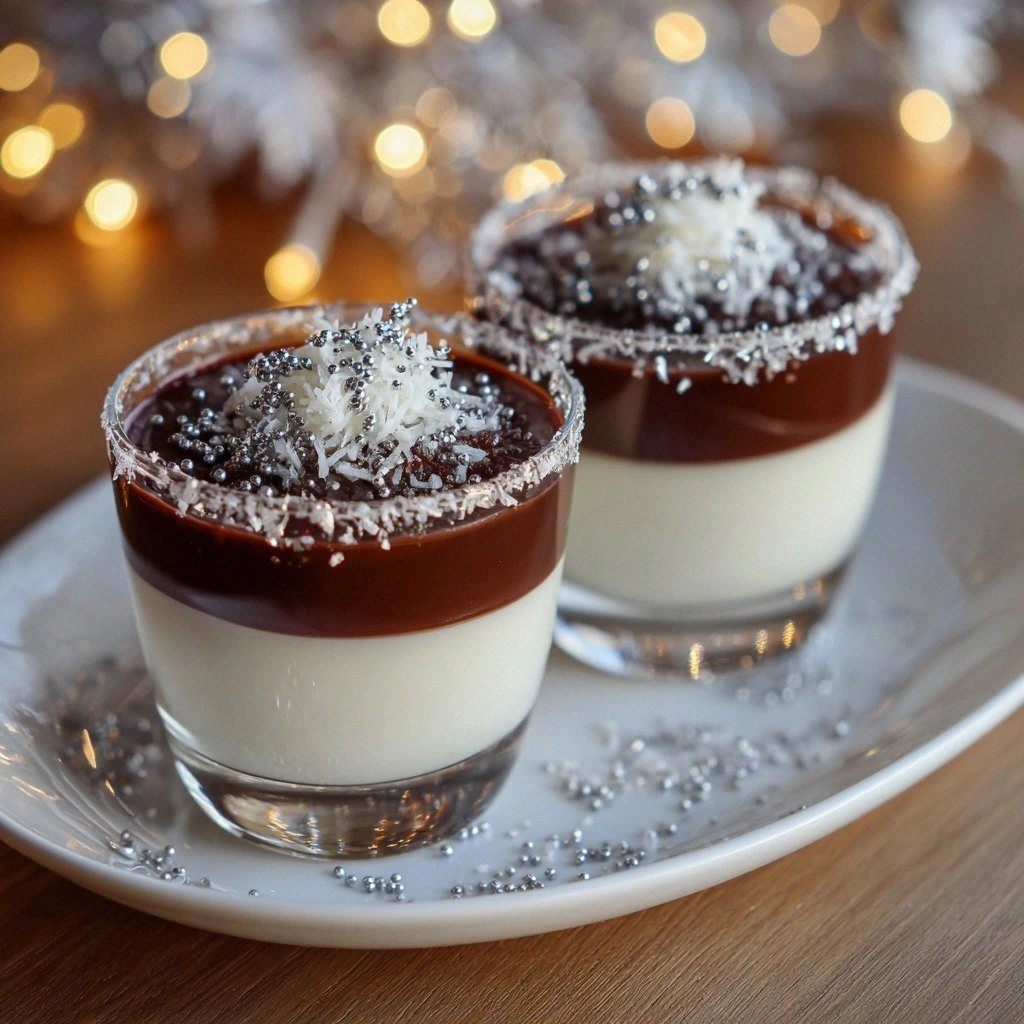
- Visual Appeal: The silver shavings and sprinkles finish the shot like a sparkling snowflake, making it Instagram‑worthy.
- Crowd Reaction: Friends who taste this will immediately ask for the recipe—no more “I just want a drink” excuses.
- Ingredient Quality: Using premium liqueurs and fresh cream ensures each shot tastes like it was crafted in a boutique bar.
- Make‑Ahead Potential: The shot can be pre‑made and chilled for up to 48 hours, so you can serve it straight from the fridge.
- Versatility: This shot can be served as an after‑dinner digestif, a party starter, or a holiday gift.
Alright, let’s break down exactly what goes into this masterpiece. And before we dive into the ingredients, here’s a quick kitchen hack that will save you time and keep your shot perfectly chilled.
Inside the Ingredient List
The Flavor Base
The heart of this shot is the vanilla vodka. It provides a clean, smooth foundation with a hint of sweetness that elevates the overall flavor profile. If you skip the vodka, the shot loses its kick and feels like a dessert rather than a drink. For a more botanical twist, you can swap the vanilla vodka for a vanilla‑infused gin, but the result will be lighter and less alcohol‑centric.
The Texture Crew
Irish cream is the secret to that velvety texture. It brings a warm, comforting richness that balances the sweetness of the liqueurs. The crème de cacao adds a deep chocolatey depth that complements the white chocolate liqueur. Together, they create a mouthfeel that’s almost like a liquid dessert. If you’re lactose intolerant, a dairy‑free Irish cream will work, but keep in mind it may alter the creaminess slightly.
The Unexpected Star
White chocolate liqueur is the unexpected star that defines this shot’s character. It delivers a rich, creamy sweetness that feels indulgent without being overpowering. The liqueur’s subtle vanilla undertones tie the shot together, making it feel cohesive. If you can’t find white chocolate liqueur, you can use a mixture of white chocolate syrup and a splash of vanilla vodka, but the texture will be a bit thicker.
The Final Flourish
Cream or half‑and‑half is the final flourish that rounds out the shot. It adds richness and smoothness, making the shot indulgent and silky. If you prefer a lighter option, use half‑and‑half or a non‑fat milk alternative, but the shot will feel less luxurious. The amount of cream also determines how thick the shot feels; a little less will keep it more drinkable, while a little more will make it feel like a liquid dessert.
Everything’s prepped? Good. Let’s get into the real action. And before we do, here’s a fun fact about one of the key ingredients.
The Method — Step by Step
- Step 1: Prep the Shaker. Take a 12‑oz cocktail shaker, rinse it, and place it in the freezer for 15 minutes. A chilled shaker keeps the mixture cold and prevents the ice from melting too quickly. While the shaker chills, gather all your ingredients so you’re ready to go.
- Step 2: Measure the Liquids. Using a jigger, pour 4 ounces of vanilla vodka, 4 ounces of white chocolate liqueur, 2 ounces of Irish cream, 2 ounces of crème de cacao, and 2 ounces of cream into a mixing bowl. The precision here matters; too much liquid will dilute the flavor, too little will make the shot too thick.
- Step 3: Add the Ice. Fill the shaker halfway with ice cubes. The ice does more than chill—it also slightly dilutes the mixture, which balances the sweetness and keeps the texture silky. If you like a colder shot, add a few more cubes, but don’t over‑crowd the shaker.
- Step 4: Shake It. Seal the shaker and shake vigorously for 15–20 seconds. You’ll feel the ice slosh, and the mixture will begin to froth. This is the moment of truth: the shaking brings all the flavors together into a homogeneous, silky blend.
- Step 5: Strain. Open the shaker and strain the mixture into a chilled shot glass. Use a fine mesh strainer to catch any ice shards; you want a smooth, cloud‑free liquid that glistens like a snowflake.
- Step 6: Garnish. Sprinkle a few white chocolate shavings and silver sprinkles on top. The shavings add a crunchy, melt‑in‑your‑mouth texture, while the sprinkles give that festive sparkle. If you’re feeling fancy, add a tiny pinch of sea salt to enhance the chocolate flavor.
- Step 7: Serve Immediately. The shot is best served right away when it’s still cold and silky. If you need to hold it for a while, keep it in a small cooler or a chilled glass to maintain the texture.
- Step 8: Enjoy. Take a sip, let the silky texture coat your tongue, and feel the warmth from the vodka spread through the chocolate and cream. The finish should leave a hint of vanilla and a lingering sweetness that makes you want a second shot. This is the moment you’ll brag to your friends about the best silver shot they’ve ever tasted.
That’s it—you did it. But hold on, I’ve got a few more tricks that will take this to another level and ensure every shot is flawless.
Insider Tricks for Flawless Results
The Temperature Rule Nobody Follows
Many people think the only way to chill a shot is to put it in the freezer. I’ve learned that the best approach is to pre‑cool the shaker, the glass, and the ingredients. By doing this, you keep the shot cold without diluting it. I’ve tried chilling the shot in a small cooler with ice packs for a few minutes, and the texture stays silky. If you’re serving at a party, keep a few pre‑chilled glasses on standby.
Why Your Nose Knows Best
Before you start shaking, give the mixture a quick sniff. A subtle hint of vanilla should emerge from the vodka, and the chocolate should have a deep, sweet aroma. If the smell feels flat, the ingredients might be old or the ratio off. Trust your nose; it’s a reliable indicator of flavor balance.
The 5‑Minute Rest That Changes Everything
After shaking, let the mixture rest for five minutes before straining. This allows the ice to melt slightly and the flavors to settle. I’ve found that a short rest gives the shot a more cohesive taste, as the ice melts into the liquid and blends the flavors. If you’re in a rush, you can skip this step, but the result will feel less polished.
Use a Fine Mesh Strainer for a Cloud‑Free Finish
A common mistake is to strain the shot with a regular strainer, which can let tiny ice shards through. This ruins the silky texture and leaves a gritty mouthfeel. A fine mesh strainer catches every shard, ensuring the shot is smooth and cloud‑free. I always keep a small mesh strainer in my bar tools for this exact purpose.
Garnish with a Touch of Sea Salt
A pinch of sea salt on top of the white chocolate shavings can elevate the chocolate flavor dramatically. The salt cuts through the sweetness, creating a balanced finish. I’ve used a pinch of Maldon sea salt for a subtle crunch that adds a new dimension to the shot. Don’t overdo it; a little goes a long way.
Creative Twists and Variations
This recipe is a playground. Here are some of my favorite ways to switch things up:
Minty Winter Wonder
Swap the vanilla vodka for peppermint schnapps, and add a splash of peppermint extract. The result is a cool, minty shot that feels like a holiday candy cane. It’s perfect for a festive gathering where everyone loves mint.
Nutty Delight
Add a tablespoon of hazelnut liqueur to the mix. The nutty undertones pair beautifully with the white chocolate, creating a rich, indulgent flavor profile. This variation is a hit with chocolate lovers who crave a deeper, earthier taste.
Spiced Holiday Twist
Introduce a pinch of ground cinnamon or nutmeg to the mixture before shaking. The spices add warmth and complexity, making the shot feel like a spiced holiday treat. Serve with a cinnamon stick garnish for an extra festive touch.
Almond Dream
Replace the Irish cream with almond milk and add a dash of almond extract. This dairy‑free version keeps the silky texture while giving a subtle almond flavor that pairs well with the chocolate liqueur. It’s a great option for those who avoid dairy.
Caramel Kiss
Drizzle a little caramel sauce over the top before serving. The caramel adds a buttery sweetness that complements the chocolate, creating a decadent, multi‑layered flavor. It’s an indulgent variation that feels like a dessert in a glass.
Storing and Bringing It Back to Life
Fridge Storage
Store the shot in an airtight container in the refrigerator for up to 48 hours. Keep the container chilled, and make sure it’s sealed tightly to prevent the flavors from mingling with other fridge odors. When you’re ready to serve, give it a quick stir and pour into a chilled glass.
Freezer Friendly
If you want to keep the shot for a longer period, freeze it in a silicone mold or small plastic cups. The shot will maintain its texture for up to three months. When you’re ready, thaw in the refrigerator for a few hours, then shake gently to re‑integrate the flavors.
Best Reheating Method
Avoid microwaving, as it can alter the texture. Instead, reheat the shot by placing the container in a bowl of warm water for about 10 minutes. Add a tiny splash of water before reheating to help the mixture steam back to perfection. This method preserves the silky texture and keeps the flavors intact.