I still remember the first time I tried to make s'mores cookies. It was a disaster of epic proportions. The marshmallows melted into sticky puddles that glued themselves to my baking sheet like industrial-strength adhesive. The chocolate chips burned into bitter little nuggets. And the graham crackers? Let's just say they turned my kitchen into a crumb-filled crime scene. I stood there, spatula in hand, wondering how something that sounded so simple could go so spectacularly wrong.
But here's the thing about kitchen failures—they're just stepping stones to greatness. After that initial catastrophe, I became obsessed. I tested dozens of recipes, each promising to deliver that perfect campfire flavor in cookie form. Most were disappointments. Some were edible. A few were actually pretty good. But none captured that magical moment when you're sitting around a campfire, the marshmallow perfectly toasted, the chocolate just melted enough, the graham cracker providing that essential crunch.
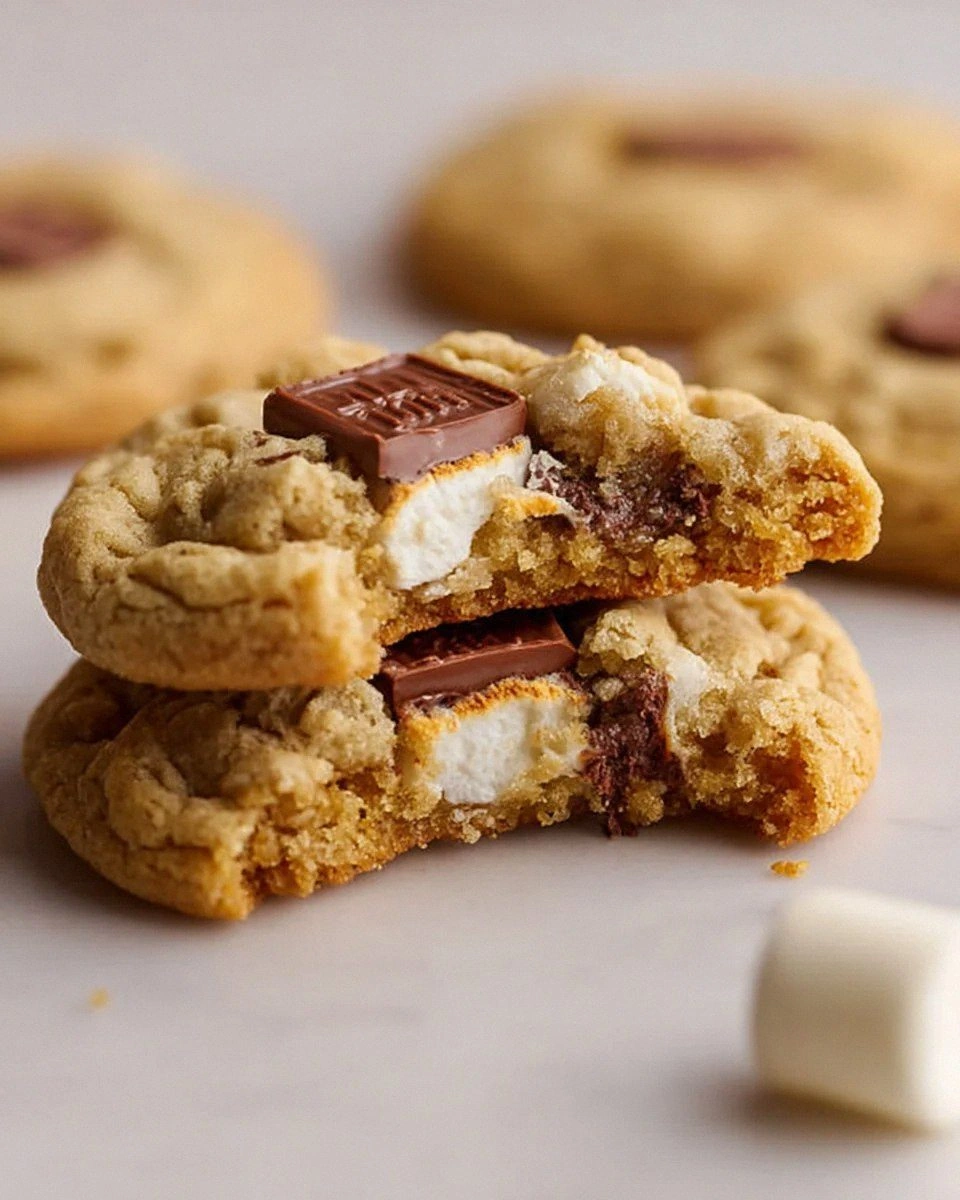
Picture this: It's 2 AM, my kitchen looks like a flour bomb exploded, and I'm on my fifteenth batch. The smell of toasted marshmallows hangs heavy in the air. My neighbors probably think I'm running some kind of underground bakery. But then—eureka!—I pull a tray from the oven and there they are. Golden-brown cookies with pockets of molten chocolate, marshmallows that have caramelized rather than disappeared, and the unmistakable aroma of graham crackers woven throughout. The edges are crispy like the best chocolate chip cookies, but the centers stay soft and gooey like a perfectly crafted s'more.
Okay, ready for the game-changer? This recipe isn't just about throwing some marshmallows and chocolate into cookie dough. We're building layers of flavor that will make your taste buds do a happy dance. We're talking about browning butter until it smells like toasted nuts, using a blend of sugars for the perfect chew, and incorporating graham crackers in three different ways. If you've ever struggled with s'mores cookies before, you're not alone—and I've got the fix that will change everything.
What Makes This Version Stand Out
Triple Graham Power: Most recipes just toss in some graham cracker crumbs and call it a day. We're using graham flour in the dough, graham cracker pieces for texture, and a graham cracker streusel on top for maximum flavor impact. The result is a cookie that tastes like a graham cracker had a beautiful baby with a chocolate chip cookie.
Marshmallow Magic: Instead of those vanishing mini marshmallows, we're using a combination of marshmallow fluff folded into the dough and larger marshmallow pieces pressed into the top. They create those gorgeous toasted peaks without disappearing into sticky nothingness.
Browned Butter Brilliance: This isn't just butter—it's liquid gold. Browning the butter concentrates the flavor and adds nutty, caramel notes that make these cookies taste like they've been kissed by a campfire. The aroma alone will have people wandering into your kitchen asking what smells so incredible.
Chocolate Strategy: We're using three types of chocolate—milk chocolate chunks for creaminess, dark chocolate chips for depth, and white chocolate drizzled on top for visual appeal. Each plays a crucial role in creating that authentic s'mores experience.
Texture Paradise: These cookies have it all—crispy edges that shatter like thin ice, chewy centers that stretch like taffy, melty chocolate pockets, and toasted marshmallow pillows. Every bite is a textural adventure that keeps you coming back for more.
Make-Ahead Champion: The dough freezes beautifully for up to three months. I always keep a log in my freezer for emergency cookie cravings or unexpected guests. You can bake them straight from frozen—just add two extra minutes to the cooking time.
Alright, let's break down exactly what goes into this masterpiece...
Inside the Ingredient List
The Flavor Foundation
Browned butter is the secret weapon here. When you melt butter and let it cook until the milk solids turn golden brown, you're creating a flavor compound that's nutty, caramel-like, and utterly addictive. It takes about 8-10 minutes over medium heat, and the transformation is magical. The butter will foam, then the milk solids will sink to the bottom and gradually turn from pale yellow to deep amber. Don't walk away—this can go from perfect to burnt in seconds. Once browned, pour it into a heatproof bowl and let it solidify in the fridge for about an hour.
Dark brown sugar isn't just for color—it's packed with molasses that adds deep, complex flavor notes. The higher molasses content compared to light brown sugar gives these cookies a rich, almost smoky sweetness that pairs perfectly with the toasted marshmallows. If you only have light brown sugar, you can add a tablespoon of molasses to get similar results.
The Texture Team
Graham flour is whole wheat flour that's been coarsely ground, and it's what gives graham crackers their distinctive texture and flavor. It adds a subtle nuttiness and hearty texture that regular flour just can't match. If you can't find graham flour, substitute with whole wheat pastry flour or use regular whole wheat flour but reduce the amount by 2 tablespoons per cup to avoid dense cookies.
Cornstarch might seem like an odd addition, but it's our insurance policy against tough cookies. Just a tablespoon makes these cookies incredibly tender and helps them stay soft for days. It's the same trick that Chinese restaurants use to keep their meat tender—cornstarch interferes with gluten development, giving us that perfect soft center.
The Chocolate Coalition
Milk chocolate chunks are crucial for that authentic s'mores flavor. We're talking about real milk chocolate here, not candy melts or baking chips. Chop up a good quality bar into irregular pieces—some small, some big. The variety in size means you'll get different levels of chocolate distribution throughout each cookie. The larger pieces create those glorious molten pockets that stretch when you break a warm cookie in half.
Dark chocolate chips balance the sweetness of the milk chocolate and marshmallows. Go for 60-70% cacao—anything darker will compete with the other flavors, anything lighter won't provide enough contrast. The bitterness cuts through all that sweetness and keeps the cookies from being cloying.
The Marshmallow Strategy
Marshmallow fluff is our secret weapon for marshmallow flavor throughout the cookie without the disappearing act. Fold it gently into the dough at the very end—overmixing will cause it to dissolve completely. The fluff adds sweetness and that unmistakable marshmallow flavor in every bite.
Large marshmallows get torn in half and pressed into the top of each cookie right before baking. They toast up beautifully, creating those classic campfire marshmallow peaks. Don't use mini marshmallows—they'll vanish into the dough like they were never there.
Everything's prepped? Good. Let's get into the real action...

The Method — Step by Step
- Start by browning your butter in a medium saucepan over medium heat. Cut the butter into even pieces so it melts uniformly. As it melts, it will foam—this is the water evaporating. Stir occasionally with a rubber spatula, scraping the bottom to prevent burning. After about 5-6 minutes, you'll notice the milk solids turning golden brown and the butter will smell nutty and fragrant. This is your cue to remove it from the heat immediately and pour into a heatproof bowl. Let it cool for 10 minutes, then refrigerate for 45-60 minutes until it reaches a soft, spreadable consistency.
- While your butter chills, prep your graham crackers. Take 6 full graham crackers and break them into various sizes—some should be pea-sized pieces, others can be larger shards. This variety creates interesting texture throughout the cookies. Set these aside for later. Don't worry if they seem too big—they'll soften slightly during baking but maintain their identity rather than disappearing into the dough.
- In a medium bowl, whisk together your dry ingredients: graham flour, all-purpose flour, cornstarch, baking soda, baking powder, and salt. The combination of flours gives us that authentic graham cracker flavor while the cornstarch ensures tender cookies. Set this mixture aside while you prepare the wet ingredients. This step might seem basic, but properly whisking your dry ingredients prevents those unpleasant pockets of baking soda that can ruin a cookie.
- Grab your now-softened browned butter and add both sugars to the bowl. Beat with an electric mixer on medium speed for 2-3 minutes until the mixture is light and fluffy. This step is crucial—it incorporates air into the butter, which helps create those perfect cookie edges. The mixture should look paler than when you started and feel slightly lighter when you lift the beaters. Don't rush this step—proper creaming is the difference between good cookies and great cookies.
- Add your eggs one at a time, beating well after each addition. The first egg might make the mixture look slightly curdled—that's normal. After the second egg, add your vanilla extract. Here's where things get interesting: add one tablespoon of honey. This isn't in most recipes, but honey helps keep the cookies soft and adds a subtle floral note that complements the graham crackers beautifully. Beat for another 30 seconds until everything is fully incorporated.
- Now comes the part where most recipes go wrong—they dump everything together and mix until the cows come home. We're going to be more strategic. Add your dry ingredients in three additions, mixing just until the flour disappears before adding the next portion. Overmixing develops gluten, which gives you tough cookies. We want tender, so be gentle. The dough will look slightly crumbly at first—keep mixing and it will come together.
- Here's where we get creative with our add-ins. Reserve about a quarter of your chocolate chunks for topping, then fold the rest into the dough along with your graham cracker pieces. The key is to stop mixing as soon as everything is distributed—you should still see distinct pieces of graham cracker and chocolate throughout the dough. Cover the bowl with plastic wrap and refrigerate for at least 2 hours, preferably overnight. This rest allows the flour to hydrate fully and prevents the cookies from spreading too much.
- When you're ready to bake, preheat your oven to 350°F. Line two baking sheets with parchment paper. Use a large cookie scoop or ice cream scoop to portion the dough—about 3 tablespoons per cookie. Place them 3 inches apart on your prepared sheets. Press half a marshmallow into the top of each cookie, then sprinkle with the reserved chocolate chunks. The marshmallows will toast and expand, so don't crowd them or you'll end up with one giant cookie sheet of despair.
- Bake for 12-14 minutes, rotating the pans halfway through. The cookies are done when the edges are golden brown and the centers still look slightly underbaked. This is crucial—those centers will continue cooking from residual heat, giving you that perfect soft center. The marshmallows should be puffed and toasted, and your kitchen should smell like a campfire. Let them cool on the baking sheet for 5 minutes before transferring to a wire rack—this prevents breakage.
- While the cookies cool, melt some white chocolate in the microwave in 30-second bursts, stirring between each interval. Transfer it to a small zip-top bag, snip the corner, and drizzle over the cooled cookies. This isn't just for looks—it adds another layer of sweetness and makes these cookies look bakery-professional. Let the white chocolate set completely before storing in an airtight container.
That's it—you did it. But hold on, I've got a few more tricks that'll take this to another level...
Insider Tricks for Flawless Results
The Temperature Rule Nobody Follows
Here's the thing about cookie dough temperature—it's not just about preventing spread. Cold dough creates those beautiful rippled edges we all love. But too cold and your cookies won't cook properly in the center. The sweet spot? After chilling overnight, let the dough sit at room temperature for 15-20 minutes before scooping. It should feel firm but not rock-solid. This slight softening allows the cookies to bake evenly while still maintaining their shape. I learned this the hard way after serving cookies with raw centers to my book club—not my finest moment.
Why Your Nose Knows Best
Don't rely solely on the timer—your nose is your best baking tool. When these cookies are perfectly done, your kitchen will smell like a campfire mixed with a bakery. It's a distinct, warm aroma that's slightly nutty from the browned butter, sweet from the toasted marshmallows, and toasty from the graham crackers. If you smell something burning, you've gone too far. If you don't smell anything yet, give them another minute. This is the kind of intuitive cooking that separates good bakers from great ones.
The 5-Minute Rest That Changes Everything
After pulling these cookies from the oven, resist the urge to immediately transfer them to a cooling rack. Let them rest on the hot baking sheet for exactly 5 minutes. This allows the marshmallows to set slightly, preventing them from stretching into unmanageable strings when you move the cookies. More importantly, the residual heat continues cooking the centers without over-browning the edges. It's the difference between cookies that hold together and cookies that fall apart into a gooey mess. Trust me, I've had to eat more broken cookies than I care to admit—all in the name of research, of course.
The Salt Secret
Don't skip the flaky salt on top. Just a whisper of Maldon or another flaky sea salt sprinkled over the warm cookies creates a flavor explosion that makes all the sweet elements sing. The salt enhances the chocolate, balances the marshmallow sweetness, and adds a sophisticated touch that elevates these from kid cookies to adult treats. It's that final detail that makes people ask, "What's different about these cookies?"
Storage Strategy
Here's a confession: I eat half the batch before anyone else gets to try them. But for the cookies that survive, store them in an airtight container with a slice of bread. The bread keeps the cookies soft by adding moisture to the container. Replace the bread every day—it will become hard as the cookies stay soft. These cookies actually taste better on day two, once the flavors have had time to meld together.
Creative Twists and Variations
This recipe is a playground. Here are some of my favorite ways to switch things up:
Peanut Butter S'mores Cookies
Replace half the butter with creamy peanut butter for a Reese's cup meets s'mores situation. The peanut butter adds richness and that classic PB-chocolate combo we all love. Use chopped peanut butter cups instead of some of the chocolate chunks for extra peanut power. These disappear faster than the original version at my house, which is saying something.
S'mores Sandwich Cookies
Make the cookies slightly smaller, then sandwich them together with marshmallow fluff and a square of chocolate in the middle. Press them together while the cookies are still warm so the chocolate melts slightly. Roll the edges in mini chocolate chips for a professional finish. These are showstoppers at bake sales and parties.
Salted Caramel S'mores Cookies
Drizzle homemade or store-bought caramel over the cooled cookies, then sprinkle with flaky sea salt. The caramel adds a buttery richness that complements the graham crackers beautifully. Warm the caramel slightly so it drizzles easily but isn't hot enough to melt the chocolate on the cookies.
Gluten-Free S'mores Cookies
Substitute the graham flour and all-purpose flour with a 1:1 gluten-free baking blend, and use gluten-free graham crackers. The texture is slightly different but still delicious. I've served these to gluten-free friends who couldn't believe they weren't the "real thing." King Arthur's gluten-free flour blend works particularly well here.
Mexican Hot Chocolate S'mores Cookies
Add 1 teaspoon cinnamon and 1/4 teaspoon cayenne to the dry ingredients for a subtle warmth that builds as you eat. Use Mexican chocolate (like Abuelita) for some of the chocolate chunks. The spice adds complexity and makes these cookies feel sophisticated enough for adult dinner parties.
Campfire S'mores Cookies
Add a teaspoon of liquid smoke to the dough for that authentic campfire flavor. It's subtle but adds incredible depth. You can also torch the marshmallows with a kitchen torch after baking for extra charred flavor. Just be careful not to set off your smoke alarm—I've done that more times than I care to admit.
Storing and Bringing It Back to Life
Fridge Storage
Store completely cooled cookies in an airtight container in the refrigerator for up to 5 days. The cold actually intensifies the graham cracker flavor. Bring them to room temperature before serving, or better yet, warm them in the microwave for 8-10 seconds. This re-melts the chocolate and softens the marshmallows, making them taste freshly baked. The texture is actually better after a day in the fridge—the flavors meld together into something magical.
Freezer Friendly
These cookies freeze beautifully in every form. Freeze baked cookies in a single layer, then transfer to a freezer bag for up to 3 months. Or freeze the dough in pre-scooped portions on a baking sheet, then transfer to a bag. You can bake frozen dough balls straight from the freezer—just add 2-3 minutes to the baking time. I always keep a bag of frozen dough in my freezer for emergencies. Pro tip: write the baking instructions on the bag with a Sharpener so you don't have to hunt down the recipe every time.
Best Reheating Method
For cookies that taste like they just came out of the oven, place them on a baking sheet in a 300°F oven for 5-6 minutes. This gently warms them through without making the marshmallows tough. Alternatively, microwave individual cookies for 8-10 seconds. Don't overdo it—too long in the microwave makes the marshmallows rubbery. For the ultimate indulgence, sandwich a slightly warm cookie around a scoop of vanilla ice cream. It's messy, it's decadent, and it's absolutely worth the calories.