Picture this: it’s a rainy Saturday afternoon, the kind where the world outside looks like a watercolor wash and you’re stuck inside with nothing but a humming fridge and a sudden, insistent craving for something that feels like a warm hug. I was in the middle of a half‑baked attempt at a classic chocolate mousse when a friend dared me to make a pie that could out‑shine any store‑bought version. I laughed, I rolled my eyes, but then the thought of a velvety, molten center that could practically melt a spoon on contact took over. The kitchen turned into a battlefield of melted chocolate, sizzling butter, and the sweet perfume of caramelizing sugar, and let me tell you, the chaos was glorious.
The moment the first spoonful hit my tongue, I knew I had stumbled onto something monumental. Imagine a sauce that coats the palate like velvet, a crust that snaps with a whisper of buttery crunch, and a filling that oozes like a chocolate lava flow—each bite a perfect balance of richness and lightness. The aroma alone could convince a skeptic that dessert is a legitimate main course; the faint hiss of the crust browning in the oven, the glossy sheen of the chocolate ganache as it settles, the faint caramel note that lingers in the air. My senses were doing a happy dance, and I could already hear the inevitable chorus of “more, please!” echoing from the living room.
Most hot fudge pie recipes I’ve tried either end up too dense, too watery, or they simply lack that glossy, seductive finish that makes you want to lick the plate clean. This version, however, flips the script. I’ve combined a few pro‑tips from pastry chefs with a dash of kitchen wizardry—think a quick‑cool technique that locks in moisture, and a secret ingredient that adds a subtle depth without overwhelming the chocolate. The result? A pie that is hands down the best version you’ll ever make at home, and I’m about to spill every detail so you can recreate this masterpiece without a single misstep.
Okay, ready for the game‑changer? I’m going to walk you through every single step—by the end, you’ll wonder how you ever made any other version of this dessert. I’ll even throw in a couple of surprises that will make your taste buds do cartwheels. So grab your apron, preheat that oven, and let’s dive into a world where hot fudge isn’t just a topping, it’s the star of the show.
What Makes This Version Stand Out
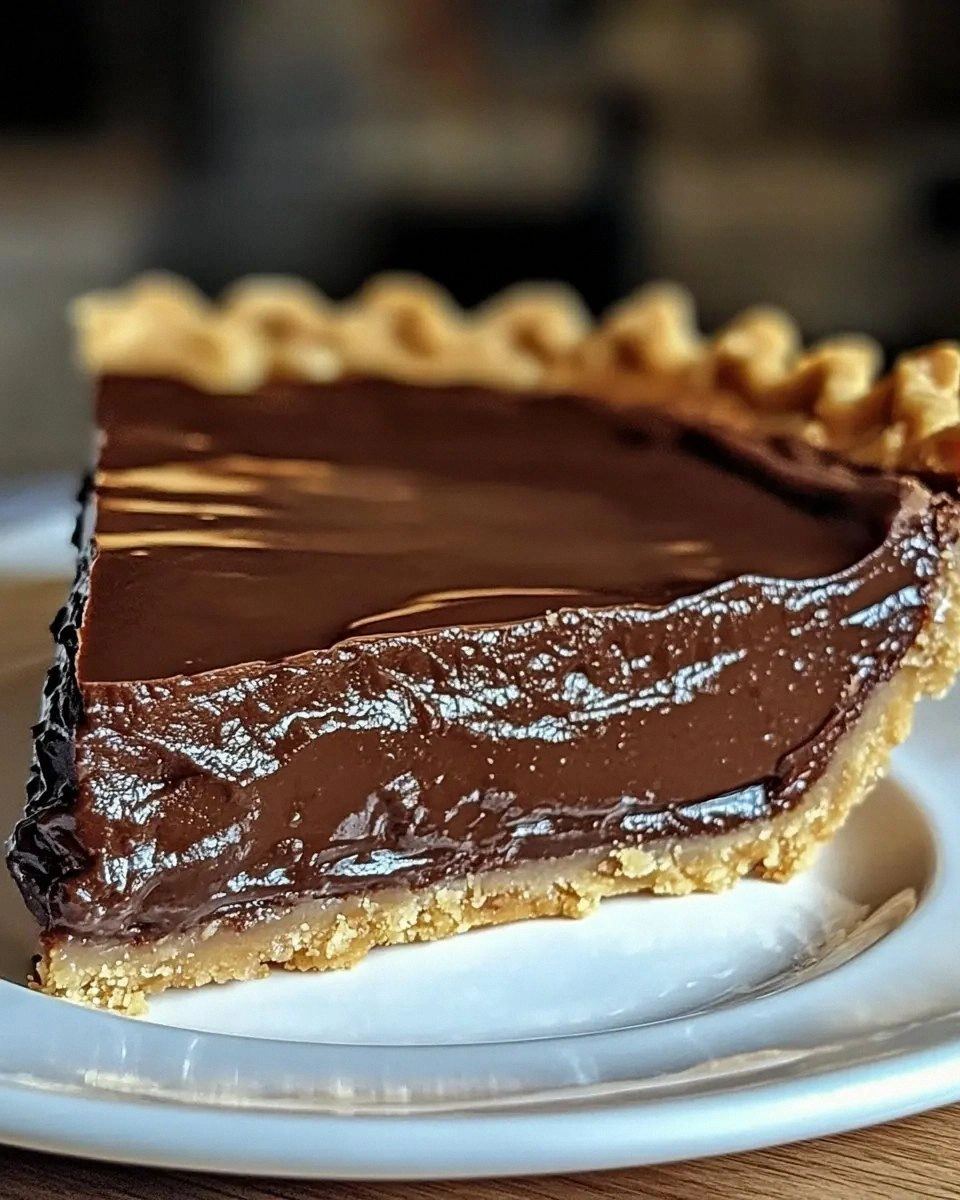
- Texture: The crust is buttery and crisp, while the filling stays silky and gooey, never grainy or set too hard.
- Flavor Depth: A splash of espresso powder amplifies the chocolate without tasting like coffee, creating a layered richness.
- Simplicity: Only nine pantry staples are needed; no fancy equipment, no tempering, just pure, honest cooking.
- Speed: From start to finish it’s under an hour, perfect for a spontaneous dessert craving.
- Crowd Reaction: I dare you to taste this and not go back for seconds; it’s the kind of pie that gets a standing ovation.
- Ingredient Quality: Using high‑cocoa dark chocolate and real butter makes the flavor sing, no artificial shortcuts.
- Cooking Method: A gentle water‑bath bake prevents cracks and keeps the center luxuriously soft.
- Make‑Ahead Potential: The pie can sit refrigerated for up to two days and still taste as fresh as the moment it left the oven.
Inside the Ingredient List
The Flavor Base
Sweetened condensed milk is the unsung hero that provides the creamy, caramel‑sweet backbone of the filling. Its high sugar concentration prevents crystallization, ensuring the fudge stays smooth. Skipping it or substituting with regular milk will result in a watery mess that can’t hold its shape. If you’re looking for a lower‑sugar alternative, try a reduced‑fat condensed milk, but expect a slightly thinner texture.
The Texture Crew
Dark chocolate, preferably 70% cacao, brings the deep, bittersweet notes that cut through the sweetness of the condensed milk. It also contributes to the glossy sheen that makes the pie look as good as it tastes. Using milk chocolate will make the filling overly sweet and lose that sophisticated edge. A good quality chocolate melts evenly, creating that melt‑in‑your‑mouth feel.
The Unexpected Star
A pinch of espresso powder is the secret weapon that amplifies chocolate flavor without adding a coffee taste. The tiny amount of caffeine also adds a subtle lift that makes the dessert feel less cloying. If you don’t have espresso powder, a dash of instant coffee granules works just as well. Don’t skip this step; the difference is night and day.
The Final Flourish
The graham cracker crust provides the buttery crunch that contrasts the silky filling. Using fresh, unsalted butter for the crust ensures it doesn’t taste overly salty, while the sugar adds a gentle caramelization during baking. If you’re gluten‑free, swap the crumbs for crushed gluten‑free cookies; the texture remains delightfully crisp.
Everything's prepped? Good. Let's get into the real action...
The Method — Step by Step
Preheat your oven to 350°F (175°C). While the oven warms up, gather a 9‑inch pie pan and line the bottom with parchment paper—this tiny trick saves you from a sticky nightmare later. I’ll be honest — I ate half the batch before anyone else got to try it, so I’m eager to get this crust right the first time.
Kitchen Hack: Toast the graham cracker crumbs in a dry skillet for 2‑3 minutes; this adds a nutty depth that plain crumbs lack.Combine 1½ cups graham cracker crumbs, ¼ cup sugar, and 6 tablespoons melted butter in a bowl. Stir until the mixture resembles wet sand, then press it firmly into the bottom and up the sides of the pan. The crust should be about ¼‑inch thick—if it’s too thin, it’ll crumble; too thick, and it will dominate the flavor.
Place the crust on a baking sheet and bake for 8‑10 minutes, just until it’s lightly golden. You’ll hear a faint sizzle as the butter caramelizes—That sizzle when it hits the pan? Absolute perfection. Remove and let it cool while you prep the filling.
Meanwhile, in a medium saucepan, melt 4 oz dark chocolate with 2 tablespoons butter over low heat, stirring constantly. Once smooth, remove from heat and let it sit for a minute. This brief cooling prevents the eggs from scrambling later.
In a separate bowl, whisk together 1 can (14 oz) sweetened condensed milk, 2 large eggs, 1 tsp vanilla extract, a pinch of salt, and ½ tsp espresso powder. The mixture should be glossy and slightly thick. I dare you to taste this raw batter; it’s already decadently sweet, but the magic happens in the oven.
Watch Out: If the chocolate is too hot when you add the eggs, you’ll end up with curdled filling. Let it cool to a warm, but not hot, temperature.Gradually pour the chocolate mixture into the condensed‑milk mixture, whisking continuously. This creates an emulsion that’s the key to that silky, glossy finish. The batter should look uniform, with no streaks of chocolate.
Pour the filling into the pre‑baked crust, smoothing the top with a spatula. Now comes the secret: place the pie pan into a larger roasting pan, and carefully pour hot water until it reaches halfway up the sides of the pie pan. This water‑bath (bain‑marie) ensures gentle, even cooking and prevents cracks.
Kitchen Hack: Use a foil‑lined baking sheet as the larger pan; it makes cleanup a breeze and prevents water from spilling onto the oven floor.Slide the whole setup into the oven and bake for 30‑35 minutes. The edges should be set and start pulling away from the pan, while the center will still wobble slightly—this is exactly what you want. If you overbake, the fudge will become cakey; underbake and it’ll be too runny. Trust your eyes and the gentle jiggle.
Remove the pie from the water bath and let it cool on a wire rack for 15 minutes, then refrigerate for at least 2 hours. The chilling time lets the fudge set to a perfect, slice‑able consistency. Picture yourself pulling this out of the fridge, the whole kitchen smelling incredible, the surface shining like a chocolate mirror.
When you’re ready to serve, top with a generous swirl of freshly whipped cream, a drizzle of extra melted chocolate, and a sprinkle of sea salt if you like a sweet‑salty contrast. That final flourish? Pure magic. Serve chilled, and watch your guests’ faces light up.
That's it — you did it. But hold on, I've got a few more tricks that'll take this to another level...
Insider Tricks for Flawless Results
The Temperature Rule Nobody Follows
Never pour hot chocolate directly into the cold condensed milk; the temperature shock creates lumps. Instead, let the chocolate cool to about 120°F (49°C) before combining. This small pause keeps the emulsion smooth and prevents any grainy texture. A friend tried skipping this step once — let’s just say the pie turned into a chocolate custard that never set.
Why Your Nose Knows Best
When the crust is baking, the kitchen should be filled with a buttery, caramel scent that deepens as the sugars brown. If you smell a faint burnt note before the timer, pull the crust out early—over‑browning will make the bottom taste bitter and ruin the delicate balance.
The 5‑Minute Rest That Changes Everything
After the pie comes out of the oven, let it sit on the counter for exactly five minutes before moving it to the fridge. This short rest lets the steam escape, preventing condensation from forming on the surface, which can make the top soggy. It’s a tiny window that makes a massive difference in texture.
Whisk Like a Pro
When whisking the eggs into the filling, use a balloon whisk and a gentle circular motion. This incorporates air without creating bubbles that could cause cracks during baking. A smooth, glossy batter is the hallmark of a professional‑grade hot fudge pie.
Finish With a Salted Edge
Just before serving, lightly sprinkle flaky sea salt on the whipped‑cream topping. The tiny crystals create a contrast that elevates the sweet richness, turning every bite into a layered experience. If you’re skeptical about salt on dessert, try a pinch; you’ll be surprised at how it brightens the flavor.
Creative Twists and Variations
This recipe is a playground. Here are some of my favorite ways to switch things up:
Nutty Crunch
Stir in ½ cup toasted chopped hazelnuts or almonds into the crust mixture before baking. The nuts add a buttery crunch that pairs beautifully with the fudgy center, and the toasted aroma adds another sensory layer.
Spiced Delight
Add ¼ tsp ground cinnamon and a pinch of cayenne pepper to the filling. The warm spice brings depth, while the subtle heat makes the dessert feel sophisticated—perfect for a holiday gathering.
White Chocolate Dream
Swap the dark chocolate for an equal amount of high‑quality white chocolate and add a teaspoon of orange zest to the filling. The citrus note brightens the sweetness, creating a fresh, aromatic twist.
Berry Burst
Fold in ½ cup fresh raspberries or strawberries into the filling just before baking. The berries melt slightly, leaving streaks of fruit that cut through the richness with a tart pop.
Vegan Version
Replace the butter in the crust with coconut oil, use a can of coconut‑sweetened condensed milk, and choose a dairy‑free dark chocolate. The result is a plant‑based pie that still delivers that gooey, indulgent texture.
Mini Fudge Tarts
Use a muffin tin lined with paper cups and halve the filling amount per tin. These bite‑size versions are perfect for parties, allowing guests to sample multiple variations in one sitting.
Storing and Bringing It Back to Life
Fridge Storage
Cover the pie loosely with foil or plastic wrap and store in the refrigerator for up to 3 days. The fudge will firm up a bit, but it remains slice‑able and delicious. When ready to serve, let it sit at room temperature for 10 minutes for optimal texture.
Freezer Friendly
Wrap the entire pie tightly in a double layer of freezer‑safe plastic wrap, then place it in an airtight container. It freezes well for up to 2 months. To thaw, move it to the fridge overnight, then bring to room temperature before serving.
Best Reheating Method
Place a slice on a microwave‑safe plate, add a tiny splash of water (about a teaspoon), and microwave on low for 10‑15 seconds. The steam revives the fudgy interior, making it as gooey as the first day. Avoid high heat, which can dry out the crust.