I still remember the day I set my kitchen on fire trying to make cookies. Not metaphorically—actual flames licking the ceiling, smoke alarms screaming like banshees, and me standing there with a fire extinguisher wondering how my sweet tooth had turned into a five-alarm disaster. That was the day I swore off baking forever, only to discover something that changed my dessert game completely: no-bake cookies that taste like they came from a French patisserie, minus the pyrotechnics.
Picture this instead: It's 8 PM on a Tuesday, you're wearing pajama pants with a questionable stain, and suddenly you need chocolate like your life depends on it. The oven feels like a commitment you can't make, but your soul is crying out for something rich, fudgy, and soul-satisfying. Enter the hero of our story—these classic no-bake cookies that require nothing more than a pot, a spoon, and the willpower to wait for them to set (spoiler: I never wait, and neither will you).
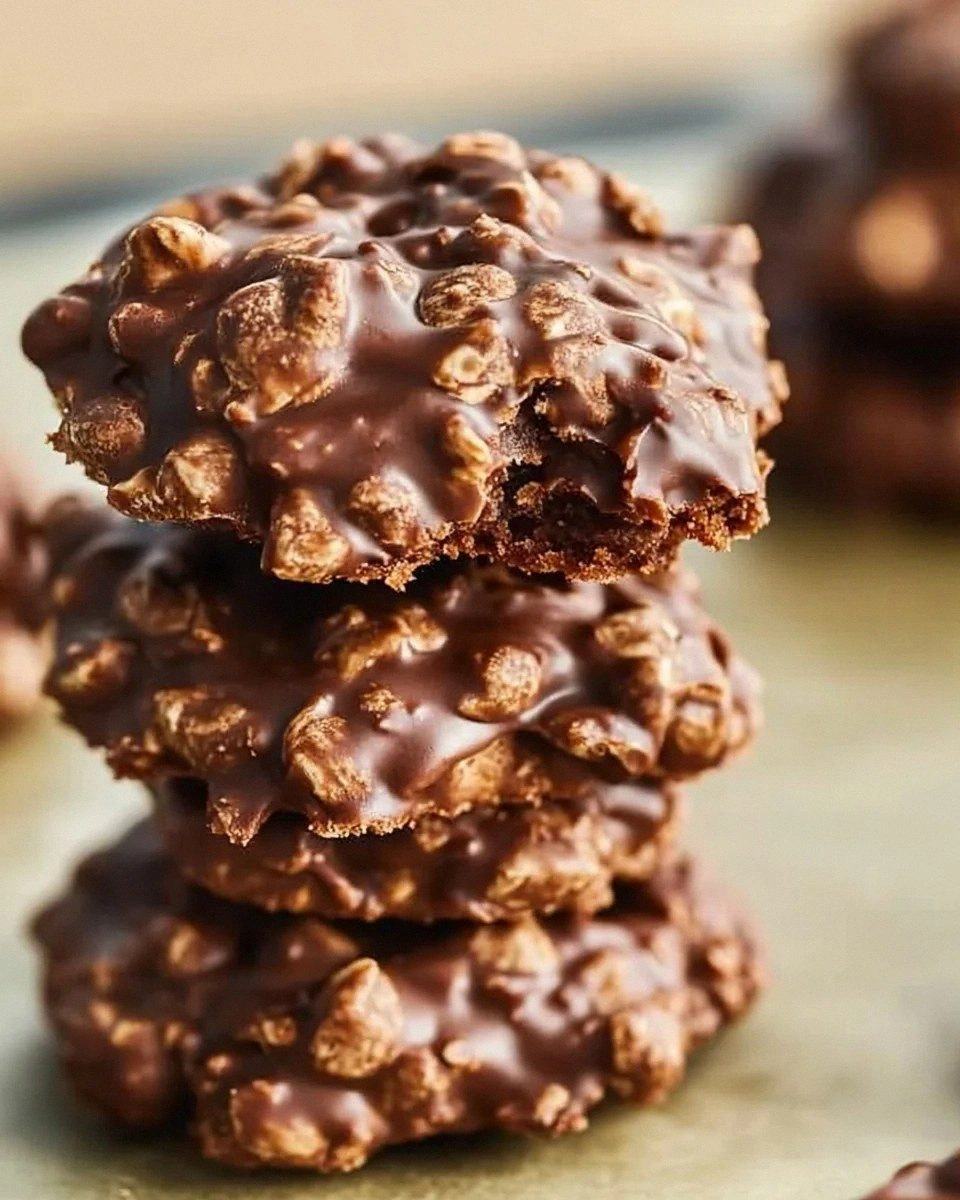
What makes these particular no-bake cookies the stuff of legend? They hit that magical sweet spot between candy and cookie, with a texture that shatters like thin ice on the top before giving way to a chewy, almost brownie-like center. The secret lies in the precise dance between sugar, butter, and cocoa—cook it too long and you've got chocolate concrete, too short and you're eating chocolate soup with oats floating in it like tiny rafts of disappointment.
I've spent three years perfecting this recipe, testing it on unsuspecting neighbors, bribing coworkers, and yes, eating half the batch before anyone else got to try it (confession time: I once made a double batch just so I could say I'd shared when really I'd eaten sixteen cookies by myself). The result is a cookie that's simultaneously nostalgic and elevated, with depth from dark cocoa and a whisper of sea salt that makes grown adults close their eyes and sigh with pleasure. Let me walk you through every single step—by the end, you'll wonder how you ever made it any other way.
What Makes This Version Stand Out
Lightning-Fast: From pantry to plate in under fifteen minutes, these cookies move faster than your kids when they hear the ice cream truck. No waiting for butter to soften, no chilling dough, no preheating ovens—just pure, unadulterated instant gratification that would make even the most patient baker giddy with excitement.
Failure-Proof: Most recipes get this completely wrong. They tell you to boil for "1-2 minutes" like that's helpful advice when you're standing over a pot watching sugar bubble like a witch's cauldron. Here's what actually works: we're using a thermometer, but not in a fancy, intimidating way—just a simple target temp that guarantees success every single time, no guesswork required.
Texture Paradise: The contrast is what kills me every time—a glossy, crackly top that gives way to the most tender, almost truffle-like interior. We're talking crispy edges that shatter like thin ice, revealing a center so soft it practically melts on your tongue, coating your mouth with chocolate like velvet.
Pantry Staples Only: Everything you need lives in your kitchen right now, I guarantee it. No specialty flours, no obscure extracts, no ingredients that require a pilgrimage to three different stores. Just good old-fashioned basics that transform into something magical through the power of science and patience (okay, minimal patience).
Kid-Approved, Adult-Adored: I dare you to taste this and not go back for seconds. I've watched self-proclaimed "not dessert people" inhale four of these without breathing. They're the great equalizer—equally beloved by sugar-crazed toddlers and sophisticated palates that claim to prefer dark chocolate with 85% cacao.
Make-Ahead Champion: Picture yourself pulling this out of the fridge tomorrow night, the whole kitchen smelling incredible because you whipped up a batch on Sunday and now you're three minutes away from dessert nirvana. They keep for a week (theoretically), freeze like a dream, and actually improve after a day of mingling flavors.
Customizable Canvas: Want to add peanut butter? Go nuts (literally). Feeling fancy with sea salt flakes? Be my guest. Prefer them with coconut or dried cherries or a swirl of caramel? This recipe bends to your will like a chocolate-covered genie, granting sweet wishes with every variation.
Alright, let's break down exactly what goes into this masterpiece...
Inside the Ingredient List
The Flavor Base
Butter is the foundation here, but not just any butter—we want the good stuff, European-style with higher fat content that melts into pure silk. Skip the margarine, ignore the oil, and please don't try to make these "healthy" with coconut oil unless you want cookies that taste like a tropical vacation gone wrong. The butter carries all the other flavors, creating a rich backdrop that makes the chocolate sing like it's performing at Carnegie Hall.
Granulated sugar provides the structure, but here's where most recipes mess up—they treat it like an afterthought. Sugar is the framework that holds everything together, creating that signature snap when you bite into these beauties. Use fresh sugar (not the stuff that's been sitting in your pantry since 2019), and measure it properly. Too little and your cookies will weep like they're watching a sad movie, too much and you'll need a diamond-tipped saw to break through them.
Unsweetened cocoa powder is the star of our show, and quality matters more than you'd think. That ancient tin of Hershey's will work in a pinch, but Dutch-processed cocoa creates a deeper, more complex flavor that makes people ask "what's your secret?" like you're hiding some exotic ingredient. The cocoa provides the chocolate backbone that defines these cookies, so this isn't the place to skimp—spend the extra two dollars and taste the difference.
The Texture Crew
Quick-cooking oats are non-negotiable here—steel-cut will break your teeth, instant will dissolve into mush, but quick oats hit that perfect middle ground. They provide the chew, the body, and that homespun texture that makes these cookies feel like they came from your grandmother's kitchen (even if your grandmother couldn't cook and these are better than anything she ever made).
Milk might seem basic, but it serves dual purposes—thinning the mixture just enough to coat every oat, and adding a subtle creaminess that rounds out the edges of the chocolate. Whole milk creates the richest cookies, but 2% works if that's what you've got. Just promise me you won't use skim milk unless you enjoy disappointment and cookies that taste like chocolate-flavored cardboard.
The Unexpected Star
Peanut butter is my secret weapon, even in the "plain" version. Just two tablespoons transform these from good to legendary, adding depth and richness without screaming "PEANUT BUTTER COOKIE!" It's like bass in a symphony—you don't necessarily notice it's there, but you'd miss it if it were gone. Use the processed stuff here, not natural peanut butter that separates into an oily mess that will sabotage your texture.
The Final Flourish
Vanilla extract is the perfume of the baking world—just a teaspoon makes everything smell like heaven and taste like comfort. Use real vanilla, not the imitation stuff that tastes like a candle factory exploded in your mouth. The alcohol cooks off, leaving behind those warm, floral notes that make people close their eyes when they take their first bite.
Sea salt is the final touch that makes everything pop. Just a pinch, stirred in at the end, transforms these from sweet to sophisticated. It's like turning up the contrast on a photo—suddenly all the flavors are more vivid, more defined, more irresistible. Skip this and your cookies will taste flat, like they're missing something you can't quite identify.
Everything's prepped? Good. Let's get into the real action...
The Method — Step by Step
- Start with your heaviest pot—I'm talking the one you'd grab if someone broke into your house because it could double as a weapon. Add the butter, sugar, milk, and cocoa powder, but don't stir yet. Let the butter melt first, creating a glossy lake that smells like potential. This takes about two minutes over medium heat, and yes, you can hover and sniff like a chocolate hound—just don't walk away because dairy plus sugar equals burnt disaster faster than you can say "I'll just check Instagram."
- Now stir like you mean it, not like you're mixing pancake batter. We want everything incorporated into a smooth, glossy mixture that looks like liquid chocolate satin. Keep stirring until the sugar dissolves completely—no gritty bits allowed. This step is crucial because undissolved sugar will create grainy cookies that feel like you're eating sand mixed with chocolate. The mixture should look like the most expensive hot chocolate you've ever seen, dark and inviting with a surface so shiny you could check your reflection.
- Bring it to a rolling boil that looks like a jacuzzi for chocolate fairies—bubbling vigorously across the entire surface, not just around the edges. Set your timer for exactly 90 seconds, but here's the key: start timing after it's at a full boil, not when you see the first bubble. This is where most recipes fail you with vague timing, but we're precision people now. Stir constantly while it boils, scraping the bottom and sides so nothing sticks and burns like chocolate-flavored regret.
- Remove from heat immediately and add your peanut butter, stirring until it melts into the mixture like it's always belonged there. The residual heat will do the work, transforming from a lumpy mess into smooth, glossy perfection. Don't rush this step—give the peanut butter time to fully incorporate, creating a unified chocolate-peanut flavor that's greater than the sum of its parts. The mixture should look like the filling of the world's most expensive truffle, thick and luxurious.
- Now add your vanilla and salt, stirring just to combine. The vanilla will make the kitchen smell like a chocolate factory had a baby with a flower shop, while the salt wakes up all the flavors like an alarm clock for your taste buds. Work quickly here—every second the mixture sits, it's cooling and setting up, and we need it fluid enough to coat those oats like chocolate armor.
- Dump in your oats all at once, no delicate sprinkling required. This is the moment of truth where we transform liquid candy into cookie magic. Stir vigorously, folding and turning until every oat is coated in chocolate and the mixture starts to thicken. It should look like the world's most delicious granola, glossy and tempting with no dry oats visible anywhere.
- Work fast now—drop by rounded tablespoons onto parchment-lined baking sheets, working quickly before the mixture sets up like concrete. I use two spoons: one to scoop, one to scrape, moving in a rhythm that feels like a kitchen ballet. Leave space between cookies because they spread slightly as they settle, creating those perfect little puddles of chocolate joy that make your heart skip a beat.
- Let them set at room temperature for about 30 minutes, or speed things up in the fridge for 10 minutes if you're as impatient as I am. They'll transform from glossy and soft to matte and firm, ready to devour. The transformation is magical—what started as chocolate soup becomes proper cookies with the most addictive texture known to humankind. I dare you to eat just one. Seriously, I double-dog dare you, and I've never seen anyone win that bet.
That's it—you did it. But hold on, I've got a few more tricks that'll take this to another level...
Insider Tricks for Flawless Results
The Temperature Rule Nobody Follows
Here's the game-changer: use a candy thermometer and pull the mixture off heat at exactly 230°F. Most recipes say "boil for 1-2 minutes" like time exists in a vacuum, but altitude, humidity, and the phase of the moon affect boiling time. At 230°F, you've reached the perfect stage where the sugar will set but not turn into jaw-breakers. A friend tried skipping this step once—let's just say it didn't end well, and her dentist still sends me thank-you cards.
Why Your Nose Knows Best
Your nose is the best kitchen tool you own. When the mixture smells like hot fudge and toasty chocolate, you're in the sweet spot. If it starts to smell sharp or caramelized, you've gone too far and need to start over. The aroma should make you want to dive face-first into the pot—if it doesn't, adjust your heat and timing accordingly. Trust your senses; they've been honed by thousands of years of evolution to detect when sugar is perfectly cooked.
The 5-Minute Rest That Changes Everything
After removing from heat, let the mixture rest for exactly five minutes before adding oats. This allows the sugar to cool slightly, preventing the oats from getting mushy and creating a better final texture. The mixture will thicken just enough to coat the oats perfectly, like each oat is wearing a custom chocolate tuxedo. Skip this step and your cookies will have the texture of chocolate-flavored oatmeal, which is nobody's idea of a good time.
The Secret Ingredient Swap
Replace the milk with strong coffee for mocha cookies that taste like they came from a fancy café. The coffee enhances the chocolate flavor without making them taste like a coffee shop, creating depth that makes people ask "what's different about these?" in the best possible way. Use espresso for maximum impact, or regular drip coffee for a subtler effect that just makes everything taste more expensive and intentional.
Storage That Actually Works
Layer cookies between sheets of wax paper in an airtight container, and they'll stay fresh for a week. The wax paper prevents them from sticking together in one giant chocolate mass that requires a chisel to separate. Store at room temperature for the best texture—fridge makes them too hard, and counter makes them too soft. Find that Goldilocks zone and you'll have perfect cookies for days (assuming they last that long, which in my house is a big assumption).
Creative Twists and Variations
This recipe is a playground. Here are some of my favorite ways to switch things up:
Rocky Road Remix
Fold in mini marshmallows and chopped almonds with the oats, creating a rocky road situation that'll transport you straight to childhood summers and ice cream trucks. The marshmallows stay soft and gooey, while the almonds add crunch that makes each bite a textural adventure. Kids go absolutely feral for these, and adults pretend they're sophisticated while eating six in a row.
Salted Caramel Swirl
Drizzle homemade caramel over the cookies right after scooping, then sprinkle with flaky sea salt. The caramel sets into ribbons of buttery sweetness that cut through the chocolate richness like a golden thread. These disappear at potlucks faster than you can say "I brought dessert," and I've seen people hide them in purses for later.
Peppermint Patty
Add peppermint extract instead of vanilla, creating cookies that taste like thin mints but better because they're homemade and you can eat forty without judgment. Crush candy canes on top for holidays, or keep them plain for year-round mint chocolate perfection that freshens your breath while satisfying your sweet tooth.
Coconut Dream
Replace half the oats with unsweetened coconut flakes, transforming these into German chocolate cake's cooler cousin. Toast the coconut first for deeper flavor that makes people ask if you've been to culinary school. Even coconut haters (weirdos) love these because the coconut adds texture without that sunscreen flavor that gives coconut a bad name.
Peanut Butter Overload
Double the peanut butter and add peanut butter chips for cookies that taste like a peanut butter cup had a baby with an oatmeal cookie. Use crunchy peanut butter for extra texture, or smooth for uniform fudginess that melts across your tongue like chocolate-peanut butter silk. Warning: these are so good they should be classified as a controlled substance.
White Chocolate Raspberry
Swap the cocoa for white chocolate chips and fold in freeze-dried raspberries with the oats. The result is cookies that look like jewels and taste like summer in cookie form. The tart raspberries cut through the sweet white chocolate, creating balance that makes these sophisticated enough for dinner parties but addictive enough for midnight snacking.
Storing and Bringing It Back to Life
Fridge Storage
These cookies live their best life at room temperature in an airtight container, staying fresh for up to a week. Layer them between wax paper sheets like chocolate lasagna, and they'll maintain their perfect texture without sticking together in one giant mass that requires dynamite to separate. Keep them away from heat sources (don't store above the dishwasher unless you enjoy chocolate puddles), and they'll reward you with days of perfect snacking.
Freezer Friendly
Flash-freeze individual cookies on a baking sheet for two hours, then transfer to freezer bags where they'll keep for three months. This prevents them from freezing into one solid chocolate brick that requires a chisel to separate. Thaw at room temperature for ten minutes, or eat them frozen for a fudgy, almost ice cream-like experience that'll change your midnight snacking game forever.
Best Reheating Method
Room temperature is the sweet spot, but if they've been refrigerated, let them sit out for ten minutes to take the chill off. Microwave for five seconds if you must, but any longer and you'll have chocolate soup with oat islands floating in a sea of disappointment. Pro tip: place a barely-damp paper towel in the container when storing to maintain perfect moisture levels that keep cookies fresh but not soggy.