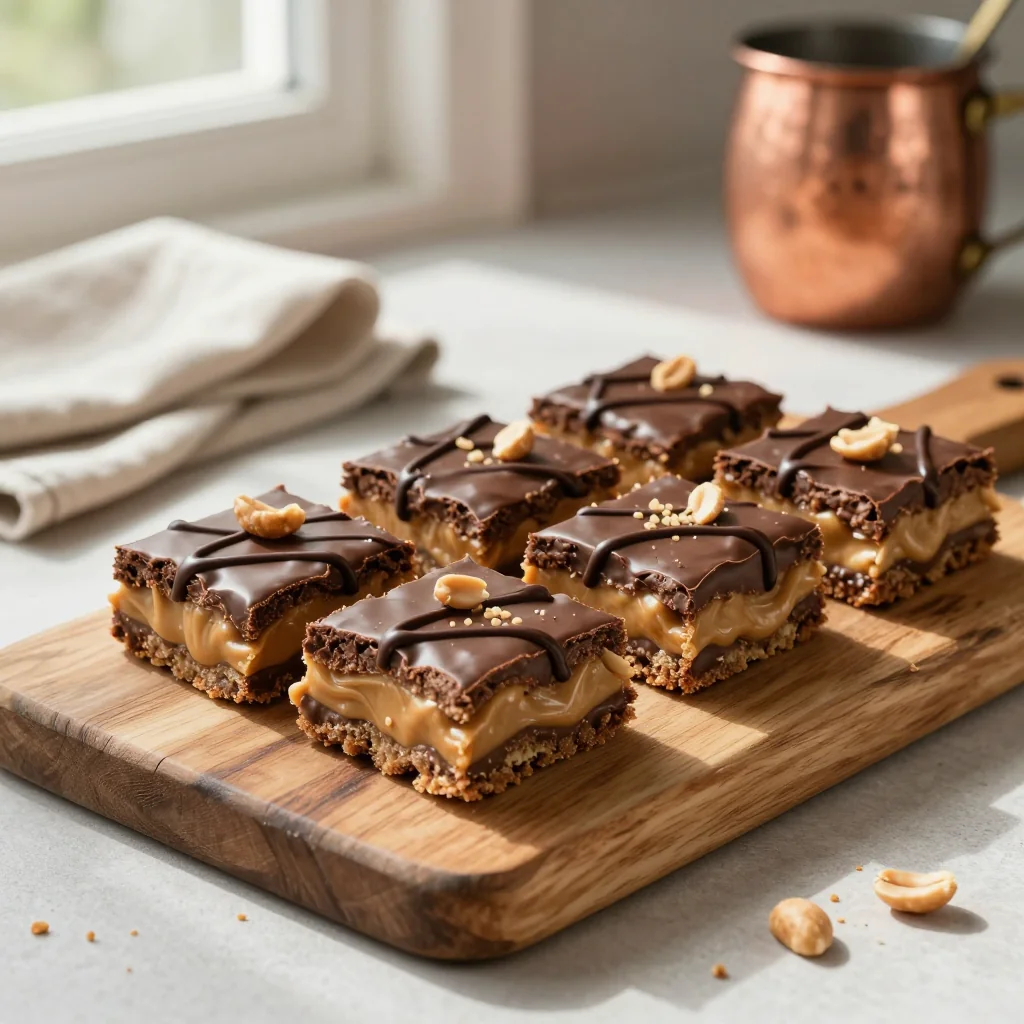
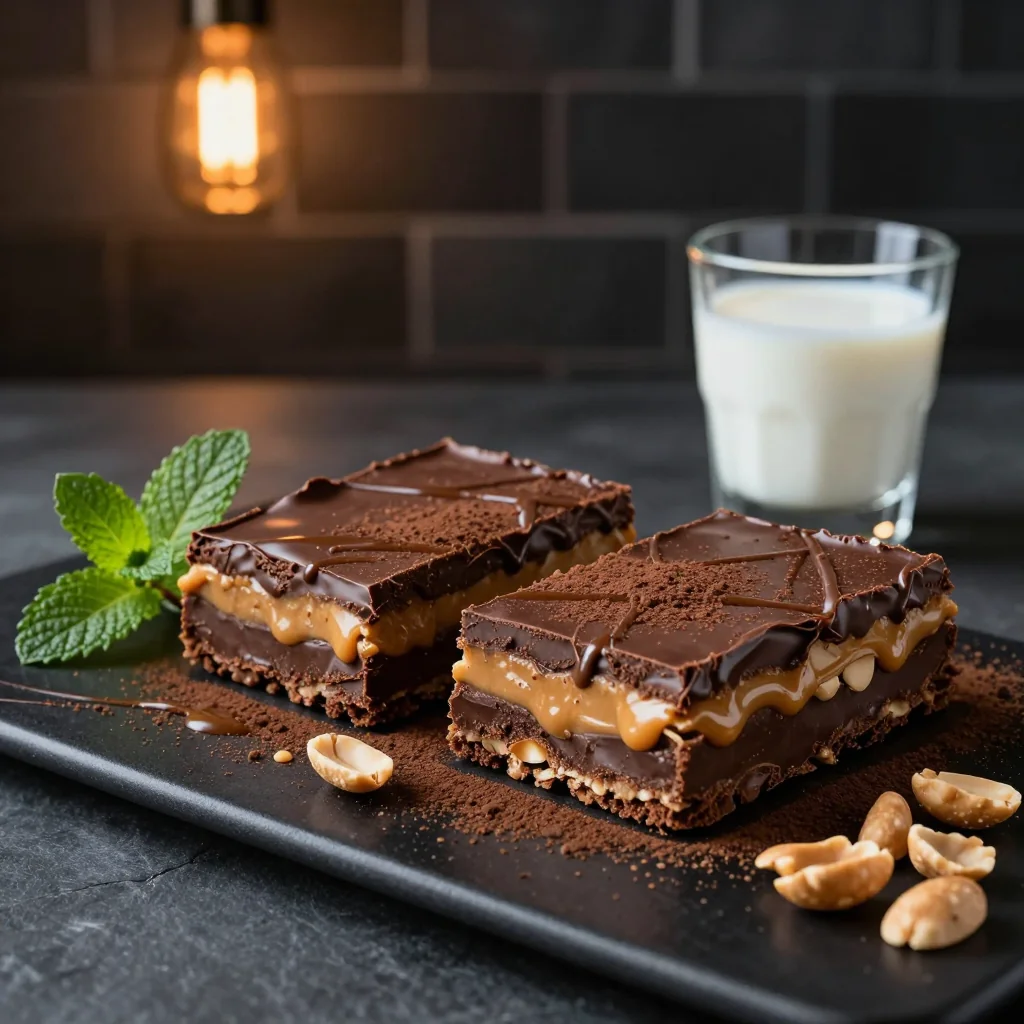
A silky, chewy bar that marries rich chocolate with creamy peanut butter for a snack you’ll crave all day.
I still remember the first time I tasted a bar that combined the deep, comforting notes of dark chocolate with the salty, nutty embrace of peanut butter. It was at a bustling street market in Bangkok, where a vendor was handing out bite‑size treats that melted in my mouth and left a lingering smile on my face. The memory of that moment—sunlight filtering through lanterns, the hum of conversation, and the sweet‑savory harmony—has stayed with me ever since.
Chocolate Peanut Butter Bars belong to a lineage of “no‑bake” desserts that originated as quick, portable snacks for families on the go. Though the exact birthplace is hard to pin down, the combination of chocolate and peanut butter has roots in both American school cafeteria treats and European confectionery traditions. Over the years, home cooks have refined the recipe, adding layers of texture and flavor to create something that feels both nostalgic and sophisticated.
In this article, I’ll walk you through a step‑by‑step method that guarantees a glossy, firm base, a velvety peanut butter swirl, and a final drizzle that adds just the right amount of crunch. You’ll learn how to balance sweetness with salt, why a touch of coconut oil makes the bars melt‑in‑your‑mouth, and how to scale the recipe up or down without compromising texture.
I’m thrilled to share this indulgent treat with you, and I promise that by the end of this guide you’ll have a batch of bars that look as impressive as they taste—perfect for a quick snack, a party platter, or a make‑ahead dessert for the week.
🌟 Why This Recipe Will Win Your Heart
Whether you’re a seasoned baker or a kitchen newcomer, these bars offer something special that keeps you coming back for more.
- ✨ Perfect Balance of Sweet and Salty: The creamy peanut butter cuts the richness of dark chocolate, creating a harmonious flavor profile that satisfies both cravings.
- ✨ No‑Bake Simplicity: With just a stovetop and a refrigerator, you can finish the entire recipe in under thirty minutes, making it ideal for busy weekdays.
- ✨ Customizable Texture: Adjust the amount of coconut oil for a softer or firmer bar, or add crunchy peanuts for an extra bite.
- ✨ Portable and Storable: Once set, the bars keep well in the fridge for up to a week, and they freeze beautifully for longer storage.
- ✨ Crowd‑Pleasing Appeal: The combination of chocolate and peanut butter is a universally loved duo, perfect for kids, adults, and even picky eaters.
- ✨ Budget‑Friendly Ingredients: All components are pantry staples, keeping the cost low while delivering a gourmet experience.
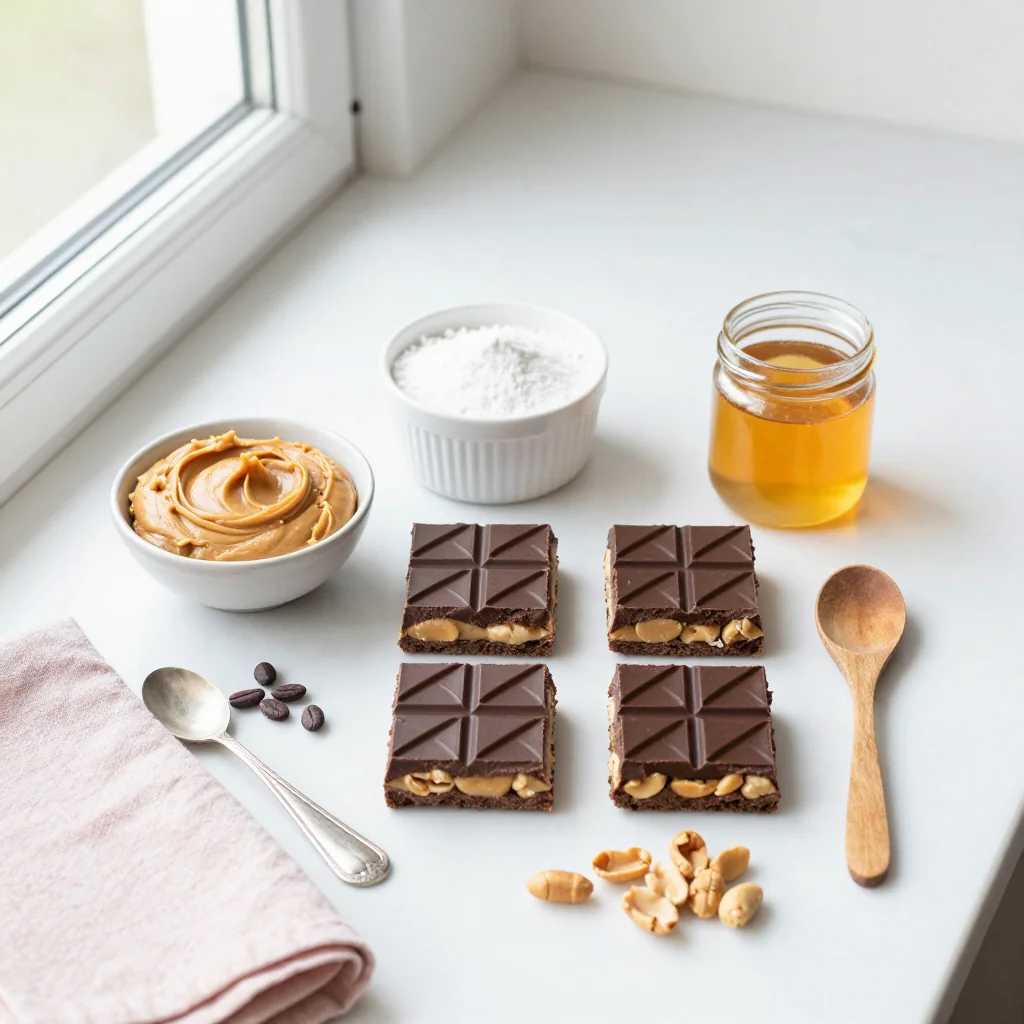
🥗 Ingredients
📝 Complete Ingredient List
For the Base Layer:
For the Topping:
🔍 Focus on Key Ingredients
Dark Chocolate (70% Cocoa)
Dark chocolate provides the deep, slightly bitter backbone that balances the sweet honey and the earthy peanut butter. Look for a bar with at least 70% cocoa solids; this ensures a firm set once cooled and a glossy finish. If you prefer a sweeter bar, you can use 60% cocoa, but remember that the flavor profile will shift toward a milder chocolate taste.
Smooth Peanut Butter
Choosing a natural, unsweetened peanut butter is crucial. It delivers a pure nutty flavor without added sugars that could make the bars overly sweet. Stir the peanut butter gently into the melted chocolate to avoid air bubbles, which helps maintain a smooth texture.
Coconut Oil
Coconut oil acts as a liquid stabilizer, ensuring the base sets quickly while staying soft enough to bite through. Its subtle coconut aroma complements the chocolate without overpowering it. If you’re allergic, substitute with a neutral oil such as grapeseed or melted butter.
🔄 Quick Substitutions
| If you don’t have... | Use instead... |
|---|---|
| Dark chocolate | Milk chocolate (but reduce honey by 10 g) |
| Peanut butter | Almond butter or cashew butter |
| Coconut oil | Unsalted butter melted |
👨🍳 Step‑by‑Step Instructions
Follow these clear stages to create bars that are glossy, chewy, and perfectly balanced.
📋 Phase 1: Preparation & Mise en Place
Gather your tools and measure every ingredient before you start.
Prepare the Baking Pan
Line an 8×8‑inch square baking pan with parchment paper, allowing the paper to overhang on two sides. This overhang will act as a handy “handle” for lifting the set bars out of the pan later, ensuring clean edges and minimal breakage.
Measure and Set Aside Dry Ingredients
Weigh the dark chocolate and chocolate chips, and set them in separate heat‑proof bowls. This prevents cross‑contamination of flavors when you melt the base and later drizzle the topping.
🔥 Phase 2: Melting & Assembly
Gentle heat is key to preserving the chocolate’s sheen.
Melt the Base Chocolate
Place the 250 g dark chocolate and coconut oil into a medium saucepan over low heat. Stir constantly with a silicone spatula until the mixture is fully melted, smooth, and glossy—about 4‑5 minutes. Remove from heat immediately to avoid scorching.
Incorporate Peanut Butter and Honey
Whisk in the smooth peanut butter and honey while the chocolate is still warm. The mixture should become a glossy, homogenous blend that smells of roasted peanuts and sweet caramel. Continue whisking for another 30 seconds to ensure full integration.
Pour and Spread the Base
Transfer the melted mixture into the prepared pan, spreading it evenly with a spatula. Tap the pan lightly on the counter to release any trapped air bubbles, which helps the final bar stay dense and not crumbly.
✨ Phase 3: Finishing & Chill
A quick chill locks in texture and flavor.
Prepare the Topping
In a small microwave‑safe bowl, melt the chocolate chips for 20‑seconds intervals, stirring between each until smooth. Drizzle the melted chips over the base in a decorative zig‑zag pattern.
Peanut Butter Drizzle & Salt
Warm the remaining 30 g peanut butter just enough to become pourable (about 10 seconds in the microwave). Drizzle it over the chocolate chip layer, then sprinkle a pinch of sea salt across the surface for that essential sweet‑salty contrast.
Refrigerate Until Set
Place the pan in the refrigerator for at least 20 minutes, or until the bars are firm to the touch. The cooling process allows the cocoa butter to crystallize, giving the bars their characteristic snap when cut.
💡 Expert Tips & Tricks
🛒 Choosing the Right Ingredients
Opt for a chocolate bar with a high cocoa percentage; it provides structure and a less sugary taste. When buying peanut butter, read the label—look for “no added sugar” and “no hydrogenated oils.” The quality of honey matters too; a light, floral honey adds nuanced sweetness without overpowering the nutty notes.
🔪 Preparation Techniques
Before you begin, pre‑measure everything into small bowls (a “mise en place” approach). This prevents over‑cooking the chocolate and allows you to add ingredients quickly, preserving the glossy texture. Use a silicone spatula for stirring; it won’t conduct heat and reduces the risk of scorching.
🌡️ Mastering the Cooking Process
Keep the heat low and steady when melting chocolate; a double‑boiler is ideal, but a saucepan on low flame works fine if you watch closely. If the mixture gets too hot, it can become grainy and lose its sheen. Always remove the pan from the heat as soon as the chocolate is fully melted.
🍽️ Presentation & Service
After chilling, lift the bars out using the parchment overhang and place them on a cutting board. Use a sharp, warmed knife (dip it in hot water, wipe dry) to cut clean squares. Dust the top with a light sprinkle of sea salt or cocoa powder for an elegant finish.
🏆 Pro‑Level Insights
Elevate your bars from delicious to unforgettable with these professional secrets.
- 🎯 Temperature Control: Chocolate sets best when cooled gradually from 45 °C to 27 °C (tempering). While full tempering isn’t necessary for this recipe, allowing the melted chocolate to rest for a minute off the heat before adding peanut butter improves gloss and snap.
- 🎯 Layer Thickness: Aim for a base thickness of about 5 mm. Too thin and the bar may break; too thick and the flavor ratio becomes unbalanced. Use a ruler or your fingertip to gauge the depth before chilling.
- 🎯 Air Bubble Removal: After pouring the base, give the pan a gentle tap on the countertop three times. This releases trapped air, preventing unsightly pockets that can create weak spots when cutting.
- 🎯 Salt Placement: Sprinkle sea salt while the chocolate is still glossy; the salt will adhere better and create a subtle crunch that pops with each bite.
- 🎯 Drizzle Technique: Use a small squeeze bottle for the peanut butter drizzle. A controlled stream creates elegant ribbons rather than clumps, enhancing visual appeal.
- 🎯 Portion Scaling: The built‑in portion adjuster recalculates ingredient amounts on the fly, ensuring the texture stays consistent whether you make 6 or 24 bars.
“The secret to a perfect chocolate bar is balance—sweetness, bitterness, and a pinch of salt. When you master that, the rest is just chemistry.” — Dominique Ansel, Pastry Chef
🔄 Variations & Adaptations
The core formula is flexible, allowing you to tailor the bars to dietary needs, flavor cravings, or seasonal themes.
🥬 Vegan Version
Replace honey with maple syrup or agave nectar (use the same volume). Swap the dairy‑free dark chocolate (ensure it contains no milk solids) and choose a natural peanut butter without honey. The result is a fully plant‑based bar that retains the same creamy texture.
- Maple syrup (instead of honey) – adds a subtle caramel note.
- Vegan dark chocolate – check the label for “dairy‑free”.
🌶️ Flavor Twists
Feel free to experiment with additional flavor layers to keep the experience fresh.
Spicy Kick
Add ½ teaspoon of cayenne pepper to the base chocolate mixture. The heat pairs surprisingly well with the richness of chocolate and the nuttiness of peanut butter.
Mediterranean Touch
Stir in a teaspoon of finely chopped rosemary into the melted chocolate before adding peanut butter. The herbaceous aroma adds depth without overwhelming the core flavors.
Asian Inspiration
Mix a tablespoon of toasted sesame oil and a pinch of toasted sesame seeds into the topping drizzle. The nutty sesame notes complement the peanut butter beautifully.
⚠️ Dietary Adjustments
Gluten‑Free
All ingredients are naturally gluten‑free. Ensure that any added toppings (e.g., pretzels) are certified gluten‑free if you choose to incorporate them.
Lactose‑Free
Use dairy‑free dark chocolate and verify that the peanut butter contains no added dairy. Coconut oil is already lactose‑free.
Low‑Calorie
Swap half of the dark chocolate with unsweetened cocoa powder (increase coconut oil slightly to maintain melt). Reduce honey to 30 ml and use a sugar‑free peanut butter alternative.
👶 Kid‑Friendly Version
For younger palates, use milk chocolate instead of dark, and drizzle a thin layer of caramel sauce on top. Reduce the sea salt to a light dusting, or omit it entirely.
📦 Storage & Reheating
🧊 Conservation
Refrigerator
- Duration: Up to 7 days
- Recommended container: Airtight plastic container or the original parchment‑wrapped bars
- Tip: Place a sheet of parchment between layers to prevent sticking.
Freezer
- Duration: Up to 3 months
- Method: Wrap the entire pan tightly with foil, then place in a freezer‑safe bag.
- Defrosting: Transfer to the refrigerator overnight; no need to thaw before serving.
💡 For best texture, avoid rapid temperature changes; let the bars come to room temperature for 10 minutes before cutting.
♨️ Reheating
🔥 Oven (Recommended)
- Preheat to 150 °C (300 °F).
- Cover the pan loosely with aluminum foil.
- Warm for 8‑10 minutes, until the chocolate surface softens.
- Remove foil and continue for 2‑3 minutes if you want a slightly crisp top.
⚡ Microwave (Quick)
- Place a single bar on a microwave‑safe plate.
- Cover with a microwave‑safe lid or paper towel.
- Heat on medium power for 20‑30 seconds; check and repeat if needed.
- Let stand 30 seconds before serving.
🍳 Stovetop (Pan‑Sear)
Heat a non‑stick skillet over low heat, place a bar inside, cover, and warm for 1‑2 minutes, flipping halfway. This method adds a gentle crisp to the edges.
🍷 Perfect Pairings
🥗 Side Dishes
- Fresh Berry Salad: The acidity of strawberries and raspberries cuts through the richness.
- Greek Yogurt Dip: A dollop of tangy yogurt with a drizzle of honey balances the sweet bar.
- Light Citrus Sorbet: A palate‑cleansing scoop between bites keeps the experience fresh.
🍷 Wine & Beverage Matches
- Ruby Port: Its deep fruit notes echo the chocolate while complementing the peanut butter.
- Cold Brew Coffee: The bitterness of coffee highlights the sweet‑salty contrast.
- Non‑Alcoholic: Sparkling water with a splash of orange bitters adds a refreshing fizz.
🍰 Complementary Courses
Start with a light citrus appetizer such as a lemon‑herb bruschetta, follow the bars with a simple vanilla panna cotta, and finish the meal with a fresh mint tea. This progression keeps the palate from becoming overly heavy while showcasing the bars as the star dessert.
❓ Frequently Asked Questions
Q: Can I use milk chocolate instead of dark chocolate?
Yes, you can substitute milk chocolate, but reduce the honey by about 10 g to prevent the bars from becoming overly sweet. Milk chocolate also yields a softer set, so be sure to chill the bars a little longer for a firmer texture.
Q: How do I prevent the chocolate from seizing?
Keep the heat low and avoid any water contact with the chocolate. Use a dry spatula and a clean saucepan. If a speck of moisture does get in, immediately add a tablespoon of coconut oil and stir vigorously; this often rescues the mixture.
Q: What can I do if the bars are too crumbly after chilling?
Crumbliness usually indicates insufficient fat. Add an extra 10 ml of coconut oil to the base mixture and re‑melt. The added fat helps bind the chocolate and peanut butter together, resulting in a smoother, more cohesive bar.
Q: Is it possible to add nuts for extra crunch?
Absolutely! Roughly ¼ cup of chopped roasted peanuts can be folded into the base before spreading it in the pan. This adds texture without altering the flavor balance dramatically.
Q: How can I make the bars gluten‑free?
All ingredients listed are naturally gluten‑free. Just ensure any optional toppings (such as pretzel crumbs) are certified gluten‑free, and avoid cross‑contamination in your kitchen.
Q: Can I prepare the bars ahead of a party?
Yes, the bars keep well refrigerated for up to a week. For a party, prepare them the day before, cover tightly, and bring them to room temperature 15 minutes before serving for optimal texture.
🎉 Let’s Get Baking!
These Chocolate Peanut Butter Bars combine the comforting familiarity of a classic treat with a few professional tricks that elevate them to a restaurant‑quality dessert. The glossy chocolate base, the silky peanut butter swirl, and the final salty drizzle create a symphony of flavors that will impress both family members and guests alike. Whether you’re looking for a quick after‑school snack or a show‑stopping dessert for a gathering, this recipe delivers on taste, texture, and visual appeal.
I can’t wait to see how you make this recipe your own—whether you add a hint of spice, swap in almond butter, or experiment with different toppings. Share your results, ask questions in the comments, and don’t forget to rate the recipe. Your feedback helps the community grow!
Have you tried this recipe?
Leave a comment and rating below! Share your photos on Instagram with #ChocolatePBBar for a chance to be featured.
Chocolate Peanut Butter Bars
Silky chocolate meets creamy peanut butter in a no‑bake bar that’s perfect for any occasion.
📝 Ingredients
Base Layer
Topping
👨🍳 Instructions
- 1 Line an 8×8‑inch pan with parchment and butter the paper.
- 2 Melt dark chocolate and coconut oil over low heat, stirring until smooth.
- 3 Whisk in peanut butter and honey until fully incorporated.
- 4 Pour the base into the pan, spread evenly, and tap to release bubbles.
- 5 Melt chocolate chips and drizzle over the base.
- 6 Warm 30 g peanut butter, drizzle, then sprinkle sea salt.
- 7 Refrigerate for 20 minutes until firm.
- 8 Lift using parchment, cut into 12 squares with a warm knife.
- 9 Serve at room temperature or slightly chilled.
- 10 Store leftovers in an airtight container in the fridge.
🥗 Nutrition (per serving)
*Nutritional values are estimates based on standard ingredient data.
📚 You Might Also Like
Salted Caramel Pretzel Bars
Matcha White Chocolate Squares
Nutella Espresso Tart

💬 Comments & Reviews
Leave a Comment
No comments yet. Be the first to share your thoughts!