I still remember the night I almost set my kitchen on fire. I was juggling a pot of pasta, a pan of garlic butter, and a handful of shrimp that had been left out too long. The smell of sizzling garlic filled the air, but the shrimp were turning a pale, unappetizing gray instead of a gorgeous blush. That disaster sparked a quest: to find a shrimp recipe that would never fail, would taste like a hug, and would make every kitchen mishap feel like a triumph. I’m not just sharing a recipe; I’m handing you a battle plan that guarantees the shrimp will be the star of the night, no matter what.
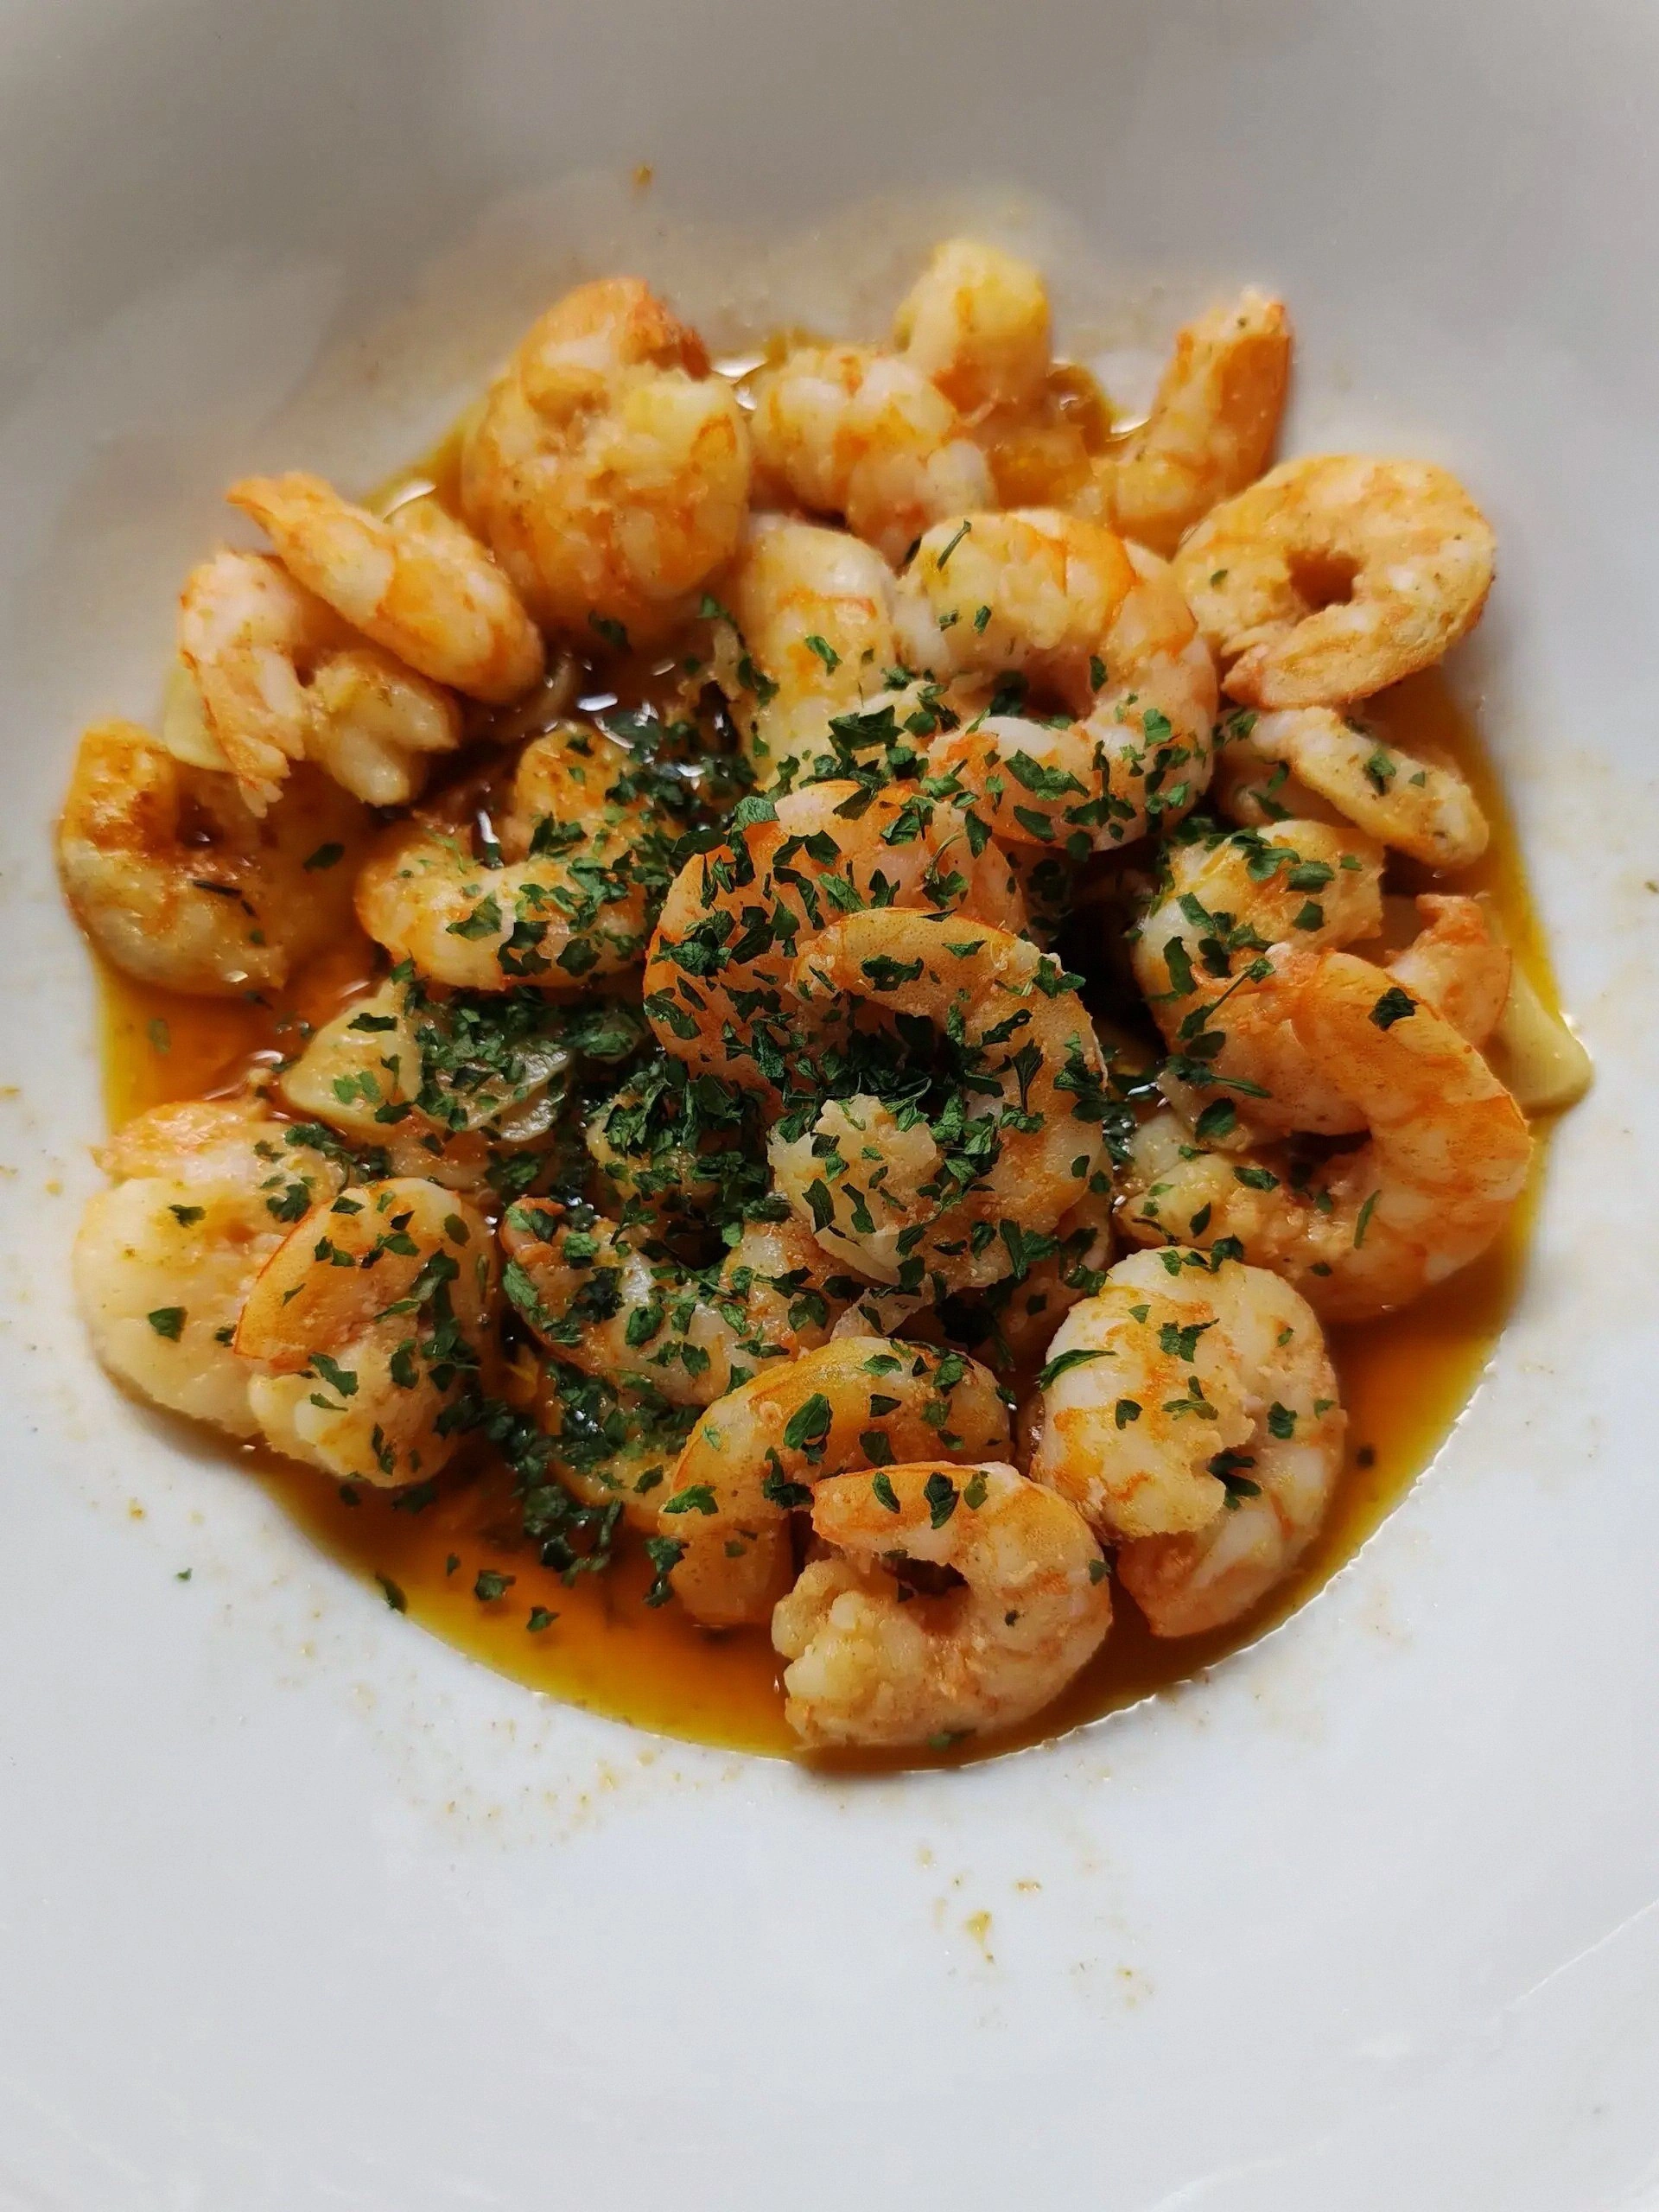
Picture the scene: a bright, airy kitchen, the clink of a stainless steel pan, the aroma of garlic dancing in the air, the gentle hiss of oil as it warms. The shrimp, when cooked right, burst open like tiny, succulent jewels, their shells cracking with a satisfying pop that signals perfection. The buttery garlic sauce coats each shrimp in a silky glaze that clings lovingly, while the fresh parsley adds a splash of green that brightens the plate. That first bite is a harmony of textures—tender, juicy shrimp, a slight crunch from the garlic, and a whisper of heat from the red pepper flakes. It’s the kind of moment that makes you pause, inhale, and savor the anticipation of the next mouthful.
Why is this version of garlic shrimp the best you’ll ever make at home? Because it’s built on simplicity, precision, and flavor that hits the spot every single time. The shrimp are seasoned just enough to let their natural sweetness shine through, while the garlic butter sauce delivers depth without overpowering. The method is straightforward, yet each step is designed to maximize flavor and texture. I’ve distilled the recipe to its core elements, eliminating any unnecessary steps that can lead to uneven cooking or a ruined sauce. The result? A dish that’s both approachable for beginners and a showstopper for seasoned chefs.
And here’s the twist: you’ll discover that a splash of lemon juice at the very end unlocks a brightness that transforms the dish from good to unforgettable. I dare you to taste this and not go back for seconds. If you’ve ever struggled with shrimp that turn rubbery or sauces that separate, you’re not alone—and I’ve got the fix. Stay with me here—this is worth it.
What Makes This Version Stand Out
- Flavor: The sauce is a marriage of garlic, butter, and olive oil that coats every shrimp like velvet, leaving a lingering, savory finish that makes the dish unforgettable.
- Texture: The shrimp are cooked to a perfect pink center—juicy inside, slightly crisp on the edges—so each bite feels like a small, satisfying explosion.
- Simplicity: With only eight ingredients and a single pan, this recipe is a breeze to prepare, even on a busy weeknight.
- Speed: From prep to plate takes just 45 minutes, making it an ideal choice for a quick yet impressive dinner.
- Versatility: It can be served over pasta, rice, or a crisp green salad, and it pairs beautifully with a light white wine.
- Make‑ahead Potential: The shrimp can be cooked ahead and reheated with a splash of lemon juice to restore moisture and flavor.
- Ingredient Quality: Fresh shrimp, real butter, and a handful of herbs bring a depth that pre‑made sauces simply can’t match.
- Crowd Reaction: Friends who taste it often ask for the recipe after the first bite—proof that this is more than just a dish; it’s an experience.
Inside the Ingredient List
The Flavor Base
At the heart of this recipe lies a simple yet powerful sauce. Olive oil serves as the foundation, allowing the garlic to bloom without scorching. Butter adds a rich, creamy undertone that lingers on the palate, while a pinch of red pepper flakes injects a subtle heat that never overwhelms. Together, they create a sauce that clings to each shrimp, delivering a burst of flavor with every bite. If you skip any of these, the dish becomes flat, lacking the depth that makes it memorable.
The Texture Crew
Shrimp are the star of the show, and their texture is everything. Fresh, high‑quality shrimp should be firm to the touch but give slightly when pressed. Overcooking them turns them rubbery, while undercooking leaves them raw and chalky. The quick sear in the pan locks in juices and creates a slight caramelization on the edges, giving a satisfying snap. If you’re using frozen shrimp, thaw them completely and pat dry to avoid excess moisture that can steam them instead of sear.
The Unexpected Star
Lemon juice is the unsung hero that brightens the dish and balances the richness of butter and olive oil. A tablespoon of fresh lemon juice added at the end lifts the flavors, cutting through the buttery heaviness and adding a citrusy zing that dances on the tongue. It also helps to keep the shrimp from drying out by adding a touch of acidity. If you’re out of lemon, a splash of white wine or a dash of vinegar can substitute, though the citrus note is irreplaceable.
The Final Flourish
Fresh parsley is the final touch that adds a pop of color and a hint of herbal brightness. It’s chopped finely so it blends into the sauce without dominating the plate. The parsley’s mild bitterness counterbalances the buttery richness, creating a more complex flavor profile. If parsley isn’t on hand, a pinch of dried oregano or basil can work, but the fresh herb truly completes the dish.
Everything’s prepped? Good. Let’s get into the real action.
The Method — Step by Step
- First, rinse the shrimp under cold water and pat them dry with paper towels. Removing excess moisture is essential to achieve a good sear; otherwise, the shrimp will steam instead of brown. While you’re drying them, peel off the shells if you prefer a more elegant presentation, or leave them on for a rustic look. Once dry, season the shrimp with a generous pinch of salt and a dash of black pepper, letting the flavors penetrate the meat.
- Heat a large skillet over medium‑high heat and add the olive oil. Allow the oil to shimmer but not smoke; this indicates the right temperature. Once the oil is hot, add the minced garlic, stirring constantly to prevent burning. The garlic should release a fragrant aroma within 30 seconds—if it starts to brown, lower the heat immediately.
- Add the shrimp to the pan in a single layer, ensuring they don’t overlap. This step is critical: overcrowding the pan will cause the shrimp to steam and lose that coveted sear. Sauté for 2 minutes on one side, then flip them over. The shrimp should turn pink and opaque, but don’t overcook—this is the moment of truth.
- Once the shrimp are pink, add the butter to the pan. As the butter melts, it will mingle with the garlic and oil, creating a glossy sauce. Stir the shrimp gently so the butter coats them evenly. Watch the edges—when they start pulling away from the pan, the shrimp are ready.
- Stir in the red pepper flakes, tossing the shrimp so every piece gets a hint of spice. The heat from the flakes should be gentle, just enough to awaken the other flavors. If you prefer a milder dish, reduce the flakes to a quarter of a teaspoon or omit them entirely.
- Squeeze the lemon juice over the shrimp, then sprinkle the chopped parsley. The citrus will cut through the buttery richness, while the parsley adds a fresh, green note that brightens the plate. Toss everything together, letting the sauce cling to each shrimp for a few seconds before serving.
- Serve immediately over your choice of pasta, rice, or a bed of crisp greens. The shrimp’s juices will coat the grains or greens, turning a simple dish into a feast. Garnish with extra parsley or a wedge of lemon for an extra pop of color. The final result is a plate that looks as good as it tastes, with a harmonious blend of buttery, garlicky, and citrusy notes.
- If you’re feeling adventurous, drizzle a little extra olive oil or a few drops of hot sauce for added depth. This dish is flexible; it can be the centerpiece of a casual dinner or a sophisticated entrée for guests. The key is to keep the shrimp tender and the sauce balanced—no overcooking, no overseasoning.
That's it—you did it. But hold on, I've got a few more tricks that'll take this to another level.
Insider Tricks for Flawless Results
The Temperature Rule Nobody Follows
Many people believe that high heat is always the best for searing shrimp, but the truth is a moderate heat yields the most consistent results. Cooking shrimp at medium‑high heat allows the exterior to caramelize without the interior becoming rubbery. If you’re using a cast‑iron skillet, pre‑heat it for a full minute to ensure an even surface. This small adjustment saves you from a soggy mess and guarantees that every shrimp has that coveted golden crust.
Why Your Nose Knows Best
The aroma of garlic is your best indicator that the flavor profile is developing correctly. When the garlic releases a sweet, nutty scent, it means it’s cooked to the right level. If the smell is sharp or burnt, the garlic is overcooked and will leave a bitter taste. Trust your nose, and pause the cooking process to let the aroma settle before adding the next ingredient.
The 5-Minute Rest That Changes Everything
After cooking, let the shrimp rest for five minutes off the heat. This brief pause allows the juices to redistribute throughout the meat, ensuring each bite is moist and tender. While resting, cover the pan loosely with foil to keep the shrimp warm. This simple step often separates a good dish from a great one.
The Quick Toss Trick
When you add the parsley and lemon juice, toss the shrimp quickly rather than stirring. A quick toss coats each shrimp evenly and prevents the sauce from becoming diluted. It also keeps the parsley bright and fresh, rather than wilted. This technique is especially useful when you’re cooking a large batch and want to maintain consistency.
The Final Glaze Finish
Right before serving, drizzle a tiny amount of high‑quality extra‑virgin olive oil over the shrimp. The oil adds a silky finish and enhances the buttery flavor without overpowering it. This final flourish can elevate a simple dish into something that feels special and restaurant‑grade. The key is to use a light hand; a single glimmer is all you need.
Creative Twists and Variations
This recipe is a playground. Here are some of my favorite ways to switch things up:
Spicy Cajun Shrimp
Replace the red pepper flakes with a tablespoon of Cajun seasoning and a splash of hot sauce. The result is a bold, smoky flavor that pairs wonderfully with a creamy avocado salsa. It’s a crowd‑pleaser for those who love a kick.
Herb‑Infused Shrimp Pasta
Serve the shrimp over linguine tossed with olive oil, garlic, and a handful of fresh basil. The basil adds a sweet, aromatic note that complements the garlic butter sauce. Finish with a squeeze of lemon and a sprinkle of grated Parmesan for depth.
Coconut‑Lime Shrimp
Swap the olive oil for coconut milk and add a splash of lime juice. The creamy coconut base gives the dish a tropical twist, while the lime brightens the flavor. Pair it with jasmine rice for an exotic flair.
Mediterranean Shrimp Skewers
Thread the shrimp onto skewers with cherry tomatoes, olives, and bell peppers. Grill them until charred and serve with a yogurt‑lemon dip. This version brings a smoky, Mediterranean vibe to the table.
Sautéed Shrimp with Pesto
After cooking the shrimp, toss them in a spoonful of basil pesto. The pesto adds a fresh, herby layer that contrasts beautifully with the buttery garlic sauce. Serve over zucchini noodles for a low‑carb option.
Storing and Bringing It Back to Life
Fridge Storage
Cool the shrimp completely before placing them in an airtight container. Store in the refrigerator for up to 2 days. This method preserves the shrimp’s texture and keeps the flavors intact. When ready to serve, reheat gently in a pan with a splash of lemon juice.
Freezer Friendly
For longer storage, freeze the cooked shrimp in a single layer on a parchment‑lined tray. Once frozen, transfer them to a freezer bag and label with the date. They’ll stay fresh for up to 3 months. Thaw overnight in the refrigerator before reheating.
Best Reheating Method
Reheat the shrimp in a skillet over low heat with a tablespoon of water or broth. The liquid steams the shrimp, restoring moisture without overcooking. Finish with a drizzle of lemon juice to revive the brightness of the dish.